
Best adhesive for acoustic wall panels depends on panel type, panel weight, wall surface, room conditions, and whether the installation is permanent or removable. Foam acoustic panels usually work best with foam-safe spray adhesive, while PET felt panels, wooden slat acoustic panels, MDF acoustic panels, and 3D acoustic panels usually need stronger grab adhesive, MS polymer adhesive, hybrid adhesive, or polyurethane adhesive.
The right acoustic panel adhesive affects bond strength, panel stability, finish quality, wall protection, curing performance, and removal risk. Drywall, plasterboard, painted walls, brick, concrete, timber, tile, and uneven surfaces all change bonding performance. Bathrooms, kitchens, hallways, bedrooms, home offices, and rental properties also change the best fixing method because humidity, grease, vibration, and future removal needs increase installation risk.
This guide explains the best adhesive for each acoustic wall panel type, the best adhesive for different wall surfaces, and when glue, screws, or hybrid fixing gives the safest result. The guide also covers common adhesive mistakes, technical bonding factors, curing guidance, removable fixing options, and the strongest adhesive categories for modern acoustic wall panels.
Table of Contents
Why Is Choosing The Right Adhesive For Acoustic Panels Important?
Choosing the right adhesive for acoustic panels is important because the adhesive affects bond strength, panel stability, wall protection, finish quality, and removal risk. The wrong adhesive can cause slipping, weak bonding, damaged panel backing, or paint and plaster failure.
Panel Stability And Long-Term Hold
The right adhesive improves panel stability by matching bond strength to panel weight and panel structure. Heavy slat acoustic panels and MDF-backed acoustic panels place more stress on the bond than lightweight foam panels. Stronger grab matters more for large decorative wall panels.
Wall Surface Protection
The right adhesive protects the wall surface by matching the wall material and finish condition. Painted plasterboard, brick, concrete, timber, and tile all create different bonding conditions. A strong adhesive on weak paint still fails because the paint layer becomes the weak point.
Installation Quality And Finish
The right adhesive improves installation quality by reducing slipping, improving alignment, and creating more even contact behind the panel. Clean application helps prevent visible squeeze-out. Better contact also improves the finished appearance of decorative acoustic wall panels.
Panel Material Compatibility
Panel type matters because acoustic panels use different materials, weights, and backing structures. Slat acoustic wall panels need stronger vertical hold. PET felt acoustic panels need clean and even coverage. Acoustic foam panels need foam-safe adhesive chemistry.
Surface Compatibility
Wall type matters because wall surfaces vary in porosity, smoothness, and strength. Drywall, painted walls, masonry, timber, and tile do not hold adhesive in the same way. Dust, gloss paint, loose skim, and dampness all reduce bond reliability.
Removal Risk And Future Changes
Removal risk matters because stronger permanent adhesives increase the chance of paint tear, plaster damage, and surface marks during panel removal. Lower-impact fixing methods make more sense where redesign, replacement, or rented occupancy is part of the project.
Indoor Comfort And Low-Odour Installation
Indoor use matters because low-odour adhesive creates a more comfortable installation environment in occupied rooms. Bedrooms, home offices, meeting rooms, and other enclosed spaces make adhesive fumes more noticeable during fitting and curing.
What Types Of Adhesives Are Used For Acoustic Wall Panels?

The main adhesive types used for acoustic wall panels are construction adhesive, MS polymer adhesive, polyurethane adhesive, spray adhesive, and temporary fixing systems such as double-sided tape and hook systems. Each acoustic wall panel adhesive type matches a different panel weight, panel backing, and wall condition.
Construction Grab Adhesive
Construction grab adhesive suits heavy acoustic wall panels because the formula provides strong vertical hold and better early grab during installation. Construction grab adhesive suits wood slat acoustic wall panels and MDF-backed acoustic wall panels. Strong initial grab reduces panel movement during installation. Permanent bond strength makes construction grab adhesive more suitable for fixed interior installations.
MS Polymer Adhesive
MS polymer adhesive is used for acoustic wall panels where flexibility and surface tolerance matter most. MS polymer adhesive works well on uneven surfaces and in areas with light structural movement or vibration. Hybrid bonding performance makes MS polymer adhesive a strong option for decorative acoustic wall panels fitted to imperfect interior walls.
Polyurethane Adhesive
Polyurethane adhesive is used for acoustic wall panels on porous or uneven walls because polyurethane adhesive expands during curing and creates strong permanent bonding. Polyurethane adhesive suits difficult wall surfaces where minor gaps reduce contact. Strong permanent hold makes polyurethane adhesive more suitable for long-term installations than removable installations.
Spray Adhesive
Spray adhesive is used for lightweight acoustic wall panels because spray adhesive creates fast and even coverage across low-weight materials. Spray adhesive is most suitable for acoustic foam panels and other lightweight acoustic treatments. Lower load capacity makes spray adhesive less suitable for heavy wood slat acoustic wall panels or MDF-backed acoustic wall panels.
Double-Sided Tape And Hook Systems
Double-sided tape and hook systems are used for temporary acoustic wall panel installation because double-sided tape and hook systems allow faster removal and lower wall damage risk. Temporary fixing methods suit renters, short-term setups, and non-permanent acoustic treatment. Lower holding strength makes double-sided tape and hook systems more suitable for lightweight acoustic panels than heavy decorative panels.
Which Adhesive Is Best For Different Types Of Acoustic Panels?
The best adhesive for different types of acoustic panels depends on panel weight, panel backing, and wall surface. Lightweight foam panels need low-mass bonding, while wooden slat panels, PET felt panels, and MDF acoustic panels need stronger and more stable fixing methods.
Foam Acoustic Panels
Spray adhesive is the best adhesive for foam acoustic panels because spray adhesive provides lightweight and even bonding across low-mass surfaces. Foam acoustic panels need full-area contact without excessive adhesive build-up. Foam-safe adhesive chemistry is important because aggressive formulas can damage soft foam structure.
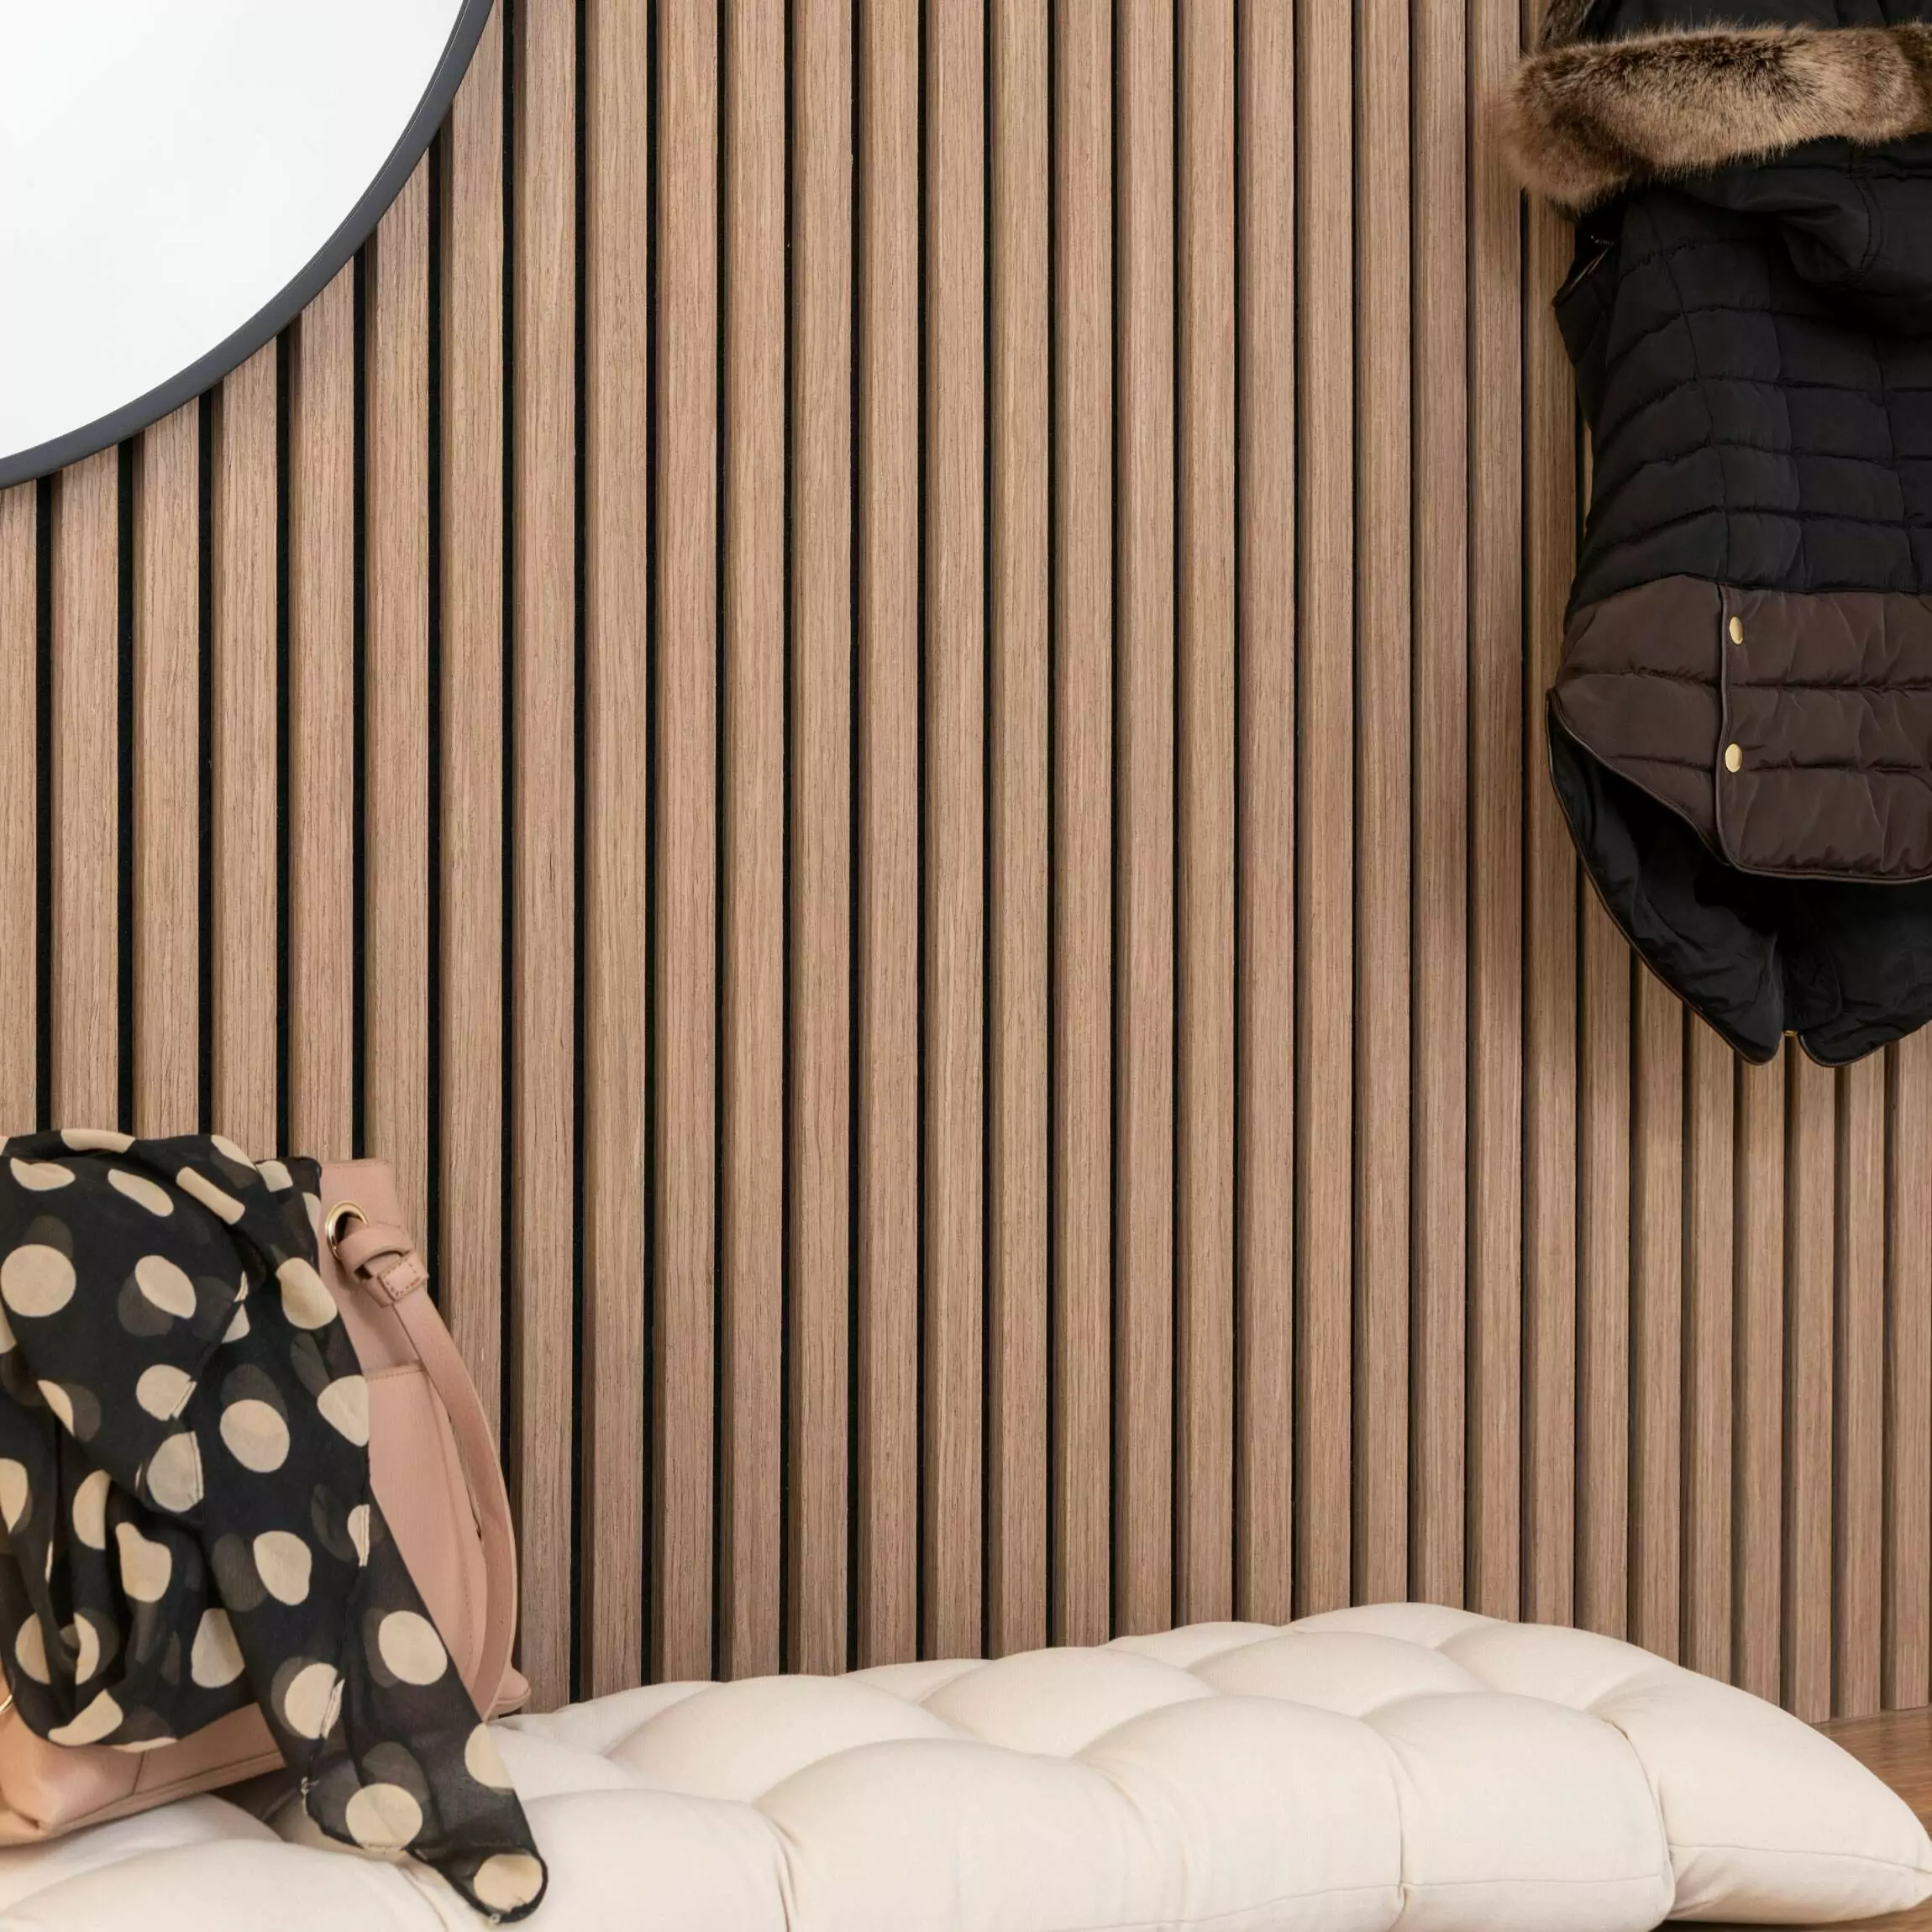
Wooden Slat Acoustic Panels
Heavy-duty grab adhesive is the best adhesive for wooden slat acoustic panels because wooden slat acoustic panels are heavier and place more stress on the bond line. Strong initial grab helps keep the panel stable during fitting. Hybrid fixing methods, such as adhesive plus screws, are often a better choice for large slat panels or less reliable wall surfaces.
PET Felt Acoustic Panels
MS polymer adhesive is one of the best adhesives for PET felt acoustic panels because MS polymer adhesive provides balanced strength and flexibility. PET felt acoustic panels need secure bonding without excessive rigidity. Clean application and surface compatibility matter more with PET felt because visible edges and face quality affect the finished result.
Mdf Or 3d Acoustic Panels
PU adhesive or high-strength construction adhesive is the best adhesive for MDF or 3D acoustic panels because MDF and 3D acoustic panels are heavier and need stronger permanent bonding. Uneven or porous walls often benefit from PU adhesive because PU adhesive expands during curing. Mechanical support becomes more important with MDF or 3D acoustic panels because higher panel weight increases long-term load on the wall.
To understand the types, structure, and applications of acoustic panels, see our complete guide on acoustic wall panels.
Acoustic Panel Adhesive Comparison By Panel Type
The table below compares panel type, adhesive type, support level, and risk profile.
| Wall Panel type | Best adhesive | Support level | Main risk |
| Foam acoustic panels | Foam-safe spray adhesive | Low | Foam damage from wrong chemistry |
| PET felt acoustic panels | MS polymer adhesive or construction adhesive | Medium | Visible edge contamination |
| Wooden slat acoustic panels | Heavy-duty grab adhesive or construction adhesive | High | Bond stress from panel weight |
| MDF or 3D acoustic panels | PU adhesive or high-strength construction adhesive | High | Long-term load and surface failure |
Wall surface changes the answer again because substrate condition affects real bond performance.

Which Adhesive Works Best On Different Wall Surfaces?
The best adhesive for acoustic wall panels on different wall surfaces depends on surface porosity, surface strength, and surface flatness. Drywall, plasterboard, brick, concrete, painted walls, and uneven walls all create different bonding conditions, so acoustic wall panel adhesive choice changes with the substrate.
Drywall Or Plasterboard Walls
Low-expansion adhesive works best on drywall or plasterboard walls because drywall and plasterboard surfaces are more sensitive to pressure and surface damage. MS polymer adhesive and controlled-bead construction adhesive are common choices for drywall or plasterboard walls. Surface sensitivity matters because weak skim coat, loose paper facing, or unstable paint can reduce bond strength.
Concrete Or Brick Walls
PU adhesive or MS polymer adhesive works best on concrete or brick walls because concrete and brick walls are porous and often uneven. PU adhesive gives strong grip on porous surfaces and fills minor gaps during curing. MS polymer adhesive is also suitable where flexibility and clean application are more important.
Painted Or Smooth Walls
Acoustic wall panel adhesive works best on painted or smooth walls after surface preparation improves adhesion. Painted or smooth walls often reduce grip because gloss finishes, dust, grease, or weak paint layers interrupt contact. Surface preparation usually includes cleaning, drying, and checking paint stability before adhesive application.
Uneven Or Damaged Walls
Gap-filling adhesive works best on uneven or damaged walls because uneven or damaged walls reduce full-surface contact. PU adhesive and high-build construction adhesive are strong options where low spots, rough patches, or minor wall damage create bonding gaps. Flexibility and bonding strength both matter more on uneven walls because rigid contact points increase stress across the panel back.
Why Does Choosing the Wrong Adhesive Cause So Many Problems?
Wrong adhesive creates panel slip, edge lift, weak bonding, visible gaps, and premature failure because acoustic wall panels need strong initial grab, full-surface contact, and long-term stability across vertical wall surfaces.
Wrong adhesive usually fails in one of three ways: poor grab, poor compatibility, or poor durability. Poor grab allows movement during installation. Poor compatibility weakens adhesion on painted plaster, masonry, or tile. Poor durability reduces holding strength after temperature or humidity changes.
Acoustic wall panels carry more weight than many buyers expect. Felt-backed slat panels combine decorative slats with a dense acoustic backing, so vertical load stays constant across the wall. Weak adhesive may appear secure on day one, then allow slow downward creep over time.
Visual quality also suffers quickly. Small adhesive failure often creates uneven seams, drifting slat lines, lifted corners, or hollow contact areas behind the panel. Acoustic wall panels depend on straight lines and consistent spacing, so minor movement becomes highly visible.
Repair costs rise when failure starts late. Panel removal, wall repair, repainting, and reinstallation usually cost more than choosing the correct adhesive from the start. Good adhesive selection protects appearance, performance, and installation time.
Are There Special Considerations for Specific Rooms?
Room conditions affect adhesive performance because humidity, grease, temperature fluctuation, and impact risk change bond strength, curing behaviour, and long-term panel stability on different interior wall surfaces.
Living Rooms, Bedrooms, and Home Offices
Living rooms, bedrooms, and home offices are usually the simplest spaces for adhesive fixing. Dry air and stable temperature create fewer bond risks, so wall condition and panel weight become the main decision factors.

Bathrooms
Bathrooms need more caution. Repeated humidity exposure can weaken unsuitable adhesive and expose weaknesses in paint, plaster, or filler behind the panel. Moisture-resistant adhesive is usually the safer choice for bathroom walls and nearby splash zones.
Kitchens
Kitchens create a different challenge. Heat, airborne grease, and surface residue reduce adhesion if preparation is poor. Thorough cleaning is essential before installation because hidden grease films often cause avoidable bond failure.
Hallways and Stairs
Hallways and stair walls face more contact, vibration, and accidental knocks. Strong initial grab matters more in those areas because edge movement becomes more likely under regular daily use.
Rental Properties and Temporary Fit-Outs
Rental properties and temporary fit-outs need a different strategy. Permanent grab adhesive may create unnecessary wall damage during removal, so reversible fixing methods or screw-supported installation often make more sense.
Should Acoustic Wall Panels Be Fixed With Glue Or Screws?
Acoustic wall panels can be fixed with glue or screws, and the best method depends on panel weight, wall condition, and installation goals. Glue gives a cleaner finish. Screws give stronger structural support. A hybrid method often gives the safest result for heavier acoustic wall panels.
Advantages of Adhesive Fixing
Adhesive fixing gives a cleaner and less visible installation finish. Glue removes the need for exposed screw heads and reduces drilling into finished walls. Adhesive fixing also suits decorative acoustic wall panels where wall appearance matters as much as panel performance.
Adhesive fixing works best on flat, clean, and stable wall surfaces. Plasterboard, drywall, and prepared painted walls are common examples. Adhesive fixing is often the easier option for lightweight acoustic wall panels and selected medium-weight panels where the wall surface is reliable.
Adhesive fixing also helps keep the visual design simple. Wood slat acoustic wall panels, PET felt acoustic wall panels, and fabric-faced acoustic panels often look more refined without visible fasteners breaking the surface pattern.
Advantages of Mechanical Fixing
Mechanical fixing gives stronger support for heavy acoustic wall panels and more difficult wall conditions. Screws transfer load more directly into the wall structure. That makes screws a better choice for large slat acoustic wall panels, MDF acoustic panels, uneven substrates, and surfaces with weak paint or poor finish stability.
Mechanical fixing also gives more predictable long-term support. Panel weight, gravity, and surface movement place constant stress on any adhesive bond. Screws reduce that dependence on surface chemistry and wall finish quality. Mechanical fixing is also more practical where panel removal, replacement, or repositioning may happen later.
Ceiling-mounted acoustic panels and high-load wall panels usually fit better with mechanical fixing because overhead or heavier installations need more than clean surface bonding alone.
When To Use A Hybrid Installation Method?
A hybrid installation method is best when acoustic wall panels are heavy or the wall surface is less reliable. Glue helps with positioning, contact, and finish quality. Screws add structural security. The two methods together create a more stable and lower-risk installation.
Hybrid fixing is a strong choice in 4 common situations:
- Heavy wooden slat acoustic wall panels
- MDF or 3D acoustic wall panels
- Painted walls with uncertain paint adhesion
- Brick, concrete, or uneven wall surfaces
Hybrid fixing also makes sense when the panel size is large. Larger acoustic wall panels create more pull across the bond line, especially near the upper section of the panel. A screw-assisted installation reduces that load on the adhesive alone.
What Are The Key Technical Factors In Adhesive Performance?
The key technical factors in adhesive performance are load-bearing capacity, initial tack, curing strength, flexibility, vibration resistance, and resistance to heat, humidity, and fire exposure. These factors decide whether acoustic wall panel adhesive holds securely and remains suitable for the installation environment.
Load-Bearing Capacity And Panel Weight Support
Load-bearing capacity measures how much panel weight an adhesive can hold without slipping, sagging, or losing bond strength. Heavy slat acoustic wall panels and MDF acoustic panels need higher load-bearing adhesive than lightweight foam acoustic panels.
Initial Tack Compared With Final Curing Strength
Initial tack is the early grip of an adhesive, while curing strength is the final bond strength after full setting. High initial tack helps keep panels in position during installation. Full curing strength matters more for long-term support.
Flexibility and Vibration Resistance in Acoustic Wall Panel Bonding
Flexibility and vibration resistance help adhesive hold acoustic wall panels on surfaces that move slightly or face repeated vibration. MS polymer adhesive performs well in that role because the bond remains more flexible after curing.
Heat, Humidity, and Fire Resistance in Adhesive Selection
Heat, humidity, and fire resistance matter because installation environments do not place the same stress on the adhesive line. Damp rooms, warmer spaces, and regulated commercial interiors need more careful adhesive selection than dry and stable rooms.
How Should Acoustic Wall Panels Be Installed Using Adhesive?

Acoustic wall panels should be installed using adhesive by preparing the wall surface, applying the correct adhesive pattern, covering the panel evenly, and allowing full curing before load or adjustment. Clean preparation and controlled application decide bond quality more than adhesive quantity alone.
Surface Preparation Steps
Surface preparation starts with a clean, dry, stable, and level wall surface. Dust, grease, loose paint, wallpaper edges, and moisture reduce bond strength.
The main surface preparation steps are given below:
- Clean dust and debris from the wall
- Remove grease, polish, or surface residue
- Check loose paint, cracked skim, or weak plaster
- Repair damaged areas and allow repairs to dry
- Smooth high spots that interrupt panel contact
- Mark panel positions before adhesive application
Correct Adhesive Application Methods
Correct adhesive application uses controlled beads or an even spray layer based on panel type and adhesive type. Heavy acoustic wall panels usually need bead-applied construction adhesive or grab adhesive. Lightweight foam acoustic panels usually need an even spray adhesive layer.
The main adhesive application methods are given below:
- Apply vertical beads for heavy rigid panels
- Apply zig-zag centre beads for wider panel support
- Keep adhesive away from visible panel edges
- Use spray adhesive evenly across lightweight foam panels
- Press panels into position with steady pressure
- Avoid over-applying adhesive that causes squeeze-out
Recommended Coverage Techniques
Recommended coverage techniques spread adhesive across the panel in a way that matches panel weight, panel size, and wall flatness. Heavy decorative acoustic wall panels need broader load distribution. Lightweight panels need lighter and more even contact.
The main coverage techniques are given below:
- Use perimeter-and-centre coverage for rigid panels: perimeter support secures panel edges, while centre support reduces hollow spots and improves contact.
- Use multiple adhesive runs on large panels: repeated bead lines improve load distribution across the panel width.
- Use gap-filling coverage on uneven walls: thicker bead application helps bridge shallow depressions on brick, concrete, or damaged plaster.
- Use light full-area spray coverage on foam panels: broad spray contact spreads holding force without deforming soft material.
- Use extra support points near panel corners and upper edges: upper sections carry more stress because gravity pulls the panel downward over time.
Curing and Setting Time Guidelines
Curing and setting time guidelines require panels to stay undisturbed until the adhesive reaches full bond strength. Initial tack holds the panel in position early. Full cure provides the long-term structural hold.
The main curing and setting guidelines are given below:
- Hold the panel firmly after first placement
- Use temporary support for heavy panels where needed
- Avoid loading or adjusting the panel too early
- Follow the adhesive curing time on the product label
- Allow more time in colder or more humid rooms
How Do You Choose The Best Adhesive For Your Specific Project?
Best adhesive choice depends on panel weight, wall surface, room condition, and permanence because each factor changes grab requirement, compatibility, moisture resistance, and long-term holding performance.
Start with panel type. Lightweight foam tiles, polyester acoustic tiles, and felt-backed slatted wall panels do not place the same demands on adhesive. Heavier panels need stronger initial grab and broader contact across the back surface.
Next, assess the wall. Plasterboard, skimmed plaster, painted masonry, sealed surfaces, and tile all behave differently. Some surfaces are absorbent, while others are smooth or weak at the paint layer rather than the substrate.
Then assess the room. Dry decorative walls allow more flexibility. Bathrooms, kitchens, and utility spaces need better moisture resistance and more reliable long-term flexibility after curing.
Finally, decide whether the installation is permanent. Permanent feature walls usually justify a stronger construction-grade adhesive. Temporary projects, rental spaces, or layouts likely to change later often benefit from less destructive fixing methods.
A simple decision path helps:
- Heavy slatted panel + sound plasterboard = strong grab adhesive
- Heavy slatted panel + smooth sealed wall = high-tack hybrid adhesive
- Humid room = moisture-resistant flexible adhesive
- Future removal expected = consider screw fixing or semi-permanent support
What Mistakes Should Be Avoided When Using Adhesive For Acoustic Panels?
The main mistakes to avoid when using adhesive for acoustic panels are using low-strength adhesive, ignoring panel weight, skipping wall preparation, overusing expanding adhesive, and relying on adhesive alone where mechanical support is needed. These mistakes reduce bond strength, increase panel movement, and raise the risk of wall damage or installation failure.
Using Low-Strength Household Adhesives
Low-strength household adhesives are a poor choice for acoustic panels because most formulas do not provide enough bond strength for vertical panel installation. General-purpose glue, basic craft adhesive, and light-duty household products often fail under the weight of rigid acoustic wall panels. Heavy slat acoustic panels, MDF acoustic panels, and 3D acoustic panels need stronger adhesive categories such as grab adhesive, MS polymer adhesive, or high-strength construction adhesive.
Ignoring Panel Weight and Density
Ignoring panel weight and density is a common installation mistake because panel weight and density decide how much stress the adhesive must carry. Lightweight foam acoustic panels need a different adhesive approach from dense wooden slat acoustic panels. Heavy acoustic wall panels place more force on the upper bond line and more downward load across the full panel back. Adhesive selection becomes unreliable when panel type is treated as a minor detail.
Skipping Wall Preparation
Skipping wall preparation is a major mistake because adhesive bonds to the wall surface, not to the idea of the wall surface. Dust, grease, loose paint, wallpaper residue, dampness, and cracked skim reduce direct contact. A strong adhesive on a weak wall finish still fails. Clean, dry, stable, and level wall surfaces give acoustic wall panels a more reliable bond.
Overusing Expanding Adhesives
Overusing expanding adhesives is a mistake because expanding adhesive can distort panel position and create uneven pressure behind the panel. Controlled use of PU adhesive can help on porous or uneven walls, but excessive expansion can push the panel out of alignment, create squeeze-out, or stress lighter panel materials. Expanding adhesive works best where minor gap filling is needed, not where uncontrolled volume becomes part of the installation.
Not Combining Adhesive With Mechanical Fixing
Not combining adhesive with mechanical fixing is a mistake when acoustic wall panels are heavy or the wall surface is less reliable. Heavy wooden slat acoustic panels, MDF acoustic panels, and large-format decorative acoustic panels often benefit from adhesive plus screws. Mechanical support reduces strain on the adhesive and improves long-term installation security on painted walls, masonry, and uneven surfaces.
Using The Wrong Adhesive For The Panel Material
Using the wrong adhesive for the panel material is a mistake because panel materials respond differently to adhesive chemistry. Acoustic foam panels need foam-safe adhesive. PET felt acoustic panels need clean and controlled coverage. MDF acoustic panels need stronger bonding performance. A single adhesive does not suit every acoustic panel category.
Applying Too Little Adhesive
Applying too little adhesive is a mistake because limited coverage creates weak contact points across the panel back. Small adhesive spots leave unsupported areas near edges and across the centre of the panel. Weak coverage increases the risk of edge lift, hollow sections, and long-term peeling.
Applying Too Much Adhesive
Applying too much adhesive is a mistake because excessive adhesive increases squeeze-out, uneven contact, and curing problems. Thick over-application can push adhesive beyond visible panel edges and reduce finish quality. Excess adhesive can also create pressure points behind lightweight acoustic panels.
Using The Wrong Adhesive Pattern
Using the wrong adhesive pattern is a mistake because adhesive placement affects load distribution. A single central blob does not support the full panel. Perimeter coverage and centre coverage give better contact for rigid acoustic wall panels. Even spray coverage gives better results for lightweight foam acoustic panels.
Failing To Dry Fit The Panels First
Failing to dry fit the panels first is a mistake because acoustic wall panel alignment becomes harder after adhesive is applied. Dry fitting confirms spacing, edge position, and cutting accuracy before bonding starts. Better layout control reduces waste, misalignment, and repositioning errors.
Installing On Damp Or Unstable Walls
Installing acoustic panels on damp or unstable walls is a mistake because moisture and surface movement weaken the adhesive bond. Damp plaster, fresh paint, crumbling skim, and loose wall sections all reduce long-term holding strength. Stable wall condition matters as much as adhesive quality.
Ignoring Curing Time
Ignoring curing time is a mistake because initial grab and full bond strength are not the same. Early touch-dry hold does not mean the adhesive has reached final strength. Heavy acoustic wall panels are more likely to slip or detach when the panel is loaded or adjusted before full curing.
Repositioning The Panel After Bonding Starts
Repositioning the panel after bonding starts is a mistake because adhesive contact becomes less even after the first placement. Panel movement can break the bead pattern, smear the adhesive, and reduce bond consistency. Accurate first placement improves finish quality and long-term support.
Fixing Panels To Weak Paint Or Wallpaper
Fixing acoustic panels to weak paint or wallpaper is a mistake because the wall finish often fails before the adhesive fails. Wallpaper edges, loose paint, and flaking decorative finishes do not provide a reliable base for permanent bonding. Acoustic wall panels need direct contact with a stable surface.
Ignoring Room Conditions
Ignoring room conditions is a mistake because heat, humidity, and ventilation affect adhesive behaviour. Bathrooms, utility spaces, poorly ventilated rooms, and warmer interiors place more stress on the bond line than dry and stable rooms. Adhesive choice needs to match the environment as well as the panel.
Main Installation Risk
The main installation risk is treating acoustic panel adhesive as a universal solution instead of part of a full fixing system. Acoustic wall panel performance depends on adhesive strength, panel mass, wall condition, panel material, and support method working together in one installation system.
How Can You Fix Or Remove Acoustic Wall Panels Safely?
Acoustic wall panels can be fixed or removed safely by matching the fixing method to panel weight, preparing the wall properly, using controlled support during installation, and reducing surface damage during removal. Safe acoustic wall panel handling depends on panel type, wall condition, and bond strength.
Safe Fixing Methods For Acoustic Wall Panels
Safe fixing starts with the correct method for the panel type and wall surface. Lightweight acoustic foam panels often suit spray adhesive or temporary fixing systems. Heavy slat acoustic wall panels and MDF acoustic panels are safer with grab adhesive plus mechanical support.
Safe Removal Methods For Acoustic Wall Panels
Safe removal starts with reducing force at the bond line. Sudden pulling increases the chance of paint tear, plaster damage, and panel edge damage. Controlled separation gives a safer result.
The main safe removal steps are given below:
- Check whether the panel is glued, screwed, or hybrid fixed
- Remove visible screws or mechanical fasteners first
- Protect the floor and surrounding wall area
- Work from one edge instead of pulling the full panel at once
- Support the panel during release to prevent dropping
- Remove adhesive residue gradually rather than aggressively
Are There Removable Or Temporary Adhesive Options For Acoustic Wall Panels In The UK?
Removable adhesive options are available, but most options suit lightweight acoustic tiles better than full-size slatted acoustic wall panels because heavy vertical panels need stronger and more durable fixing.
Temporary adhesive products usually work best on low-weight decorative panels. Large felt-backed slat panels create continuous downward force, which places much greater demand on any removable fixing system.
Initial hold is not the main problem. Long-term stability is the real issue. Temporary adhesive may bond at first, then weaken gradually as room temperature, humidity, surface tension, and panel weight interact over time.
For projects where future removal matters, screw fixing is often the more practical option. Small repair points are usually easier to manage than widespread plaster or paint damage caused by aggressive permanent adhesive.
Another practical route is mounting panels onto a secondary backing board or batten structure rather than bonding directly to the finished wall. That method protects the main wall and simplifies future removal.
Temporary adhesive suits lightweight acoustic décor. Permanent or semi-permanent fixing is usually the safer choice for full-height decorative acoustic wall panels.

What Is The Strongest Adhesive For Acoustic Wall Panels?
The strongest adhesive for acoustic wall panels is usually a high-strength construction adhesive or polyurethane adhesive for heavy rigid panels. High-strength grab adhesive also performs strongly on slat acoustic wall panels and MDF acoustic wall panels. The final result depends on panel weight, wall surface, and fixing method, not on adhesive strength alone.
High-Strength Construction Adhesive
High-strength construction adhesive is one of the strongest options for acoustic wall panels because high-strength construction adhesive provides strong vertical hold and strong long-term bonding. High-strength construction adhesive is a strong fit for wooden slat acoustic wall panels, MDF acoustic panels, and other rigid decorative panels. Thick bead application also helps improve contact on slightly uneven walls.
Polyurethane Adhesive Strength On Difficult Wall Surfaces
Polyurethane adhesive is one of the strongest permanent bonding options for acoustic wall panels because polyurethane adhesive expands during curing and grips porous surfaces strongly. Polyurethane adhesive performs well on brick, concrete, and other uneven wall surfaces. Strong expansion also means controlled application matters more with lighter panels.
High-Strength Grab Adhesive For Slat Acoustic Wall Panels
High-strength grab adhesive is one of the strongest practical options for acoustic wall panels because high-strength grab adhesive combines strong initial tack with reliable cured bonding. High-strength grab adhesive is widely suited to heavy slat acoustic wall panels and MDF-backed acoustic wall panels. Strong early hold makes installation easier on vertical wall surfaces.
Strength By Wall Panel Type
The strongest adhesive changes with panel type because acoustic panels do not place the same load on the wall. Foam acoustic panels do not need the strongest adhesive category. Heavy slat acoustic wall panels and 3D acoustic wall panels need much stronger bonding than lightweight foam or thin felt panels.
The strongest adhesive direction by panel type is given below:
- Foam acoustic panels: foam-safe spray adhesive
- PET felt acoustic panels: MS polymer adhesive or construction adhesive
- Wooden slat acoustic panels: high-strength grab adhesive or construction adhesive
- MDF or 3D acoustic panels: polyurethane adhesive or high-strength construction adhesive
Strength By Wall Surface
The strongest adhesive also changes with wall surface because wall condition affects real bond strength. A strong adhesive on weak paint still fails. A high-strength adhesive on dusty brick still underperforms. Bond reliability comes from adhesive strength plus substrate strength.
The strongest adhesive direction by wall surface is given below:
- Drywall or plasterboard: high-strength construction adhesive with controlled expansion
- Brick or concrete: polyurethane adhesive or high-strength construction adhesive
- Painted walls: high-strength adhesive only on stable paint
- Uneven walls: gap-filling polyurethane adhesive or high-build construction adhesive
When The Strongest Adhesive Is Not Enough?
The strongest adhesive is not always enough for acoustic wall panels because heavy panels and weak surfaces often need mechanical support as well. Heavy wooden slat acoustic wall panels, MDF acoustic panels, and large-format decorative panels often perform better with adhesive plus screws. Mechanical support reduces strain on the adhesive and improves long-term stability.
What Are the Best Adhesive Products Available in the UK Right Now?
Best adhesive products for acoustic wall panels are high-grab construction adhesives, panel-specific wall panelling adhesives, and hybrid polymer adhesives because those categories combine vertical hold, surface compatibility, and durable interior performance.
Product selection should focus on adhesive type before brand name. A strong category match usually matters more than a popular label on the cartridge. Acoustic wall panels need reliable grab, even coverage, and durable support after curing.
Panel-specific wall panelling adhesives are usually the most direct match for decorative acoustic wall panels. Those products are designed for interior cladding and similar wall-mounted installations, so application characteristics often suit felt-backed and timber-faced panels well.
High-grab construction adhesives are a strong option for general dry-room installation. Those products work well where plasterboard, plaster, or masonry is sound and the wall surface has been prepared properly.
Hybrid polymer adhesives are often the better choice on mixed or less absorbent surfaces. Flexible cured performance and stronger compatibility with sealed backgrounds make that category useful for kitchens, bathrooms, and more demanding wall conditions.
A clear way to present product recommendations is by category:
- Panel-specific wall panelling adhesive
- High-grab construction adhesive
- Hybrid polymer adhesive
- Moisture-resistant adhesive for humid rooms
Conclusion
The best adhesive for acoustic wall panels depends on panel type, panel weight, and wall surface, not on adhesive strength alone. Foam acoustic panels work best with lightweight spray adhesive. PET felt acoustic panels suit flexible and balanced bonding. Wooden slat acoustic panels, MDF acoustic panels, and 3D acoustic panels need stronger grab adhesive, construction adhesive, or polyurethane adhesive, with mechanical support where load is higher.
Acoustic wall panel installation performs best when adhesive choice follows the full fixing system. Wall condition matters as much as panel material. Drywall, plasterboard, painted walls, brick, concrete, and uneven surfaces all change the bonding result. Glue and screws are both valid fixing methods, and a hybrid method often gives the safest result where panel weight or surface risk is higher.
Match the adhesive to the panel, match the fixing method to the wall, and treat acoustic wall panel installation as a full system rather than a single product choice.
