
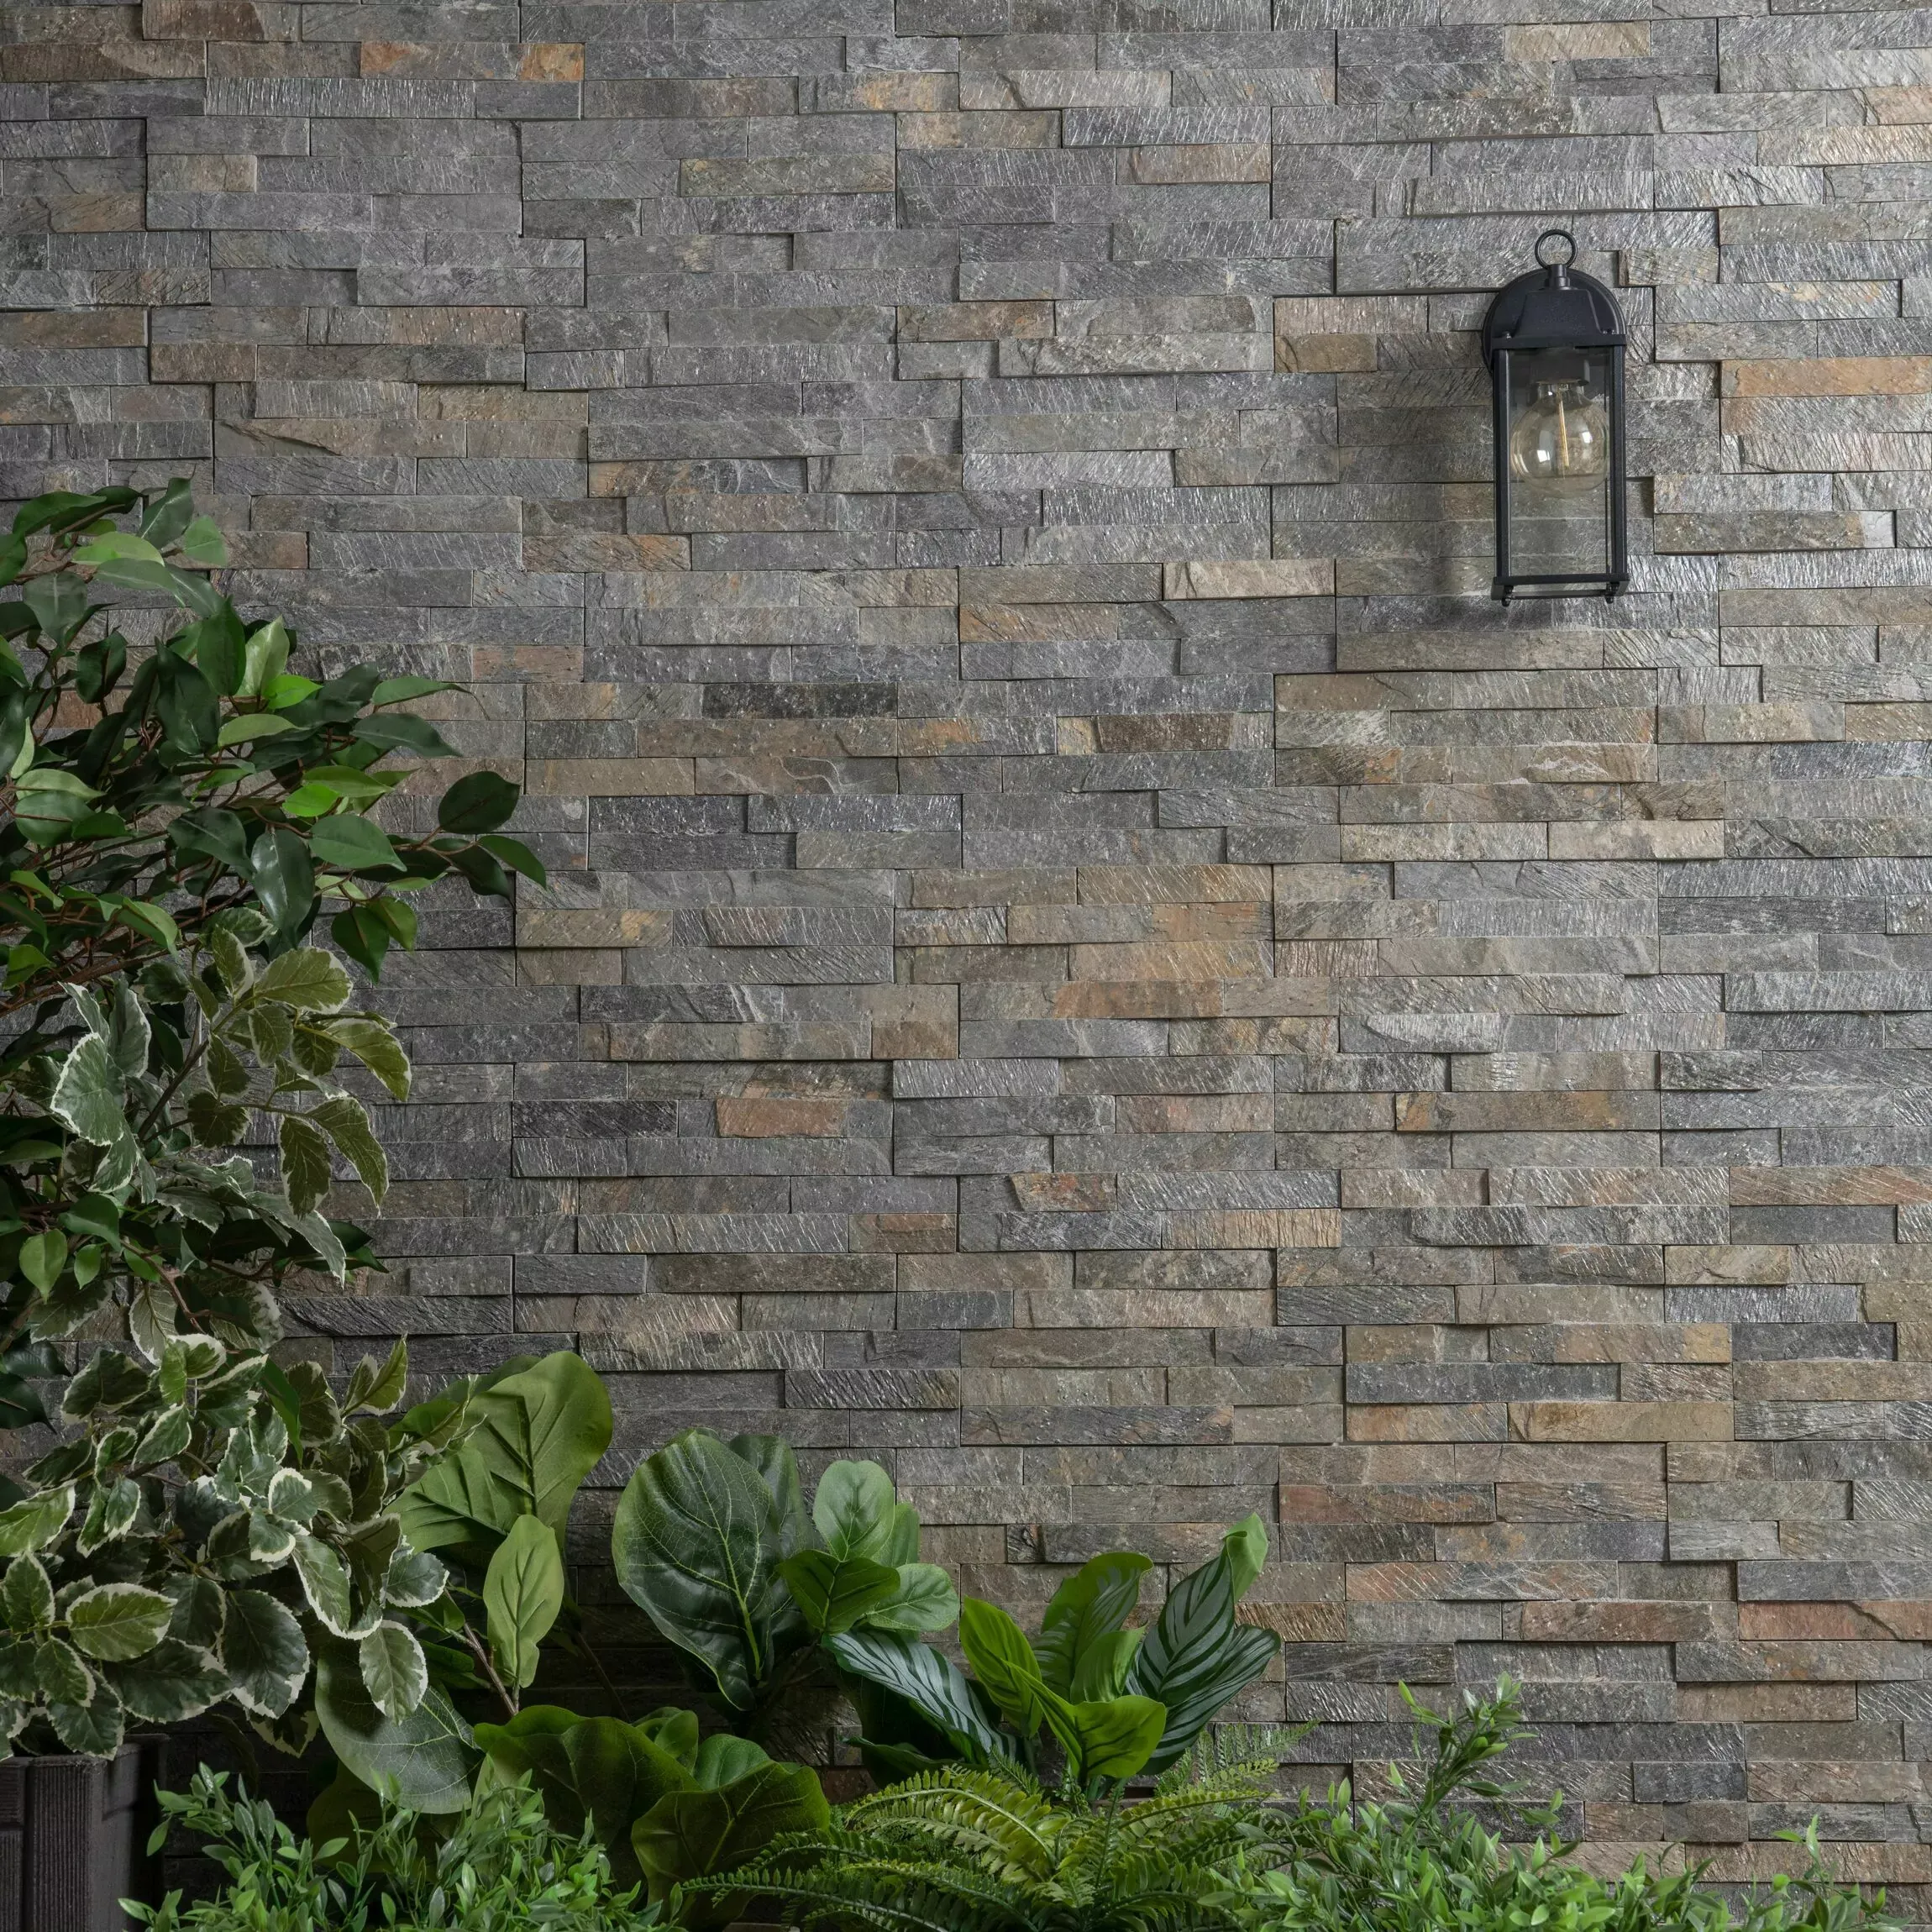
Tiling a garden wall creates a durable decorative surface for outdoor kitchens, seating areas, raised beds, courtyards, water features and boundary walls. A successful installation requires exterior-rated tiles, stable masonry, suitable fixing materials and effective protection against rain, frost and temperature changes.
Water presents the greatest threat to exterior wall tiling. Moisture entering behind garden wall tiles can cause staining, white salt deposits, cracked grout and adhesive failure. Freezing conditions increase the risk because trapped water expands inside gaps and porous materials.
Table of Contents
What Tiles Are Best for a Garden Wall?
Porcelain tiles are generally the best tiles for a garden wall because porcelain combines low water absorption, frost resistance, dimensional stability and limited maintenance. Exterior rated ceramic, natural stone, split-face cladding and mosaics also suit selected garden wall applications.
Every chosen tile must have explicit approval for exterior wall installation. Appearance, surface hardness and a glazed finish do not confirm outdoor suitability.
Porcelain Garden Wall Tiles
Porcelain tiles have a dense body and a low water absorption rate. Reduced absorption limits the volume of water entering the tile during wet weather.
Porcelain offers several practical benefits:
- Strong frost resistance
- Low water absorption
- High stain resistance
- Reliable colour stability
- Limited sealing requirements
- Consistent tile dimensions
- Simple routine cleaning
- Extensive colour and texture choices
Porcelain tiles classified within the BIa absorption group have a water absorption rate of 0.5% or lower. Exterior approval remains essential because water absorption represents only one part of the performance specification.
Stone-effect porcelain recreates slate, limestone, marble and sandstone without the variable porosity of natural stone. Concrete-effect porcelain suits modern gardens, while wood-effect porcelain introduces warmth without regular timber treatment.
Exterior Ceramic Tiles
Exterior rated ceramic tiles provide decorative colours, glazed finishes and detailed patterns. Ceramic tiles suit sheltered courtyards, covered dining spaces and protected outdoor kitchen walls.
Standard indoor ceramic tiles often absorb more water than porcelain. Higher absorption increases the risk of freeze–thaw damage. Manufacturer approval must cover exterior use and local winter conditions.
Leftover kitchen or bathroom tiles should remain indoors unless the technical specification confirms exterior suitability.
Natural Stone Tiles
Natural stone creates individual variation because every tile contains different tones, veins and textures.
Suitable stone options include:
- Granite: Dense, durable and suitable for exposed locations.
- Slate: Layered, textured and compatible with traditional or modern gardens.
- Quartzite: Hard-wearing with visible mineral variation.
- Limestone: Warm and understated but generally more porous.
- Travertine: Recognisable through natural pits and tonal movement.
- Sandstone: Textured and complementary to traditional paving.
Natural stone often requires sealing. Some varieties also need white adhesive to prevent staining or visible colour shadowing.
Limestone and travertine react badly to acidic cleaners. Product-specific cleaning and sealing requirements should form part of the buying decision.
Split-Face Wall Tiles
Split face tiles create strong texture and shadow. Popular applications include raised beds, outdoor kitchens, seating areas and decorative water-feature walls.
An exterior split-face installation requires:
- Frost-resistant tile material
- Complete adhesive coverage
- Secure external corners
- Weather-resistant joint treatment
- Effective coping
- Suitable sealing where specified
Deep surface ridges collect more dust, pollen and algae than smooth porcelain. Shaded or heavily planted gardens require more frequent cleaning.
Some split-face panels remain suitable only for sheltered exterior walls. The product specification must confirm the permitted exposure level.

Mosaic Wall Tiles
Exterior-rated mosaics suit curved walls, decorative panels and water features. Small tile sizes follow curved substrates more effectively than rigid large-format tiles.
Check the exterior suitability of the tile, mesh backing and mesh adhesive. Numerous grout joints also increase cleaning and maintenance requirements.
Mosaics used inside water features require approval for continuous immersion rather than standard exterior approval alone.
Large Format Porcelain Tiles
Large format tiles produce a contemporary appearance with fewer grout joints. Fewer joints simplify cleaning and create a continuous architectural surface.
Large tiles require:
- A very flat substrate
- Suitable installation weight
- Large-format exterior adhesive
- Correct trowel notch size
- Back-buttering
- Full adhesive contact
- Careful handling and cutting
A heavy tile installation must remain within the load capacity of the wall, render, backing system and adhesive.
Garden Wall Tile Finishes
Tile texture affects appearance, cleaning and water retention.
Common finishes include:
- Smooth matt: Easy to clean with restrained reflection.
- Textured: Creates depth but collects more organic debris.
- Gloss: Reflects light but often displays water marks.
- Stone effect: Coordinates with paving and natural planting.
- Concrete effect: Complements modern landscaping.
- Patterned: Creates a focal point in courtyards and dining areas.
Pale tiles make compact gardens appear lighter and more open. Dark tiles create contrast against planting but absorb more heat during direct sunlight.
Garden Wall Tile Buying Checklist
Choose garden wall tiles according to seven essential factors:
- Confirm exterior-use approval.
- Check frost resistance.
- Review the water absorption rate.
- Calculate the total installation weight.
- Confirm substrate compatibility.
- Assess cleaning and sealing requirements.
- Select a practical format for the wall dimensions.
Order every tile from one production batch where possible. Separate batches sometimes contain differences in shade, texture or dimensions.
Add extra tiles for cutting, accidental breakage and future repairs. Complex patterns, external corners and irregular stone formats require a greater allowance than straight porcelain layouts.
How to Prepare a Garden Wall for Tiling?
Prepare a garden wall by checking structural stability, stopping water penetration, removing contamination, repairing damaged masonry and producing a clean, dry and level substrate. Every repair, render, primer and waterproofing layer must cure fully before tile installation begins.
Surface preparation determines the strength of the finished installation. Adhesive applied over dust, algae, loose paint or weak render bonds to the contamination rather than the structural wall.
Structural Wall Inspection
Inspect the front, rear, top, base and corners of the wall. Complete another inspection after rainfall because wet conditions expose hidden moisture routes.
Look for:
- Leaning or bulging masonry: A visible lean or outward bulge often indicates foundation movement, excessive soil pressure, failed wall ties or prolonged water saturation. Tiles add further weight and conceal developing defects. A structural professional should assess significant movement before preparation begins.
- Stepped or widening cracks: Stepped cracks usually follow brick or block joints and often indicate structural movement. Cracks wider at one end, increasing over time or continuing through several materials require investigation. Rigid tiles and grout will reproduce unresolved movement across the finished surface.
- Loose bricks or concrete blocks: Individual masonry units should remain firmly bonded within the wall. Loose bricks and blocks create an unstable substrate that cannot support tile adhesive reliably. Remove and reset defective units with a compatible exterior mortar before rendering or tiling.
- Crumbling mortar joints: Soft, powdery or missing mortar reduces wall stability and allows water to penetrate between masonry units. Rake out defective material and repoint the joints with a compatible external mortar. Allow repaired joints to cure fully before applying additional layers.
- Hollow render: Hollow render produces a drum-like sound when tapped and indicates separation from the masonry. Adhesive fixed over detached render remains connected to a failing layer. Remove every hollow section, repair the exposed substrate and apply a suitable exterior render.
- Peeling paint: Flaking, blistered or detached paint forms an unreliable fixing surface. Tile adhesive bonds to the coating rather than the structural wall. Remove weak paint mechanically until a secure mineral substrate remains, then clean away all dust and debris.
- Powdery surfaces: Chalky render, friable mortar and dusty masonry prevent strong adhesive contact. Rubbing the wall with a clean hand reveals loose surface particles. Remove unstable material and repair the substrate instead of attempting to stabilise severe deterioration with primer alone.
- Persistent damp patches: Damp areas often indicate failed coping, leaking gutters, irrigation overspray, rising moisture or water entering from retained soil. Identify and correct the moisture source before tiling. Covering a damp wall traps water and increases the risk of staining, efflorescence and adhesive failure.
- White salt deposits: White crystalline marks usually indicate efflorescence. Moisture dissolves salts inside masonry and carries the salts towards the surface during evaporation. Dry brushing removes loose deposits, but the underlying moisture route needs correction before primer, waterproofing or adhesive application.
- Moss, algae and lichen: Organic growth indicates frequent dampness, shade or restricted airflow. Growth and root-like residues weaken adhesion and stain porous materials. Remove every deposit with a substrate-compatible treatment, rinse the surface thoroughly and allow the wall to dry completely.
- Damaged coping: Cracked, loose, flat or poorly jointed coping allows rainwater to enter through the wall top. Water then travels behind render and tiles. Repair or replace defective coping and provide an overhang, drainage fall and drip detail that directs water clear of the tiled face.
- Water entering from behind: Retaining walls, raised beds and boundary walls often receive moisture from soil or higher ground. Rear water pressure can push salts and moisture through the substrate. Correct rear waterproofing, drainage and backfill defects before applying a decorative tiled finish.
- Freeze–thaw damage: Flaking brick faces, surface scaling, cracked render and displaced mortar often result from water freezing inside porous materials. Remove damaged sections and repair the wall with compatible exterior materials. Continued water saturation must also be corrected to prevent repeated deterioration.
- Blocked drainage outlets: Blocked weep holes, channels and drainage pipes allow water to accumulate behind retaining walls or raised planters. Standing water increases hydrostatic pressure and saturation. Clear every outlet and confirm unrestricted drainage before waterproofing, rendering or tiling begins.
A structural professional should assess leaning walls, significant cracks and retaining walls under soil pressure. Tiles provide a decorative finish and no structural reinforcement.
Surface Cleaning
Remove soil, dust, grease, algae, moss, salts and loose coatings. Use a stiff non-metallic brush and a cleaner compatible with the masonry.
Rinse away every chemical residue and allow the wall to dry. Aggressive pressure washing damages weak render, soft bricks and mortar joints. Controlled low-pressure cleaning provides a safer method across older masonry.
Persistent algae indicates recurring moisture. Repair leaking gutters, irrigation overspray, failed coping or restricted drainage before covering the wall.
Paint and Coating Removal
Loose, flaking or chalking paint must be removed. A tiled installation remains only as secure as the weakest underlying layer.
Mechanically remove uncertain coatings until a stable mineral substrate appears. Remove all resulting dust before applying primer or adhesive.
Sound exterior paint still requires adhesion testing and an approved preparation system. Direct fixing over standard masonry paint creates an unnecessary failure risk.
Crack and Masonry Repair
Identify whether each crack remains stable or continues to move. Filling an active structural crack provides only temporary cosmetic improvement.
Movement warning signs include:
- Increasing crack width
- Stepped cracks through brickwork
- Cracks passing through several materials
- Misaligned wall sections
- Bulging masonry
- Repeated cracking after repair
Remove hollow render, weak pointing and crumbling masonry. Rebuild damaged areas with a compatible exterior mortar or render.
Existing structural and movement joints must continue through the finished tiled surface. Tiles and rigid grout should never bridge a movement joint.

Wall Flatness
A garden wall needs a consistently flat plane without deep depressions, high spots or projecting mortar. Large-format tiles require greater accuracy than mosaics or small tiles.
Place a long straightedge across several wall sections. Mark irregular areas and correct significant variations with exterior render, repair mortar or an approved levelling system.
Thick adhesive deposits should never replace proper levelling. Excessive adhesive thickness produces uneven curing and creates cavities where water collects.
Exterior Rendering
Sound, clean and flat concrete or masonry sometimes accepts tiles directly. Uneven brickwork, rough blocks and damaged surfaces generally require an exterior render or levelling layer.
Fresh render contains construction moisture. The full specified curing period must pass before priming, waterproofing or tiling. Premature installation traps moisture and increases the risk of efflorescence, staining and weak adhesion.
Substrate Priming
Primer requirements depend on substrate porosity and the chosen fixing system. Highly absorbent masonry removes water from cement adhesive too quickly. Dense surfaces sometimes need a bonding primer.
Use the primer recommended by the adhesive or waterproofing manufacturer. General-purpose sealers often reduce adhesive bonding strength.
Wall Top Protection
The horizontal wall top represents a primary rainwater entry point. Install coping stones or wall caps with:
- Sufficient overhang
- Drip grooves or drip edges
- Weather-resistant joints
- A slight drainage fall
- Secure corner details
- Complete wall-width coverage
Correct coping directs rainwater away from the tiled face. Flat, cracked or poorly jointed coping allows water to travel behind the installation.
Suitable Weather Conditions
Complete preparation and tiling during dry, stable weather within every product’s stated temperature range.
Avoid working during:
- Rain
- Frost
- Forecast overnight freezing
- Extreme heat
- Strong drying winds
- Intense direct sunlight
- Prolonged high humidity
Temporary covers should protect uncured materials without trapping condensation against the wall.
How to Tile a Garden Wall Step by Step?
Tile a garden wall by measuring the surface, planning balanced cuts, fixing a level support batten and installing exterior tiles with full adhesive contact. Complete the surface with weather-resistant grout, flexible movement joints and protected wall edges.
Adhesive open time, curing period, application temperature and supported tile weight vary between products. Manufacturer instructions should control every installation stage.
Required Tools and Materials
Essential tools include:
- Tape measure
- Spirit level or laser level
- Long straightedge
- Pencil or removable marker
- Tiling batten
- Clean buckets
- Electric mixing paddle
- Notched trowel
- Margin trowel
- Grout float
- Tile spacers
- Tile-levelling clips where appropriate
- Manual tile cutter
- Wet saw or angle grinder
- Suitable diamond blade
- Rubber mallet
- Sponges and cleaning cloths
- Personal protective equipment
Required materials commonly include:
- Exterior-rated tiles
- Exterior primer
- Repair or levelling mortar
- Waterproofing system where required
- Flexible exterior adhesive
- Exterior grout
- Flexible exterior sealant
- Exterior-rated trims
- Coping stones
- Natural stone sealer where required
Step 1: Wall Measurement
Measure the wall width and intended tiled height in metres. Multiply both figures to calculate square metres.
A wall measuring 4 metres wide and 1.5 metres high covers 6 square metres:
4 m × 1.5 m = 6 m²
Subtract large untiled openings. Add an allowance for cutting, breakages and later repairs.
Step 2: Dry Layout Planning
Place several tiles on a flat surface with the intended spacers. Measure the combined tile-and-joint module.
Transfer the measurements to the wall and mark:
- Horizontal datum line
- Vertical centre line
- External corners
- Internal corners
- Fittings and openings
- Movement-joint positions
- Finished top edge
- Finished bottom edge
Balance tile cuts at both wall ends. One narrow strip beside one full tile creates an uneven appearance and weak edge detail.
Step 3: Support Batten Installation
Fix a straight temporary batten along the horizontal datum line. Check the complete batten with a spirit level or laser.
The batten supports the first installed row and prevents tile movement while the adhesive cures. The bottom row should be cut and installed after the main wall area becomes secure.
Step 4: Adhesive Mixing
Pour the measured volume of clean water into a clean bucket. Add powdered adhesive according to the stated mixing ratio.
Mix with a slow-speed paddle until a smooth consistency forms. Allow the adhesive to rest for the specified maturation time, then remix without adding extra water.
Mix only enough adhesive for the stated working period. Adding water after stiffening weakens the cured product.
Step 5: Adhesive Application
Spread adhesive across a manageable wall section using the flat side of the trowel. Comb the adhesive with the recommended notch size.
Create straight, parallel ribs. Circular patterns trap air and prevent complete rib collapse.
Apply a thin adhesive layer to the back of large, uneven or heavily textured tiles. Back-buttering improves contact and reduces voids.
Step 6: First Tile Row
Press the first tile into the combed adhesive above the support batten. Move the tile slightly across the adhesive ribs to remove trapped air.
Insert spacers and position the next tile. Check:
- Horizontal level
- Vertical alignment
- Joint width
- Surface plane
- Pattern direction
- Adhesive contact
The first row controls every row above. Correct alignment before the adhesive begins to cure.
Step 7: Adhesive Coverage Checks
Remove a freshly installed tile periodically and inspect the back. Exterior tiles require continuous adhesive contact without water-holding cavities.
Poor coverage often results from:
- Incorrect trowel notch size
- Low trowel angle
- Circular adhesive patterns
- Uneven walls
- Skinned adhesive
- Missing back-buttering
- Insufficient tile movement during placement
Adjust the installation method immediately when visible gaps remain.
Step 8: Remaining Tile Rows
Work in small sections and avoid spreading excessive adhesive. Adhesive exposed beyond the stated open time develops a dry surface skin and loses bonding strength.
Use spacers to maintain consistent joints. Tile-levelling clips help control projecting edges across large-format tiles but cannot correct a poorly prepared wall.
Remove adhesive from tile faces and grout joints before hardening.
Step 9: Tile Cutting
Measure each cut twice and include the required joint width. Mark the tile clearly before cutting.
A manual cutter suits many straight ceramic and porcelain cuts. Dense porcelain, natural stone, notches and shaped cuts generally require a wet saw or angle grinder with a suitable diamond blade.
Wear eye, hearing and respiratory protection. Wet cutting or effective dust extraction reduces exposure to silica-containing dust.
Step 10: Corner and Edge Finishing
Exterior corners need secure weather-resistant protection.
Common finishes include:
- Exterior-grade metal trims
- Porcelain corner pieces
- Manufactured stone corners
- Overlapping return tiles
- Professionally mitred edges
Mitred edges require precise cutting and remain vulnerable to impact. Changes of plane generally need flexible sealant rather than rigid grout.

Step 11: Adhesive Curing
Allow the adhesive to cure for the full manufacturer-stated period. Cool temperatures and damp weather often extend curing time.
Protect the wall from rain, frost, direct sunlight and accidental impact throughout curing.
Step 12: Exterior Grouting
Remove spacers and clear adhesive from the joints. Mix the exterior grout with the exact specified water ratio.
Apply grout diagonally with a rubber float and fill every joint completely. Remove excess material after the grout begins to firm.
Repeated washing or excessive sponge water weakens cement grout and produces uneven colour.
Step 13: Movement Joint Sealing
Movement joints accommodate expansion, contraction and structural movement.
Movement joints commonly belong:
- Over existing structural joints
- At internal corners
- At changes of plane
- Between different substrates
- Around fixed penetrations
- Across long tiled sections
- At specified perimeter positions
Keep movement joints free from adhesive and rigid grout. Fill prepared joints with compatible exterior sealant and backing material where required.
Step 14: Final Weather Protection
Protect fresh grout and sealant for the complete curing period. Complete coping, trims, penetrations and edge details before prolonged weather exposure.
Apply natural stone sealer only after the tiles and grout reach the required dry condition.
Can You Tile Directly Onto a Garden Wall?
Yes, you can tile directly onto a garden wall when the masonry remains structurally stable, clean, dry, level and capable of supporting the total installation weight. Painted, uneven, damp, cracked or defective walls require additional preparation before tiling begins.
Direct installation depends on substrate condition, surface flatness, moisture exposure and tile weight.
Brick Garden Walls
Sound brickwork sometimes accepts direct tiling after cleaning, repairing and priming. Deep mortar joints and uneven brick faces often prevent full adhesive coverage.
An exterior render creates a flatter and more predictable base. Soft bricks, failed pointing, salts and dampness require correction before rendering or tiling.
Concrete Block Walls
Stable and accurately constructed concrete blockwork may accept an approved direct-fixing system. Rough or highly absorbent blocks generally need primer, exterior render or both.
Check the block type and supported installation weight. Lightweight and dense blocks have different absorption and loading characteristics.
Rendered Garden Walls
Exterior render provides a suitable substrate when fully cured, firmly bonded, dry and strong enough to support the tiles.
Tap across the render and listen for hollow areas. Remove detached sections and repair the exposed substrate. Powdery, painted or cracked render requires further treatment.
Concrete Garden Walls
Concrete must remain stable, cured and free from laitance, oil, release agents and curing compounds. Smooth concrete sometimes needs mechanical preparation or a bonding primer.
Repair surface defects before tiling. Active structural cracks require assessment rather than cosmetic coverage.
Painted Garden Walls
Paint creates an intermediate layer between the adhesive and masonry. Loose, flaking or chalking coatings must be removed.
Even sound masonry paint may lack sufficient strength for a heavy tiled finish. Removal back to a stable mineral surface provides a more dependable substrate.
Existing Outdoor Tiles
Existing outdoor tiles must remain completely secure, clean and capable of carrying the additional weight. Hollow, loose or cracked tiles make over-tiling unsuitable.
Removing the original tiles allows direct inspection of the wall. Approved over-tiling systems require thorough cleaning, mechanical preparation and a compatible bonding primer.
Timber Garden Walls
Ordinary timber, fencing boards and standard plywood expand and contract with changing moisture levels. Direct tiling creates a high risk of cracked grout and detached tiles.
Standard plasterboard, internal backer boards and untreated plywood remain unsuitable for exposed garden walls.
Retaining Walls
Retaining walls experience ground moisture and water pressure from behind. Waterproofing the visible face alone does not resolve rear moisture pressure.
How to Waterproof and Protect Outdoor Wall Tiles?
Protect outdoor wall tiles by preventing water entry through the wall top, controlling rear moisture and using an approved exterior waterproofing system where exposure requires additional protection. Exterior grout alone does not create a waterproof tiled garden wall.
Water management should direct moisture away from the construction rather than trap moisture inside the wall.
Waterproofing Requirements
Not every freestanding garden wall requires a surface waterproofing membrane. Waterproofing becomes particularly important across:
- Retaining walls
- Raised planters
- Water features
- Outdoor showers
- Pool splash zones
- Outdoor kitchen wet areas
- Walls receiving irrigation
- Moisture-sensitive substrates
Use a complete exterior waterproofing system approved for the substrate and exposure level. Unrelated primers, membranes and adhesives sometimes create compatibility problems.
Coping and Wall Caps
Coping stops rain from entering through the horizontal wall top. A suitable coping unit should extend beyond the tiled face and include a drip edge.
Failed coping creates:
- Damp patches
- White salt deposits
- Grout discolouration
- Adhesive deterioration
- Frost damage
- Loose tiles
Coping joints, corners and end details require regular inspection.
Exterior Adhesive Selection
Use flexible cement-based adhesive approved for exterior walls, the chosen tile and the substrate.
Dense porcelain generally requires an improved adhesive formulated for low-porosity tiles. Natural stone sometimes needs white adhesive to prevent staining.
Common classifications include:
- C2: Improved cementitious adhesive
- S1: Deformable adhesive
- S2: Highly deformable adhesive
Classification alone does not confirm complete suitability. Tile weight, format, substrate and exposure remain essential selection factors.
Exterior Grout Selection
Use weather-resistant grout compatible with the tile material and joint width. Improved cement grout with reduced water absorption often carries a CG2 WA classification.
Exterior grout should provide:
- Low water absorption
- Suitable flexibility
- Frost resistance
- Joint-width compatibility
- Colour stability
- Cleaning-product compatibility
Flexible sealant belongs in movement joints and changes of plane.
Full Adhesive Coverage
Continuous adhesive contact prevents water-holding cavities behind tiles. Isolated adhesive blobs leave unsupported areas and hidden spaces for moisture.
Full coverage also distributes tile weight evenly and improves resistance to impact, frost and thermal stress.
Movement Accommodation
Tiles, masonry and adhesive expand at different rates. Movement joints prevent thermal stress from concentrating across rigid tiled sections.
Never cover structural joints with tiles. Continue every structural joint through the complete installation and finish the joint with an approved flexible sealant system.
Tile and Grout Sealing
Porcelain and glazed ceramic generally require no surface sealer. Natural stone, unglazed tiles and cement-based materials often benefit from sealing.
A suitable sealer helps:
- Reduce water absorption
- Limit staining
- Simplify algae removal
- Protect porous grout
- Reduce pigment absorption during grouting
Sealer does not replace waterproofing, coping or full adhesive contact. Test every sealer on an unused tile because some formulas change colour or sheen.
Frost Protection
Frost protection starts with exterior-rated tiles and effective water management. Trapped water expands during freezing conditions and places pressure on adhesive, grout and porous tile bodies.
Protect fresh materials from frost until full curing. Inspect coping, grout and movement joints before winter.
Heat and Sunlight Protection
Dark tiles absorb more solar heat than pale tiles. Repeated heating and cooling create expansion and contraction across the wall.
Flexible adhesive and movement joints help accommodate thermal stress. Installation should stop when surface temperatures fall outside the product’s stated range.

What Common Mistakes Should You Avoid When Tiling a Garden Wall?
The most common mistakes include poor wall preparation, unsuitable materials, incomplete adhesive coverage, missing movement joints and installation during unsuitable weather. Such errors allow water behind the tiles and increase the risk of cracked grout, staining and tile detachment.
Poor Wall Preparation
Loose paint, hollow render, dust, algae and damp masonry prevent secure adhesive bonding. Repair cracks, remove weak materials and allow fresh render to cure before tiling. Use exterior render or levelling mortar rather than thick adhesive to flatten an uneven wall.
Unsuitable Indoor Materials
Indoor tiles, adhesive and grout often lack the frost resistance and flexibility required outdoors. Check that every tile, primer, membrane, adhesive, grout, sealant and trim carries approval for the intended exterior application.
Incomplete Adhesive Coverage
Dot-and-dab application leaves water-holding cavities behind the tiles. Comb adhesive across the whole fixing area in straight ribs, then press each tile firmly into position. Remove occasional tiles during installation to confirm full adhesive contact.
Missing Movement Joints
Tiles and masonry expand and contract as temperatures change. Missing movement joints can cause cracked grout, broken tiles and detached sections. Continue existing structural joints through the tiled finish and use flexible exterior sealant at specified movement locations.
Unsuitable Weather
Rain damages uncured materials, frost disrupts cement curing and intense sunlight causes adhesive to dry too quickly. Choose a dry period with stable temperatures and protect the wall throughout the complete curing time.
Poor Tile Layout
Starting without a dry layout often creates narrow cuts and uneven joints. Mark horizontal and vertical datum lines before applying adhesive. Balance cuts around wall ends, corners, coping, fittings and focal features.
Adhesive Left in Grout Joints
Hardened adhesive prevents grout from filling each joint to the correct depth. Shallow joints become more vulnerable to cracking and water penetration. Remove excess adhesive while fresh and keep every joint clean before grouting.
Incorrect Mixing Ratios
Excess water weakens adhesive and grout, while poor mixing leaves dry pockets. Measure the water accurately and follow the stated mixing, resting and working times. Never add more water after the mixture begins to stiffen.
How Do You Maintain Garden Wall Tiles?
Maintain garden wall tiles through gentle cleaning, seasonal inspections and prompt repairs to grout, sealant and coping. Early correction of water entry, algae growth and open joints prevents minor defects from developing into widespread frost and moisture damage.
Porcelain generally requires less maintenance than porous natural stone. Textured surfaces, shaded walls and densely planted areas need more frequent attention.
Routine Cleaning
Use warm water, a non-metallic brush and a cleaner approved for the tile material.
Follow these steps:
- Brush away leaves and loose dirt.
- Protect nearby planting.
- Apply diluted cleaner.
- Agitate the surface with a suitable brush.
- Rinse thoroughly with clean water.
- Allow the wall to dry.
- Inspect grout and sealant.
Avoid wire brushes because metal particles scratch tiles and sometimes leave rust marks.
Algae and Organic Growth
Algae develops across damp, shaded and poorly ventilated surfaces. Use an exterior cleaner compatible with the tile, grout and nearby planting.
Reduce recurring growth by:
- Redirecting leaking gutters
- Limiting irrigation overspray
- Removing trapped leaves
- Improving airflow
- Repairing coping
- Correcting drainage
- Pruning dense planting
Cleaning provides only temporary improvement when the wall remains permanently damp.
Pressure-Washing Risks
High-pressure water damages grout, flexible sealant, soft stone and loose tiles. Water pressure also drives moisture behind the tiled surface.
Use controlled low-pressure cleaning only where the product manufacturer permits the method. Keep the nozzle away from joints, corners and wall-top details.
Efflorescence Removal
Efflorescence appears as a white crystalline deposit when moisture carries salts towards the surface. Correct the moisture route before cleaning the deposit.
Use a cleaner approved for the tile material. Acidic products damage limestone, travertine, cement grout and other acid-sensitive surfaces.
Natural Stone Maintenance
Clean natural stone with a pH-appropriate product. Avoid acidic cleaners unless the stone supplier confirms compatibility.
Check sealer performance on a clean and dry section. Rapid water absorption or visible darkening often indicates reduced protection. Follow the sealer manufacturer’s reapplication instructions.
Seasonal Wall Inspection
Inspect the tiled wall during spring and autumn. Complete another inspection before prolonged winter frost.
Check for:
- Cracked grout
- Missing grout
- Open corner joints
- Detached sealant
- Persistent damp patches
- White salt deposits
- Loose or hollow tiles
- Cracked coping
- Failed wall-top joints
- Blocked drainage outlets
Repeated cracking requires investigation before regrouting. New grout will fail again when structural movement or water penetration remains unresolved.
Damaged Tile Replacement
Remove the grout surrounding the damaged tile. Break the tile carefully from the centre and work towards the edges.
Remove old adhesive without damaging the substrate or waterproofing membrane. Identify the cause of failure before installing a replacement.
Use compatible exterior adhesive and matching grout. Spare tiles from the original production batch provide the closest colour, texture and dimensional match.
A durable tiled garden wall depends on stable masonry, correct exterior materials, complete adhesive coverage, effective coping and routine maintenance. Careful installation prevents trapped water and provides the long-term performance required across changing British weather conditions.
Is Tiling a Garden Wall Worthwhile?
Yes, tiling a garden wall creates a durable, weather-resistant and attractive outdoor feature when suitable materials and installation methods are used. Long-term performance depends on stable masonry, exterior-rated tiles, full adhesive coverage, effective water management and regular maintenance.
Successful garden wall tiling begins with careful preparation. Frost-resistant tiles, flexible exterior adhesive, weather-resistant grout, movement joints and protective coping help the finished surface withstand changing British weather.
Walls and Floors offers a wide selection of outdoor tiles across porcelain, ceramic and natural stone designs. Explore suitable colours, formats and finishes, order samples to compare options outdoors, and check every product specification before beginning the garden wall project.
