
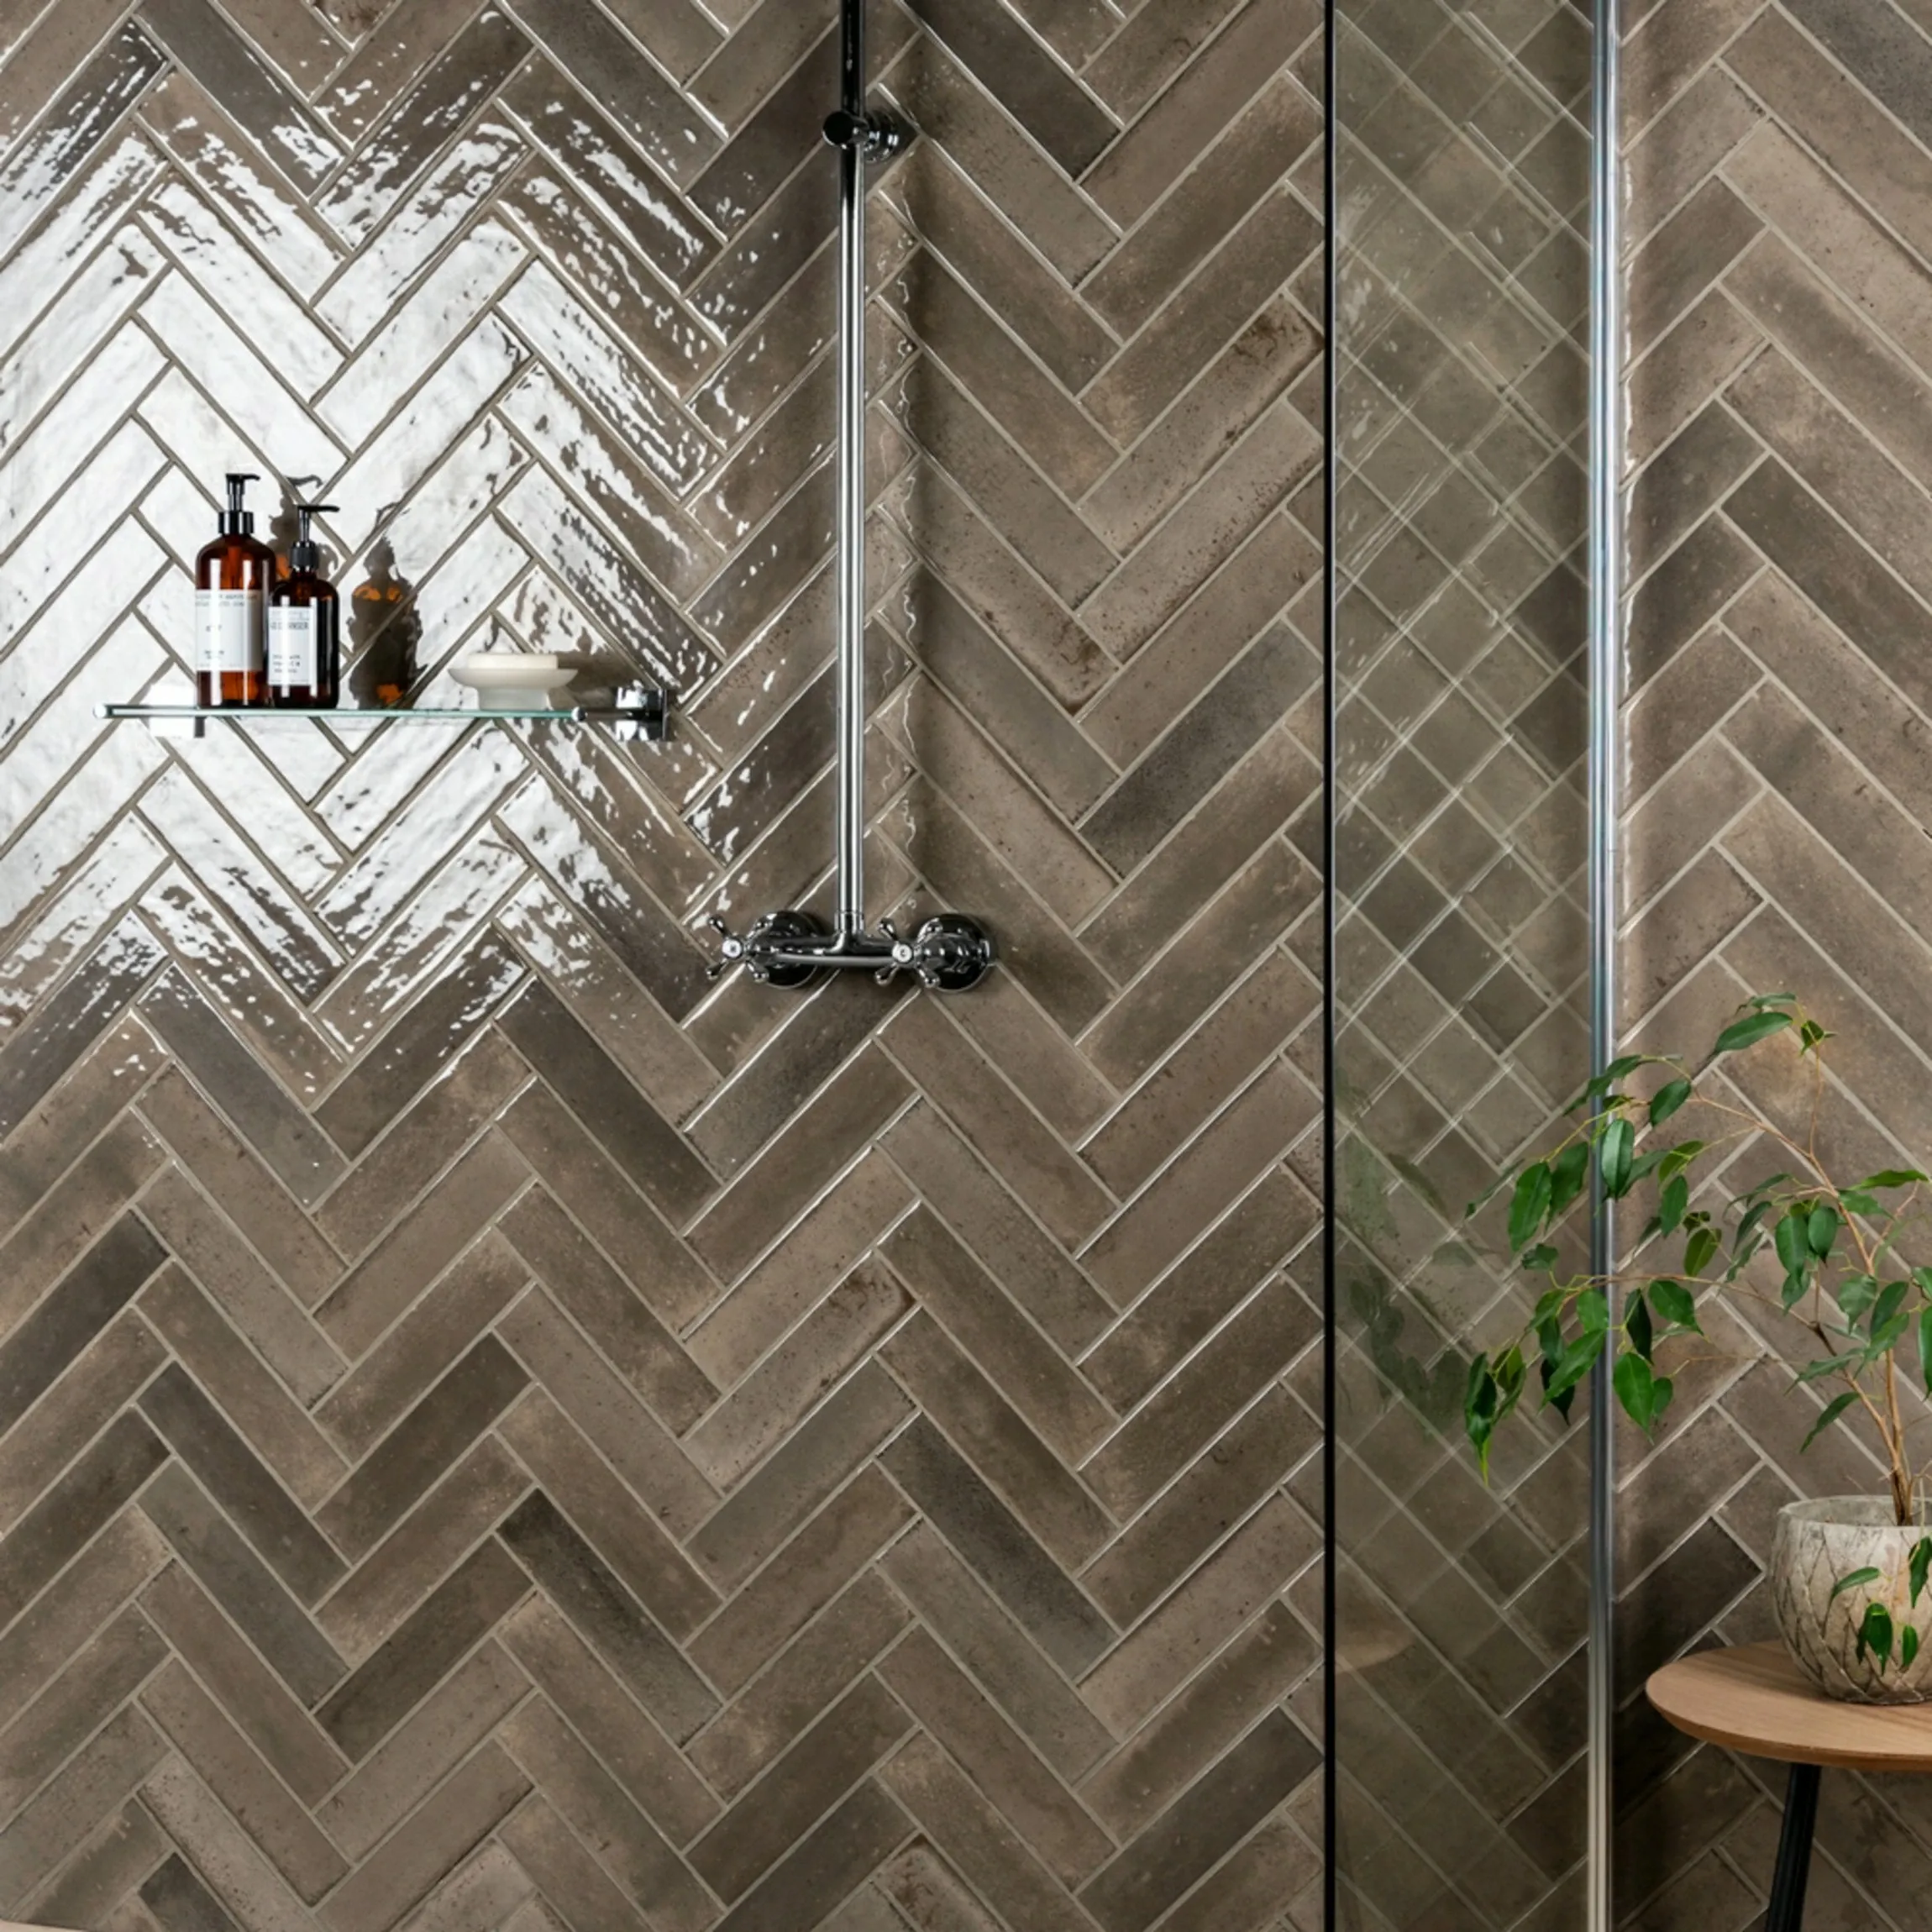
Stick on tiles provide faster installation and a lower initial project cost, while traditional adhesive-fixed tiles provide greater durability, heat resistance, water resistance and design longevity. The right choice depends on the room, surface, budget, fitting skill and planned service life.
Home renovation searches often use “non stick tiles” to describe tiles without a self-adhesive backing. The tile industry usually calls the same products ceramic, porcelain, glass, natural stone or cement tiles. A separate adhesive fixes each product to a prepared wall or floor.
Stick on tiles are also called peel-and-stick tiles or self-adhesive tiles. Many products use vinyl, PVC, gel or a lightweight composite material. Some ranges reproduce the appearance of metro tiles, mosaics, marble, terrazzo, wood or patterned ceramic tiles.
The comparison involves more than installation speed. Surface condition, moisture, heat, foot traffic, maintenance, removal and expected lifespan determine whether a covering performs successfully. Walls and Floors recommends checking technical suitability before comparing colour, shape or pattern.
Table of Contents
What Are Stick on Tiles?
Stick on tiles are lightweight wall or floor coverings with a factory-applied adhesive backing. Installation involves removing a protective sheet and pressing each tile onto a clean, dry, smooth and stable surface.
Which Types of Stick on Tiles Are Available?
Stick on tile ranges include vinyl floor tiles, PVC wall tiles, gel mosaics, decorative stickers and thin self-adhesive stone veneers. Each format has a different construction, installation method and approved application.
Common Stick on tile types include:
- Self-adhesive vinyl floor tiles: Floor-rated products with a wear layer, printed design layer, structural core and adhesive backing.
- PVC wall tiles: Lightweight coverings designed for decorative vertical surfaces.
- Gel mosaic tiles: Raised products that imitate glass or glazed ceramic mosaics.
- Decorative tile stickers: Thin printed films applied over existing tile faces.
- Self-adhesive stone veneers: Thin mineral-faced products with lower weight than conventional stone tiles.
Tile stickers form a separate product group. Stickers cover the face of existing tiles but provide little structural depth. Peel and stick tiles are complete covering units with defined edges and greater thickness. Buyers should check whether a product represents a sticker, wall covering or floor rated tile before ordering.
Wall-rated products lack the wear resistance and load capacity required for floors. Floor-rated products require a firm subfloor and often need rolling after placement. Product instructions define suitable rooms, surfaces, temperatures and cleaning methods.
What Are Non-Stick Tiles?
Non-stick tiles are conventional tiles without an adhesive backing. Ceramic, porcelain, natural stone, glass and cement tiles require a compatible separate adhesive, suitable substrate preparation and, in most installations, grout between the joints.
“Non-stick tile” is a consumer search term rather than a recognised material category. Traditional adhesive-fixed tile provides a more accurate description. The category contains products with different weights, water-absorption rates, strengths and maintenance requirements.
Which Types of Traditional Tiles Are Available?
Traditional tile ranges include ceramic, porcelain, natural stone, glass, cement and quarry products. Material composition controls weight, water absorption, strength, maintenance and suitable installation areas.
Traditional adhesive-fixed tile types include:
- Ceramic tiles: Fired clay products with glazed or unglazed surfaces.
- Porcelain tiles: Dense, low-absorption products with strong wear resistance.
- Natural stone tiles: Marble, limestone, travertine, slate and granite surfaces with individual variation.
- Glass tiles: Reflective tiles and mosaics commonly used across splashbacks and feature areas.
- Cement tiles: Patterned products requiring material-specific installation and care.
- Quarry tiles: Dense, unglazed clay products suited to selected hard-wearing floors.
Separate installation materials form part of the finished system. Primer prepares the substrate. Adhesive secures the tiles. Grout fills the joints. Flexible sealant protects changes of plane and perimeter gaps. Wet areas also need a suitable waterproofing or tanking system beneath the tiled finish.
What Is the Main Difference Between Stick on Tiles and Traditional Tiles?
The main difference concerns the fixing system. Stick on tiles contain an integrated pressure-sensitive adhesive, whereas traditional tiles require separately selected adhesive matched to the tile material, substrate, room conditions and installation area.
The fixing system affects installation time, surface preparation, weight, water resistance, heat tolerance, repair and removal. Stick on tiles create a thin covering and require immediate alignment. Traditional tiles create a thicker assembly and allow limited adjustment while the adhesive remains workable.
| Comparison factor | Stick on tiles | Traditional tiles |
| Fixing method | Factory-applied adhesive backing | Separate tile adhesive |
| Installation speed | Usually faster | Usually slower |
| Surface requirement | Clean, dry, smooth and stable | Sound, level, stable and correctly prepared |
| Grout requirement | Product-dependent | Usually required |
| Water performance | Product-dependent | Strong with a correctly specified system |
| Heat resistance | Often limited | Generally stronger |
| Expected use | Temporary to medium-term updates | Medium- to long-term installations |
| Repair | Faster removal in many cases | More labour but precise local replacement |
| Initial cost | Usually lower | Usually higher |
| Material range | Mainly printed lightweight finishes | Ceramic, porcelain, stone, glass and cement |
No fixing method compensates for a weak or damp surface. Loose plaster, flaking paint, unstable floorboards and active cracks require repair before either covering is installed.
How Do Stick on Tiles Work?
Stick on tiles use pressure-sensitive adhesive to form a bond after contact with the installation surface. Bond strength depends on surface cleanliness, porosity, flatness, temperature, moisture exposure and pressure applied during fitting.
What Controls the Adhesive Bond?
Surface cleanliness, porosity, flatness, temperature, moisture and installation pressure control the strength of a Stick on tile bond. A failure in one condition can weaken the complete covering.
Six conditions control Stick on tile adhesion:
- Surface cleanliness
- Surface porosity
- Surface flatness
- Room and product temperature
- Moisture exposure
- Pressure applied during fitting
The release sheet protects the adhesive during transport. Removing the sheet exposes a tacky layer designed to bond under firm pressure. A hand roller or manufacturer-approved floor roller improves contact and removes trapped air.
Dust, grease, soap residue and loose paint interrupt the adhesive bond. Textured surfaces reduce the available contact area. Deep grout lines can show through thin vinyl products. Damp substrates can weaken adhesive and trap moisture below the covering.
Temperature also affects performance. Cold products become less flexible, while excessive heat can soften some adhesives. Acclimatisation and fitting-temperature instructions deserve close attention. A product intended for a dry bedroom wall does not automatically suit a steamy bathroom or sunlit conservatory.
How Are Traditional Tiles Installed?
Traditional tiles are fixed with a separate adhesive spread across a prepared substrate. Correct installation requires substrate assessment, levelling, priming, adhesive selection, tile positioning, joint spacing, curing, grouting and perimeter sealing.
What Installation Stages Do Traditional Tiles Require?
Traditional tiles require assessment, repair, levelling, priming, setting out, adhesive application, tile bedding, curing, grouting and flexible sealing. Every stage contributes to the stability of the finished surface.
Traditional tile installation follows ten core stages:
- Assess the substrate and available load capacity.
- Repair cracks, movement and damaged areas.
- Level the wall or floor within the required tolerance.
- Prime or waterproof the prepared substrate.
- Plan the layout and establish level reference lines.
- Mix and spread the compatible adhesive.
- Bed, space and level the tiles.
- Allow the adhesive to cure.
- Fill regular joints with suitable grout.
- Seal perimeters and changes of plane with flexible sealant.
The substrate needs adequate strength for the combined weight of the tile, adhesive and grout. Uneven sections require levelling. Porous, dusty or smooth surfaces often need a compatible primer.
A planned setting-out line prevents narrow cuts and uneven borders. The installer spreads adhesive with the specified notched trowel, works within the open time and beds each tile with full support. Large format tiles often need adhesive on the substrate and the back of the tile to achieve the required coverage.
Spacers or a levelling system maintain joints and surface alignment. Adhesive must cure before grouting or foot traffic. Grout fills regular joints, while flexible sealant protects corners, perimeters and junctions around baths, shower trays and worktops.
Are Stick on Tiles Easier to Install Than Traditional Tiles?
Stick on tiles are generally easier to install because most products require no mixed adhesive, notched trowel or conventional grouting. Accurate measurement, cutting, alignment and surface preparation remain essential for a stable and visually consistent finish.
A small splashback or feature wall often suits a competent DIY installer. Simple tools and limited curing time shorten the project. Errors become difficult to correct after firm pressure activates the backing adhesive, so dry positioning remains valuable.
Traditional tiling demands more equipment and practical skill. Mixing adhesive, maintaining bed depth, forming level joints and cutting hard porcelain take time. Wet rooms, large-format tiles, natural stone and heated floors introduce further technical requirements.
Easy installation does not mean unrestricted installation. A failed self-adhesive covering can require complete removal, residue cleaning and surface repair. Careful preparation saves more time than a rushed fitting process.
Which Tools Are Needed for Stick on Tiles and Traditional Tiles?
Stick on tiles need fewer specialist tools, while traditional tile installation requires equipment for measuring, cutting, spreading adhesive, maintaining joints and checking alignment. Tool requirements change according to tile material and format.
Which Tools Are Needed for Stick on Tiles?
Stick on tile installation normally requires measuring, marking, cutting, levelling and rolling tools. Thicker composite products require a specialist saw or cutter.
Common Stick on tile tools include:
- Tape measure and pencil
- Straight edge and spirit level
- Utility knife and suitable cutting mat
- Pressure roller
- Jigsaw, fine-tooth saw or specialist cutter for thicker products
- Safety gloves
Which Tools Are Needed for Traditional Tiles?
Traditional tile installation requires specialist tools for cutting, mixing, adhesive spreading, spacing, levelling, grouting and cleaning. Hard materials and detailed cuts require additional powered equipment.
Common traditional tiling tools include:
- Manual or electric tile cutter
- Notched trowel
- Mixing bucket and paddle
- Tile spacers or levelling clips
- Spirit level or laser level
- Grout float and sponge
- Wet saw, diamond blade or angle grinder for specialist cuts
Eye protection, hearing protection and suitable respiratory protection become important during mechanical cutting. Electrical tools need safe use around water. Product and tool instructions take priority over generic fitting guidance.
Which Tiles Require More Surface Preparation?
Both tile types require sound surface preparation, although Stick on tiles are less capable of hiding minor defects. Thin, flexible coverings often reveal dents, joints, texture and unevenness beneath the finished surface.
Which Surface Checks Are Essential Before Installation?
A suitable installation surface must be sound, dry, clean, flat and compatible with the selected tile system. Surface defects require correction before any covering is fitted.
Every installation surface should be:
- Sound: No loose plaster, flaking paint, unstable boards or hollow existing tiles.
- Dry: No active damp, trapped moisture or incomplete plaster and screed drying.
- Clean: No dust, grease, soap, silicone, polish or cleaning residue.
- Flat: No high points, deep joints, ridges or depressions outside product tolerances.
- Compatible: Primer, adhesive, smoothing compound and tile must form an approved system.
Self-adhesive backing needs continuous surface contact. Filling deep grout joints, sanding high points and stabilising paint can prevent visible lines and lifted edges. Newly plastered walls need full drying and suitable preparation.
Traditional adhesive can accommodate only the variation permitted by the product and tile format. Adhesive should not serve as a general-purpose levelling compound. Walls and floors outside the permitted tolerance need a suitable filler, render, backer board or levelling compound.
Timber substrates require special attention because movement and deflection cause bond failure. A suitable overlay, backer board or decoupling solution may be necessary. Active damp, mould or structural movement requires correction before decorative work begins.
Can Stick on Tiles Be Installed Over Existing Tiles?
Some Stick on tiles can be installed over existing tiles when the original tiles remain firmly bonded, level, clean and dry. Deep grout joints, cracked tiles, loose sections and textured surfaces require correction before installation.
Existing tiles need thorough degreasing, particularly around cookers and kitchen worktops. Soap, limescale and silicone residue also reduce adhesion. Every original tile should remain secure because the new covering relies on the old installation.
Deep joints can telegraph through a thin covering or leave unsupported edges. A manufacturer-approved filler or smoothing layer creates a flatter base. Raised patterns and bevelled edges require similar treatment.
Added thickness affects sockets, trims, door clearances and worktop junctions. Covering cracked tiles only hides evidence of movement. The underlying cause remains active unless repaired.
Can Traditional Tiles Be Installed Over Existing Tiles?
Traditional tiles can be installed over existing tiles after bond strength, surface stability, weight limits and available floor height have been assessed. A suitable primer and compatible adhesive are normally required.
Every existing tile needs a strong bond. Hollow, cracked or loose tiles indicate a weak base and require removal or repair. The wall or floor structure must support both tile layers plus installation materials.
Floor height can obstruct doors, appliances and thresholds. Wall thickness can affect sockets, taps, trims and window reveals. Wet-area installations need confirmation that the underlying waterproofing remains sound.
A clean, correctly primed tile face creates the new bonding surface. Mechanical abrasion should only follow safe product guidance because dust and glaze fragments present hazards. Removal remains the better route where the first layer has widespread defects.

Which Tiles Cost Less to Buy?
Stick on tiles usually have a lower entry cost because the installation system reduces expenditure on separate adhesive, grout and specialist tools. Premium self-adhesive products can cost more per square metre than budget ceramic tiles.
Which Costs Should a Full Tile Budget Include?
A complete tile budget includes products, delivery, preparation, installation materials, trims, tools, waste, labour, repairs and future replacement. Tile price per square metre represents only one project cost.
A complete comparison should include:
- Tile price per square metre
- Delivery charges
- Surface preparation materials
- Primer or waterproofing
- Adhesive and grout
- Flexible sealant and trims
- Cutting and fitting tools
- Waste allowance
- Professional labour
- Future repairs and replacement
A Stick on project may still need filler, smoothing compound, primer, cutting tools and edge finishing. Tile price alone gives an incomplete comparison.
Material quality changes the result. Thick floor-rated vinyl, realistic embossing and durable wear layers increase the price of peel-and-stick products. Porcelain, handmade ceramic, glass and natural stone occupy different traditional price bands.
Buyers should compare total installed cost for the same area and intended lifespan. Current product prices and local labour quotations provide a more reliable calculation than a generic national estimate.
Which Tiles Provide Better Long-Term Value?
Traditional tiles usually provide stronger long-term value in permanent installations because ceramic, porcelain and stone surfaces resist wear, moisture, heat and fading for longer periods. Stick on tiles often provide better value for temporary or low-impact renovations.
Long-term value combines initial cost, service life, maintenance, repairs and replacement. A low-cost covering replaced several times can exceed the total cost of one durable installation. A costly permanent finish can represent poor value where a tenancy or planned redesign lasts only a short period.
Room conditions matter. A decorative bedroom wall creates little physical demand. A family hallway, shower enclosure or kitchen floor creates repeated abrasion, moisture and cleaning. The more demanding area normally rewards stronger materials and a robust fixing system.
Design longevity also affects value. Neutral or material-led finishes often survive changing trends better than a highly specific printed pattern. Keeping spare tiles improves future repair options.
How Long Do Stick on Tiles Last?
Stick on tile lifespan depends on product quality, substrate condition, moisture exposure, temperature changes and installation accuracy. Low-impact wall applications generally last longer than floors exposed to abrasion, cleaning and repeated foot traffic.
No single lifespan applies to every peel-and-stick product. Manufacturer warranties, intended-use statements and wear-layer specifications provide stronger evidence than a broad online estimate.
Edge lifting often provides the first sign of deterioration. Moisture, grease, heat and incomplete pressure can accelerate failure. Floor tiles also face grit, pets, chair castors, footwear and heavy furniture.
Routine inspection supports early repair. A lifted edge can collect dirt or water and weaken a larger area. Spare pieces stored flat and away from heat support closer colour and pattern matching.
How Long Do Traditional Tiles Last?
Traditional tiles often remain serviceable for decades when the substrate, adhesive, grout and movement joints are correctly specified. Tile failure commonly results from substrate movement, impact, water ingress or installation defects rather than surface wear alone.
Porcelain and glazed ceramic surfaces resist ordinary household wear. Natural stone can also provide a long service life but may need sealing and material-specific cleaning. Grout and silicone usually need attention before the tile surface reaches the end of service.
Cracks often reveal movement beneath the finish. Loose tiles can indicate inadequate coverage, contamination or unsuitable adhesive. Repairing the cause remains more important than replacing the visible damaged unit.
Batch variation makes later matching difficult. A sensible waste allowance and several retained spare tiles protect future repair quality.
Are Stick on Tiles Waterproof?
A waterproof surface claim does not make an entire Stick on tile installation waterproof. Water can enter through joints, edges, penetrations and damaged sections unless the product and underlying installation system are approved for continuous wet exposure.
Waterproof and water-resistant describe different performance levels. A surface may tolerate splashes while remaining unsuitable for shower spray, standing water or regular steam. The backing adhesive can also have different moisture resistance from the visible face.
Bath edges, basin junctions, corners and pipe penetrations create vulnerable points. Open seams allow water to reach the substrate. Trapped moisture can weaken the bond and support mould growth.
Product approval for a bathroom wall does not automatically include shower enclosures or wet-room floors. Buyers need location-specific confirmation from the manufacturer.

Are Traditional Tiles Waterproof?
Ceramic and porcelain tile surfaces resist water, but tiled assemblies rely on grout, sealant, adhesive and the underlying waterproofing system. Tiles and grout alone do not replace a suitable tanking membrane in defined wet areas.
Porcelain absorbs less water than ordinary ceramic, yet water can still pass through joints and junctions. Cement-based grout is not a substitute for waterproofing. Flexible sealant protects changes of plane but requires regular inspection.
Showers and wet rooms need a complete system designed to manage water before moisture reaches vulnerable boards, timber or adjoining rooms. Corners, pipe entries and drains require particular care.
Cracked grout, failed silicone and loose tiles deserve prompt investigation. Cosmetic repair without checking the underlying area can conceal continuing water ingress.
Which Tiles Are Better for Bathrooms?
Traditional porcelain or ceramic tiles are generally better for bathrooms because correctly specified systems withstand regular moisture, steam and cleaning. Stick on tiles suit selected low-splash surfaces when the manufacturer explicitly approves bathroom installation.
Which Bathroom Areas Suit Each Tile Type?
Traditional tiles suit direct-wet and high-wear bathroom areas, while approved Stick on tiles suit selected splashbacks and dry feature walls. Product approval must match the exact bathroom zone.
- Shower enclosures: Choose a complete traditional wet-area system unless a self-adhesive product has explicit approval for continuous spray.
- Bath surrounds: Traditional ceramic or porcelain tiles provide the stronger long-term option.
- Basin splashbacks: Both categories remain possible where product water-resistance guidance supports the use.
- Dry feature walls: Approved Stick on tiles provide a fast decorative update.
- Bathroom floors: Floor-rated porcelain or ceramic tiles provide stronger resistance to moisture and wear.
Traditional tiles provide the stronger choice for shower walls, bath surrounds and busy bathroom floors. A suitable waterproofing system, slip-conscious floor finish and compatible adhesive remain necessary.
Approved self-adhesive products can refresh a cloakroom or dry feature wall quickly. Seams, corners and exposed edges need close attention. General decorative stickers should stay outside wet zones unless technical instructions state otherwise.
Which Tiles Are Better for Kitchens?
Traditional tiles provide stronger heat, moisture and stain resistance for permanent kitchen surfaces. Stick on tiles provide a faster decorative update on smooth splashbacks located away from direct flames, high heat and persistent water exposure.
Which Kitchen Areas Suit Each Tile Type?
Traditional tiles suit kitchen floors, sink splashbacks and heat-exposed walls, while Stick on tiles suit dry decorative areas with limited heat, water and impact exposure.
- Sink splashbacks: Glazed ceramic, porcelain or glass provides dependable water and cleaning resistance.
- Hob splashbacks: Heat-rated traditional tiles provide the safer default near cooking appliances.
- Decorative wall areas: Stick on tiles suit dry, low-impact sections with limited heat exposure.
- Kitchen floors: Floor-rated porcelain or ceramic tiles suit repeated traffic, spills and cleaning.
- Utility areas: Product selection should reflect moisture, appliances and concentrated loads.
Glazed ceramic, porcelain and glass offer easy-clean surfaces for splashbacks. Heat suitability and appliance clearances remain essential near cooking equipment. Grout colour and surface texture influence cleaning effort.
Self-adhesive wall coverings suit low-risk decorative areas and short-term updates. Product temperature limits, fire performance and cleaning instructions need checking before installation near a hob.
Which Tiles Are Better for Floors?
Traditional floor-rated porcelain or ceramic tiles generally outperform Stick on tiles in busy rooms. Floor rated peel and stick tiles suit selected dry, low-impact interiors with smooth, stable and correctly prepared subfloors.
Where Do Traditional Floor Tiles Perform Best?
Traditional floor tiles perform best across busy, wet, heated or heavily loaded areas. Hallways, kitchens, bathrooms and utility rooms place sustained demands on the finished surface.
Traditional floor tiles provide the stronger starting choice for:
- Hallways and entrances
- Kitchens and utility rooms
- Bathrooms and cloakrooms
- Conservatories with compatible substrates
- Areas with heavy furniture or appliances
- Floors above compatible underfloor-heating systems
Hallways and kitchens experience grit, spills, heavy traffic and concentrated furniture loads. Porcelain offers strong wear resistance for such conditions. Slip resistance and underfloor-heating compatibility also influence selection.
Where Do Stick on Floor Tiles Perform Best?
Floor-rated Stick on tiles perform best across dry, smooth and moderate-use rooms. Low traffic and controlled temperatures reduce stress on the adhesive, seams and wear layer.
Floor-rated Stick on tiles suit selected:
- Bedrooms
- Dressing rooms
- Home offices without abrasive castor traffic
- Low-traffic hobby rooms
- Temporary decorative renovations
Rolling chairs, pets, direct sunlight and heavy appliances place extra stress on seams and wear layers.
Subfloor smoothness has a direct visual effect. Small ridges and joints can show through thin vinyl. Flexible flooring also needs a dry substrate and suitable moisture conditions.
Which Tiles Are Better for Walls?
Stick on tiles work well for quick decorative wall updates, while traditional tiles perform better on walls exposed to heat, impact, steam or frequent water. Product weight and substrate capacity require assessment for every traditional wall installation.
Feature walls, alcoves and low-contact decorative areas give peel-and-stick tiles favourable conditions. Lightweight construction reduces wall loading and simplifies cutting around some fittings.
Traditional tiles suit kitchen splashbacks, bathroom walls, utility areas and other surfaces requiring regular cleaning. Natural stone, thick porcelain and large formats need careful weight assessment.
Plaster, plasterboard, tile backer board and existing tile each have different loading and preparation requirements. A sound finish starts with the correct substrate rather than the visible design.
Can Stick on Tiles Be Used in Showers or Wet Rooms?
Most decorative Stick on tiles are unsuitable for shower interiors and wet-room floors unless the manufacturer explicitly approves continuous wet exposure. Open seams and vulnerable edges create routes for water to reach the adhesive and substrate.
Wet rooms combine direct spray, standing water, drainage falls and frequent cleaning. Floor surfaces also need tested slip resistance. A decorative water-resistant face does not satisfy every requirement.
Shower products need compatible joints, corners, penetrations and waterproofing. Any self-adhesive system marketed for such use should provide explicit installation instructions covering every junction.
An approved peel-and-stick product can still depend on a prepared waterproof substrate. Manufacturer approval and warranty terms should name the exact location rather than using a broad “bathroom suitable” claim.
Can Stick on Tiles Be Used Behind a Hob?
Stick on tiles should only be installed behind a hob when the product carries a suitable heat-resistance rating and the planned position meets the appliance manufacturer’s clearance requirements. Decorative vinyl products can soften, deform or discolour under excessive heat.
Gas flames create different risks from induction cooking. Pan size, burner position and wall clearance influence local temperature. Grease and steam also challenge the printed face, seams and adhesive.
No generic distance guarantees suitability for every appliance and covering. The hob instructions and tile technical data need agreement. A glass, ceramic, porcelain or purpose-made splashback provides a safer default where heat data remains unclear.
Can Stick on Tiles Be Used With Underfloor Heating?
Underfloor-heating compatibility depends on the Stick on tile, adhesive backing, subfloor and operating-temperature limit. Traditional porcelain and ceramic tiles generally transfer heat effectively when installed with compatible flexible adhesive and grout.
Repeated heating and cooling create movement. An unsuitable pressure-sensitive adhesive can soften, creep or lose strength. Floor temperature limits require precise control.
Traditional tile systems also need correct specification. Heated screeds must complete the required drying and commissioning cycle. Flexible materials and movement provision help accommodate thermal change.
Both electric and water-based heating systems need product-specific approval. Heating controls should remain within the limits stated by the floor-covering manufacturer.
Which Tiles Offer Better Slip Resistance?
Slip resistance depends on the tested surface classification rather than the fixing method. Floor tiles require a rating suitable for expected contaminants, footwear, room use and moisture exposure. Wall products should never be assumed suitable for floors.
Smooth surfaces can become slippery when wet or greasy. Heavy texture can improve grip but increase cleaning effort. Bathrooms, entrances and commercial areas need different performance considerations.
Generic descriptions such as “anti-slip” provide limited information without a recognised test result and intended-use statement. Buyers should compare manufacturer data for the actual product, not a visually similar range.
Cleaning residue also affects traction. Correct dilution, rinsing and maintenance preserve the designed surface performance.
Which Tiles Are Easier to Clean?
Both tile types support routine cleaning, although smooth porcelain and glazed ceramic surfaces generally tolerate stronger cleaning regimes. Stick on tiles require gentler methods to protect printed surfaces, seams and adhesive-backed edges.
Warm water and a pH-appropriate cleaner suit many surfaces. Abrasive pads can scratch vinyl, gloss glaze and polished stone. Solvents can damage printed films or adhesive. Acidic cleaners can attack limestone, marble and cement-based grout.
Steam cleaners introduce heat and moisture around seams. Self-adhesive product instructions should confirm steam compatibility before use. Traditional tiled areas also need sound grout and sealant before steam cleaning.
Texture, grout-joint width and surface finish often influence cleaning time more than the fixing method. Smooth, low-porosity finishes generally release dirt more easily.
Which Tiles Require More Maintenance?
Stick on tiles require regular edge and seam checks, while traditional tiles require periodic inspection of grout, sealant and natural stone treatments. Maintenance frequency depends on room conditions, traffic and installation quality.
Which Maintenance Tasks Apply to Stick on Tiles?
Stick on tile maintenance focuses on seam inspection, gentle cleaning, edge protection and prompt replacement of damaged pieces. Early action prevents dirt and moisture from spreading beneath the covering.
- Inspect edges and seams for lifting.
- Remove dirt before particles travel beneath exposed edges.
- Use cleaners approved for the printed or vinyl surface.
- Replace pieces with damaged wear layers.
- Check wet or warm areas for bond deterioration.
Lifted self-adhesive edges need early attention because dirt and water can travel beneath the covering. Damaged wear layers can expose the printed design. Replacement often provides a cleaner result than a visible patch.
Which Maintenance Tasks Apply to Traditional Tiles?
Traditional tile maintenance focuses on grout, flexible sealant, specialist surface care and early investigation of cracks or movement. Natural stone requires additional sealing where specified.
- Clean grout with a surface-compatible product.
- Inspect flexible sealant around corners and sanitaryware.
- Replace cracked or failed joints promptly.
- Reseal natural stone where product guidance requires treatment.
- Investigate loose tiles, recurring cracks or persistent staining.
Cracked grout or silicone can indicate normal ageing, movement or water-related failure.
A maintenance plan should follow the manufacturer’s cleaning and care guidance. Unapproved chemicals can shorten surface life and invalidate warranties.

Which Tiles Are Easier to Remove?
Stick on tiles are generally easier to remove, but adhesive residue and surface damage remain possible. Traditional tiles require mechanical removal and usually create more dust, noise, waste and substrate repair work.
Removal results depend on the base. Painted plasterboard can lose paint or paper. Old vinyl can leave persistent adhesive. Existing ceramic tiles often tolerate careful sticker removal more successfully than weak painted walls.
Traditional tile removal can damage plaster, backer board, screed or waterproofing. Hard materials and sharp fragments require suitable protective equipment and controlled disposal.
Temporary renovation plans should include restoration time and cost. “Peelable” does not guarantee a mark-free surface after years of heat, sunlight and cleaning.
Are Stick on Tiles Suitable for Rental Properties?
Stick on tiles suit temporary rental-property updates when the tenancy agreement permits alterations and the underlying surface can withstand removal. Adhesive residue, paint damage and disputed reinstatement costs remain important risks.
Written landlord approval protects both parties. The approval should identify the room, surface and expected condition at the end of the tenancy. Photographs create a useful record before work begins.
Tile stickers placed over sound glazed tiles usually create a more reversible option than self-adhesive coverings placed over emulsion paint. A small hidden test area can reveal bond and removal behaviour, although long-term effects may differ.
Communal buildings and managed properties can impose fire-safety or alteration rules. Permission remains necessary before changing protected or shared areas.
Which Tiles Offer More Colours, Shapes and Finishes?
Traditional tiles offer the widest range of authentic materials, formats, textures and surface effects. Stick on tiles offer accessible printed imitations of marble, terrazzo, wood, stone, metro tiles and mosaics without the corresponding material weight.
Traditional ranges include glazed ceramic, through-body porcelain, encaustic effects, handmade surfaces, glass mosaics and genuine natural stone. Sizes range from small mosaics to large-format slabs.
Peel-and-stick collections concentrate design within lightweight printed or moulded layers. Strong graphics and repeated motifs support fast decorative changes. Limited depth can make bevels, grout lines and stone texture appear less convincing at close range.
Samples help assess scale, sheen, texture and colour under the room’s natural and artificial light. Screen colours cannot reproduce every finish accurately.
Which Tiles Are Better for Uneven Walls or Floors?
Neither tile type should be installed directly over unstable or severely uneven surfaces. Thin Stick on tiles reveal underlying defects, while rigid traditional tiles risk cracking, lipping or incomplete adhesive coverage on poorly prepared substrates.
A skim coat, smoothing compound or levelling compound can create the required surface, subject to product compatibility. High points need correction as carefully as low points.
Cracks require diagnosis before filling. Active structural movement can return through either finish. Flexible timber floors need adequate stiffness and a suitable tiling build-up.
Large-format traditional tiles demand particularly accurate flatness. Thin self-adhesive coverings demand a visually smooth base because every ridge can telegraph through the face.
Which Tiles Provide Better Fire and Heat Performance?
Traditional ceramic and porcelain tiles generally provide stronger resistance to flame and high temperatures than vinyl or PVC Stick on tiles. Complete fire performance also depends on adhesive, backing, substrate and installation location.
Fireplace surrounds, stove areas and hob splashbacks need location-specific products. A non-combustible tile face does not automatically make every backing board, adhesive or wall construction suitable.
Self-adhesive polymer products can soften, discolour or burn when exposed beyond stated limits. Fire classification and maximum service temperature should come from technical documentation.
Appliance instructions, building requirements and installer advice take priority around heat sources. Unclear performance data supports choosing a purpose-made heat-resistant system.
What Problems Commonly Affect Stick on Tiles?
Common Stick on tile problems include lifting edges, visible seams, trapped air, pattern misalignment, surface telegraphing, moisture-related bond loss, heat deformation and adhesive residue after removal.
Lifting, sliding, bubbles, visible substrate defects, pattern misalignment and fading represent the most common Stick on tile failures. Preparation and location suitability prevent many defects.
- Lifting edges: Incomplete pressure, contamination or moisture weakens the perimeter bond.
- Sliding tiles: Excessive heat or an incompatible surface allows movement.
- Air bubbles: Rushed placement or poor rolling traps air beneath the face.
- Visible defects: Thin coverings reproduce deep joints, cracks and surface bumps.
- Pattern misalignment: Inaccurate setting out disrupts repeated geometric designs.
- Fading: Strong sunlight changes exposed sections faster than protected sections.
Thin coverings reproduce deep joints, cracks and bumps below the face. Pattern misalignment becomes obvious across repeated geometric designs. Fading can occur under strong sunlight, particularly when nearby furniture protects part of the surface.
Prevention centres on surface preparation, acclimatisation, accurate setting out and product-location compatibility. A failed section needs removal if water, mould or substrate damage appears beneath the covering.
What Problems Commonly Affect Traditional Tiles?
Common traditional tile problems include cracked tiles, cracked grout, lipping, hollow areas, staining, efflorescence, loose tiles and failed perimeter sealant. Most failures relate to substrate movement, inadequate preparation or incorrect installation materials.
Cracks, loose tiles, uneven edges, salt deposits and failed sealant represent common traditional tile problems. Substrate movement and installation errors cause many failures.
- Cracked tiles: Substrate movement or impact breaks the rigid surface.
- Cracked grout: Movement, poor joint preparation or premature grouting damages the joints.
- Loose tiles: Contamination, weak adhesive transfer or unsuitable materials reduce bond strength.
- Lipping: Substrate variation, tile warpage or inconsistent bedding creates uneven edges.
- Efflorescence: Moisture transports soluble salts to the tile or grout surface.
- Failed silicone: Ageing or movement opens vulnerable wet-area junctions.
Lipping describes a height difference between adjacent edges. Poor substrate flatness, tile warpage or inconsistent bedding can cause the defect. Efflorescence appears when moisture carries soluble salts to a surface.
Failed silicone around baths and showers permits water entry. Prompt replacement protects the surrounding build-up, but recurring failure needs investigation of movement and installation detail.
How Should Stick on Tiles and Traditional Tiles Be Compared Before Purchase?
A reliable comparison should assess intended location, moisture, heat, traffic, substrate condition, installation skill, project duration, total cost, maintenance and removal requirements. Product appearance should follow technical suitability in the buying decision.
| Project condition | More suitable starting option |
| Temporary decorative update | Stick on tiles |
| Long-term bathroom renovation | Traditional tiles |
| Direct shower exposure | Approved traditional wet-area system |
| Low-budget rental refresh | Stick on tiles with written permission |
| Busy entrance floor | Floor-rated porcelain tiles |
| Quick dry feature wall | Stick on tiles |
| High-heat splashback | Heat-suitable traditional tiles |
| Uneven or damaged substrate | Repair before either option |
| Underfloor heating | Compatible traditional tiles generally preferred |
| Frequent future style changes | Stick on tiles |
The table provides a starting point rather than a substitute for technical data. Individual products can perform outside general category expectations when testing and installation guidance support the use.
How Can You Choose the Best Tiles for Your Room?
Choose the best tiles by checking room moisture, heat exposure, foot traffic, substrate condition, slip resistance, maintenance needs and expected service life. Confirm wall or floor suitability, installation requirements and manufacturer restrictions before comparing colour or pattern.
Which Seven Buying Points Matter Most?
Application, moisture, heat, substrate, slip performance, installation and maintenance form the seven most important buying checks. Technical suitability should narrow the range before colour and pattern influence selection.
- Intended application: Confirm wall or floor approval.
- Wet-area suitability: Match the product to splash, shower or wet-room exposure.
- Heat resistance: Check appliance clearances and service-temperature limits.
- Substrate compatibility: Confirm the required surface and preparation method.
- Slip performance: Review tested floor data for the intended conditions.
- Installation method: Compare skill, tools, curing time and disruption.
- Long-term maintenance: Consider cleaning, repair and replacement.
Eliminate unsuitable products before comparing visual options.
A sample helps evaluate colour, surface depth, texture and scale. Place the sample in the intended room during daylight and artificial light. Compare the sample beside worktops, sanitaryware, paint, cabinets and flooring.
Calculate the full area and add an allowance for cuts, breakage and future repairs. Complex patterns and irregular rooms need a larger allowance than a simple straight layout.
Are Stick on Tiles Better Than Non-Stick Tiles?
Stick on tiles are better for quick, affordable and temporary decorative projects. Traditional adhesive-fixed tiles are better for permanent surfaces requiring strong resistance to water, heat, impact, abrasion and repeated cleaning.
Renters and short-term renovators often benefit from lower commitment and faster fitting. Dry feature walls, cloakrooms and low-traffic rooms provide favourable locations for suitable self-adhesive products.
Homeowners planning a long-term bathroom, kitchen or entrance floor generally gain more from ceramic, porcelain or stone. A correctly installed traditional system provides authentic material depth and stronger technical performance.
“Better” therefore describes suitability for a defined project, not universal product superiority. Room demands and service expectations decide the result.
Can Stick on Tiles Go Directly Onto Painted Walls?
Stick on tiles can bond to firmly attached, smooth and fully cured paint. Flaking, chalky, textured or recently applied paint requires correction before fitting, and product instructions should confirm compatibility with the specific paint finish.
Clean the surface without leaving polish or soap residue. A discreet adhesion test can expose weak paint, although short testing does not reproduce years of ageing. Fresh paint needs the full curing time stated by the paint manufacturer.
Do Stick on Tiles Need Grout?
Many Stick on tiles do not require grout because printed or moulded joints form part of the design. Some self-adhesive products accept grout, although only manufacturer-approved grout and joint dimensions should be used.
Adding grout to an unsuitable flexible product can create cracks or edge stress. Printed grout lines need routine wiping but no cement-based joint filling.
Can Stick on Tiles Be Removed Without Damage?
Careful removal can reduce damage, but no universal damage-free result exists. Adhesive strength, installation duration, heat exposure, substrate condition and paint quality affect whether residue, torn paper or lifted paint remains.
Slow removal at a low angle often reduces stress. Manufacturer-approved warming can soften some adhesives. Painted plasterboard remains more vulnerable than glazed ceramic.
Can Stick on Tiles Be Fitted Over Wallpaper?
Stick on tiles should not usually be fitted over wallpaper because the final bond depends on the wallpaper adhesive and surface coating. Removal can pull wallpaper away from the wall and destabilise the tiled finish.
Textured, vinyl-coated and washable papers create additional adhesion uncertainty. Removing the paper and preparing the underlying wall provides a stronger base.
Are Peel and Stick Tiles the Same as Tile Stickers?
Peel-and-stick tiles are complete self-adhesive coverings, while tile stickers are thin decorative films applied over existing tile faces. Tile stickers normally provide less thickness, impact resistance and surface realism.
Both formats use a release backing and pressure-sensitive adhesive. Intended location, water resistance, heat tolerance and floor suitability still differ between individual products.
How Many Extra Tiles Should You Order?
The required waste allowance depends on room shape, tile format, laying pattern and cutting complexity. Straight layouts generally require less additional material than diagonal, herringbone or heavily patterned designs, while retained spares protect future repairs.
A common starting allowance ranges from approximately 10% for simple layouts to 15% or more for complex patterns, but a project-specific calculation provides greater accuracy. Batch availability also affects the value of ordering repair stock.
Which Stick on or Traditional Tiles Are Best for Your Project?
The best tiles match the room, substrate and expected lifespan before matching the preferred appearance. Sample comparison helps assess colour, texture, scale, thickness and compatibility under the room’s natural and artificial lighting.
Choose Stick on tiles for a quick, low-disruption transformation where moisture, heat and wear remain controlled. Choose traditional adhesive-fixed tiles for a durable finish across demanding walls and floors.
The final specification should combine a suitable tile, sound substrate and compatible installation materials. Strong performance begins below the visible surface, while a well-chosen finish completes the room.
