Slate tiles, although made of a hard natural stone, are susceptible to scratching. Whether it be from dropping objects on them to small amounts of dirt or grit stuck to the bottom of you shoe, the chances are a slate floor will obtain scratches at some point in its life time. However, with the honed and brushed variations it is much more visible due to their smooth finish.
Having tried several methods of sealing and scratch repair, I have found the following products and technique to be the most effective for this type of stone. I will outline the method to seal and repair both minor surface marks to much deeper scratches.
What you will need:
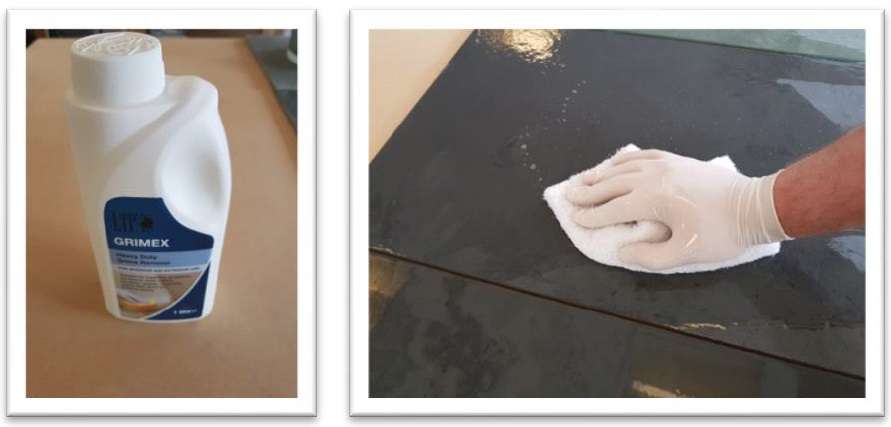
LTP Grimex
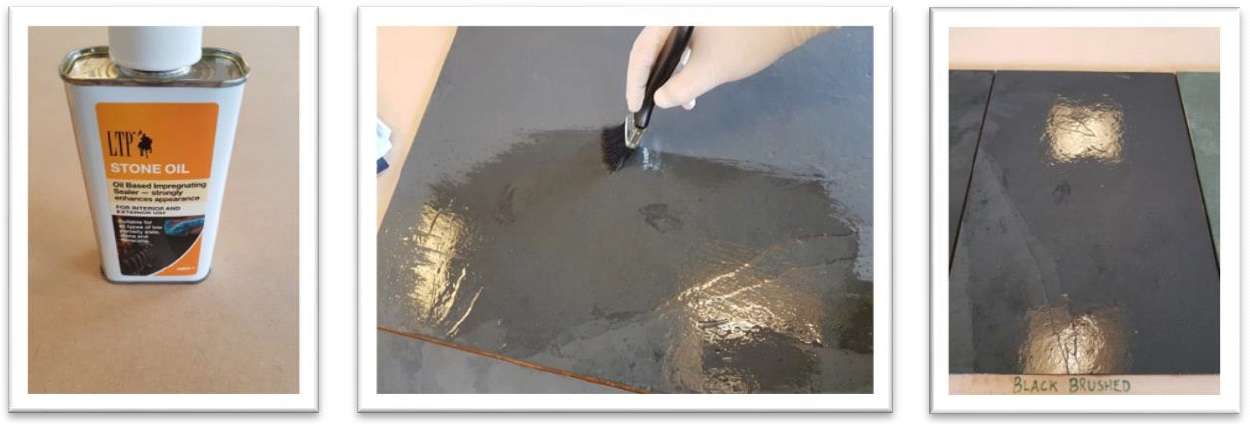
LTP Stone Oil
White Emulsifying Pad
Sponge
Microfibre Cloths
Paint Brush
200/240, 400, 600 grit Wet and Dry sand paper with a sanding pad or diamond polishing pads
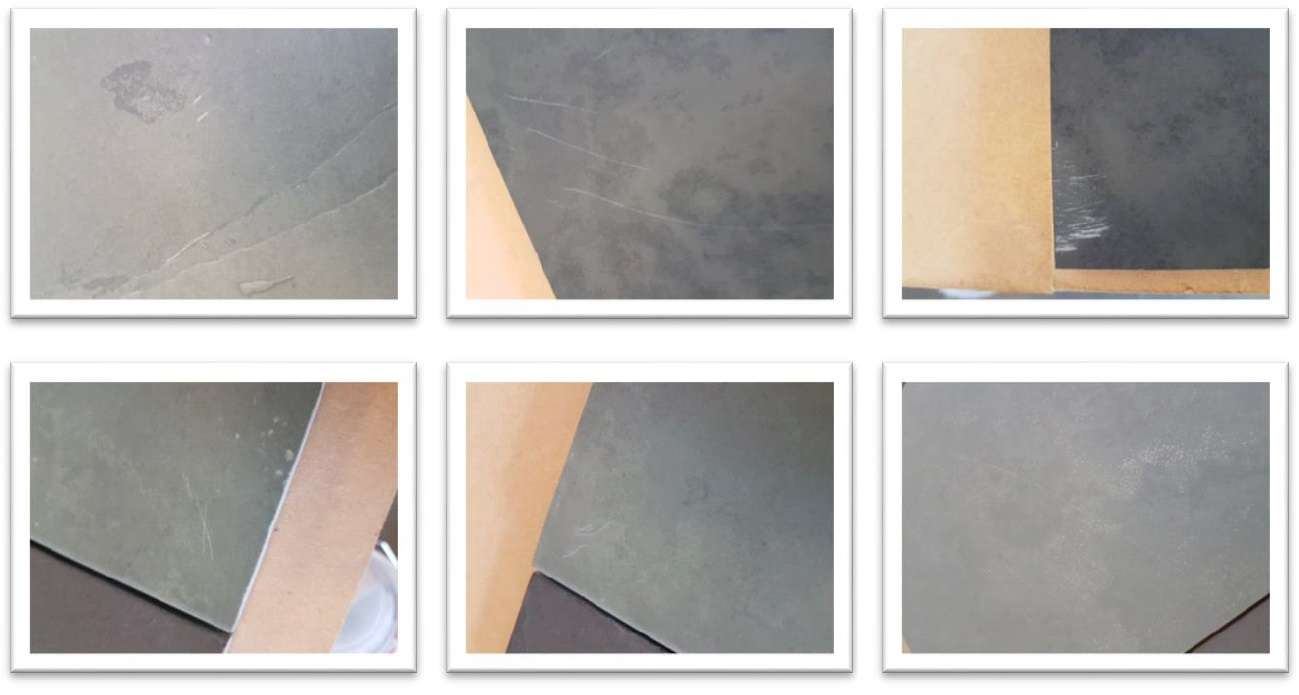
I have used 600×400 Honed Black and Green slate and the Black Brushed. The pieces were taken from the stock crates and they all contain some of the minor imperfections that are normal with these products, such as cutting and packing dust and slight transit/movement scratches (some additional scratches have been added for the purpose of this guide).
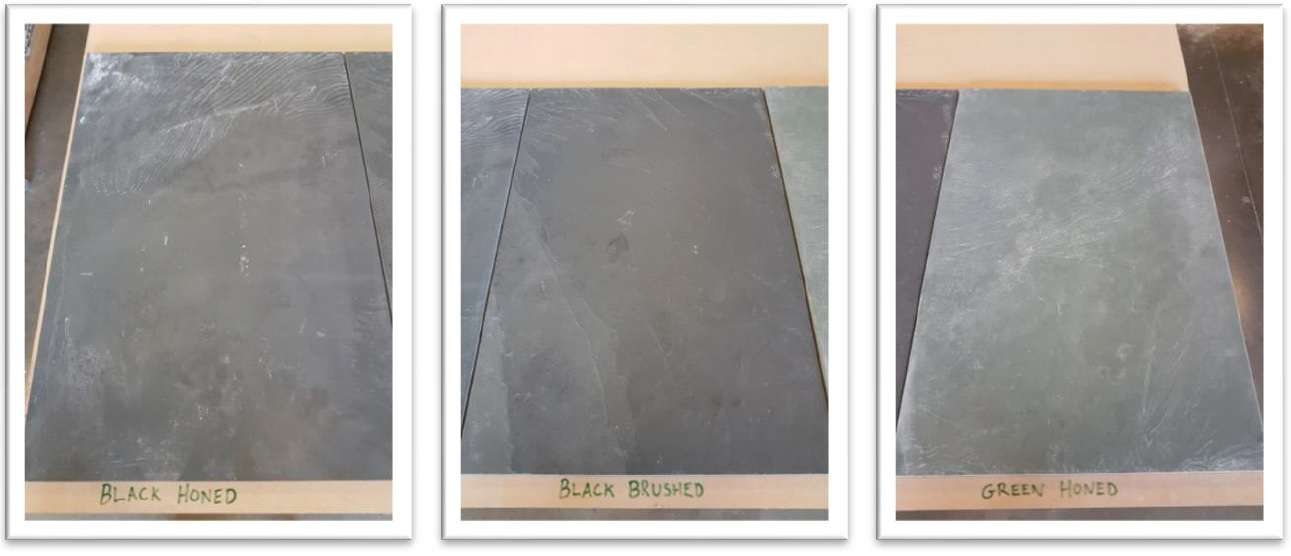
Table of Contents
Step 1: Initial Clean
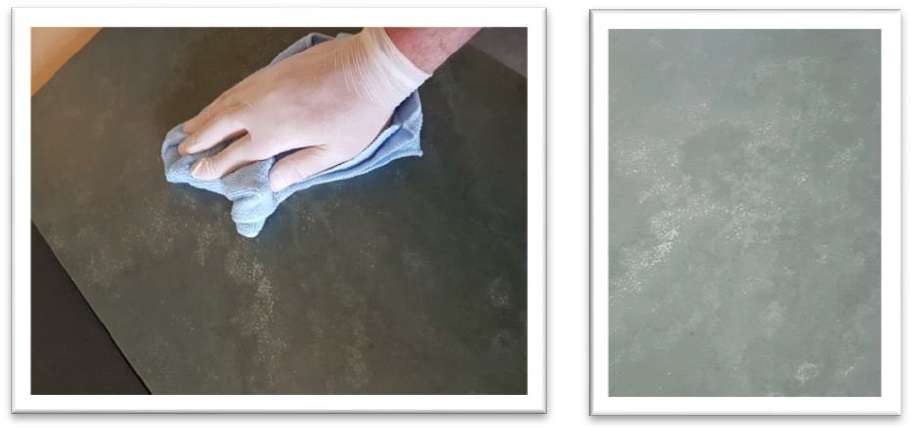
Either before or after fixing, the tiles must be intensively cleaned before any sealer can be applied. The dust you will find on the face of the tile is normally the residue from when the tile are cut and honed during the manufacturing process.
A: With a solution of the LTP Grimex (mixed at a ratio of 1:5 with warm water) and a White emulsifying pad, scrub the tiles to ensure all dirt is removed.
B: Using clean water, rinse and remove any excess moisture with a sponge.
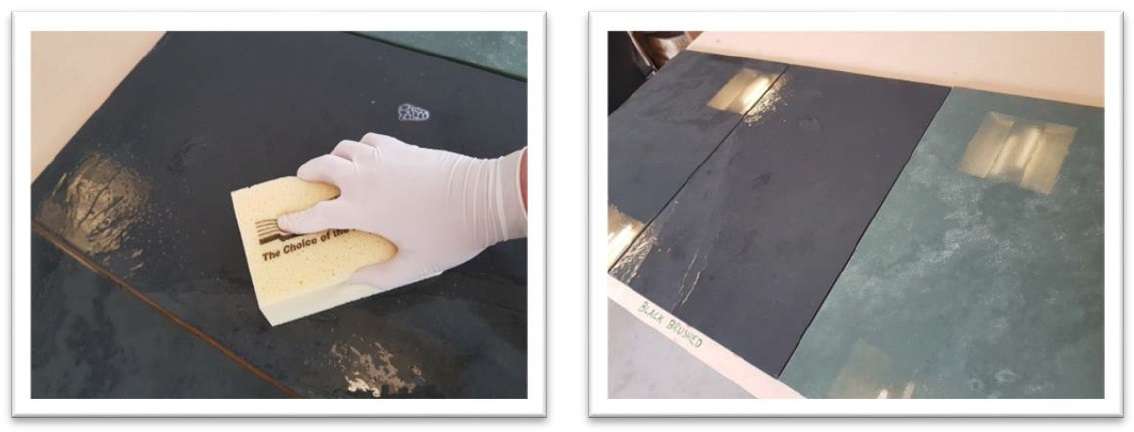
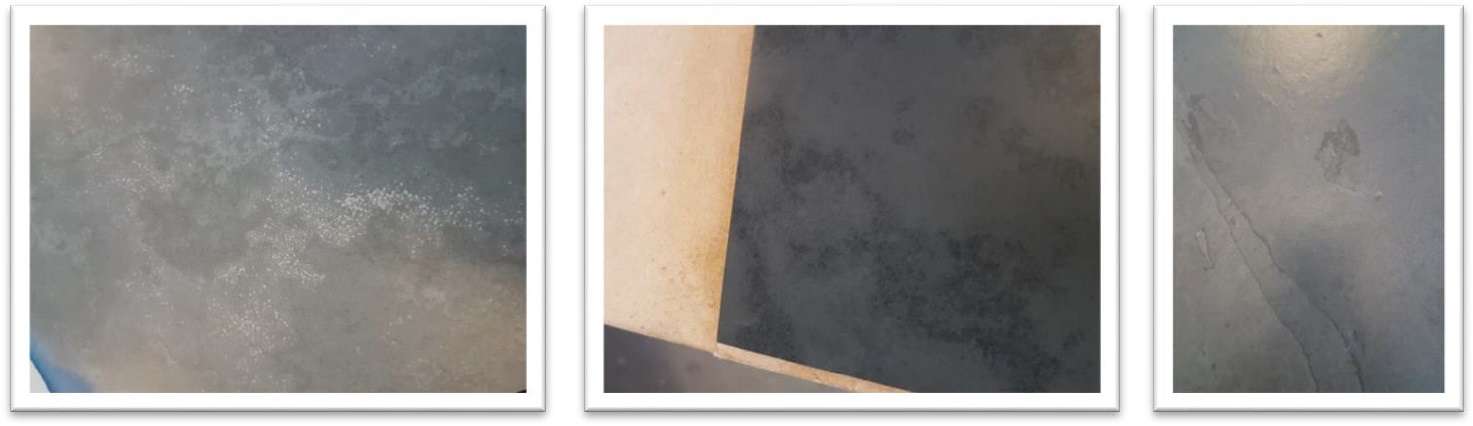
C: Leave to thoroughly dry for 24 hours. Once the tiles have dried, you will notice that transit scratching from the manufacturing dust rubbing against the tile will now be visible. But this is nothing to worry about as they will not be visible once the sealing is complete.
Step 2: Sealing
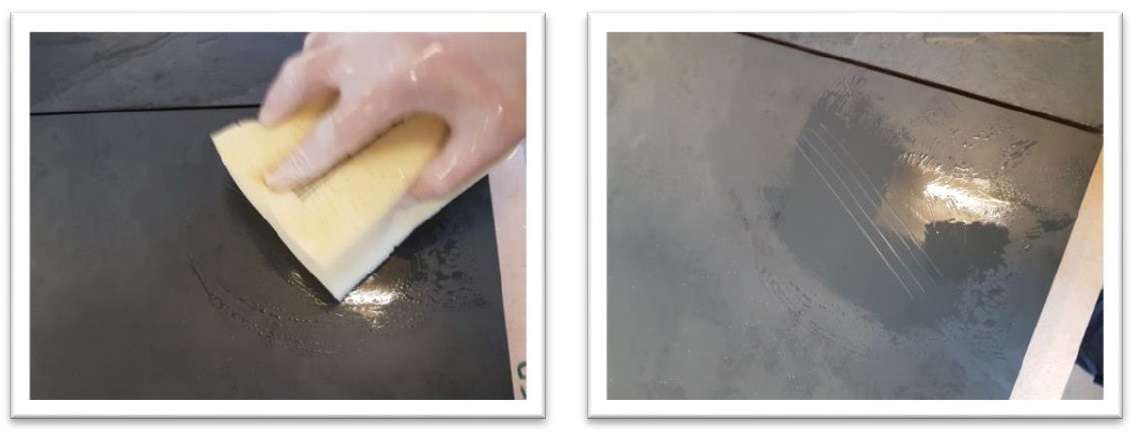
A: Apply the LTP Stone Oil liberally over the tiles using a paint brush. Once the tile is fully saturated, leave for 1 hour to impregnate the surface.
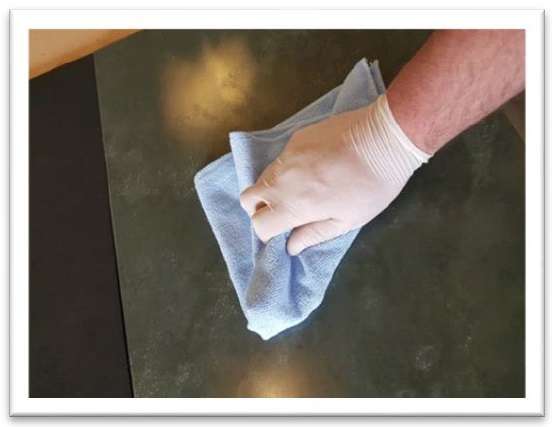
B: After an hour, remove any excess sealer that remains and buff with a microfiber cloth. Tiles should be left for a further 12 hours before applying the grout.
The benefits of using the stone oil as opposed to a normal synthetic are the:
– It significantly enriches the colour of the stone
– Once fully cured, increases the mechanical strength of the tile and its ability to resist minor scratches
– It blends in any surface marks to the point of being almost invisible
In the event that the tiles are scratched due to something being dropped on them of just general wear and tear, the marks can be blended back in by a further application of the Stone Oil on the affected area.
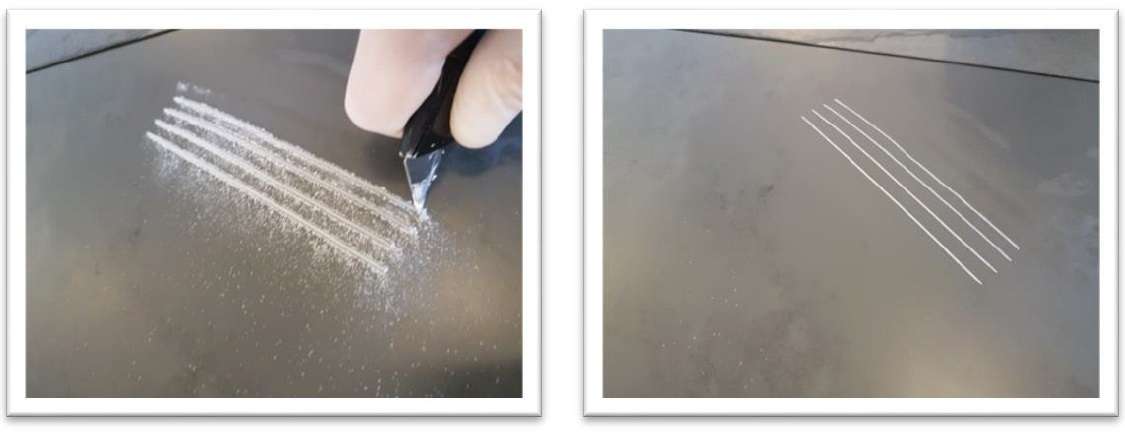
Step 3: Minor scratch removal.
A: Make sure the scratch is dust free (wipe with a slightly damp cloth)

B: Apply just enough of the LTP Stone oil to a dry cloth and gradually work into the affected area.
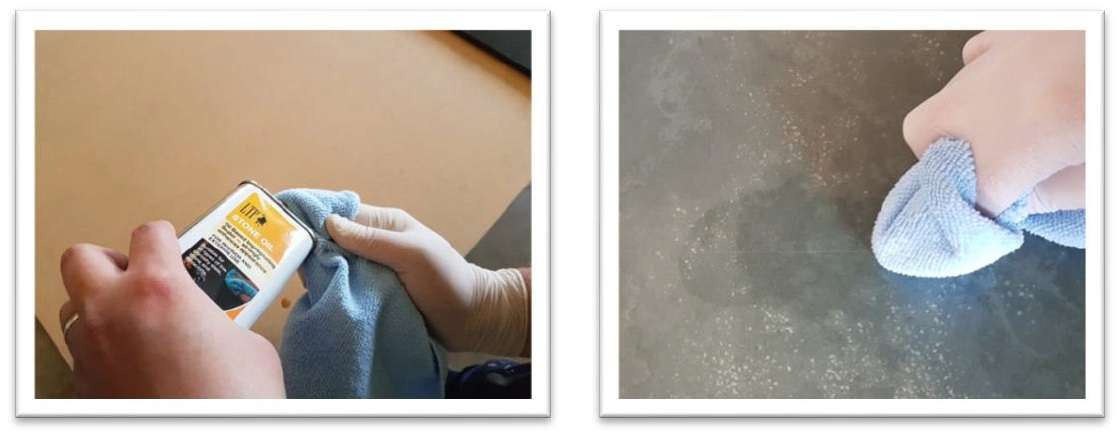
C: Leave for an hour to settle, buff with a clean microfiber cloth until dry. The surface scratch should no longer be visible.
Step 4: Deep Scratch Removal
Deeper scratches can still very noticeable, even after the stone oil has been applied and depending on the slate shade variations and lighting. Therefore we need to make it completely smooth to get the finish exactly the same of the remainder of the tile.
A: Wash the scratches with clean water and allow to dry.
B: Starting with the coarser grit paper (240, although lower can be used for deeper blemishes), sand the scratches and the surrounding area in a circular motion, until the scratch is no longer visible.

C: With the scratch removed, the affected area will need polishing to the same finish as the remainder of the tile. This can be done by going through the finer grit papers upto 600, until you can run your hand over the whole tile and feel no difference in texture. Once the required finish has been achieved, wash the tile with a sponge and clean water. Leave to sufficiently dry for 1 hour.
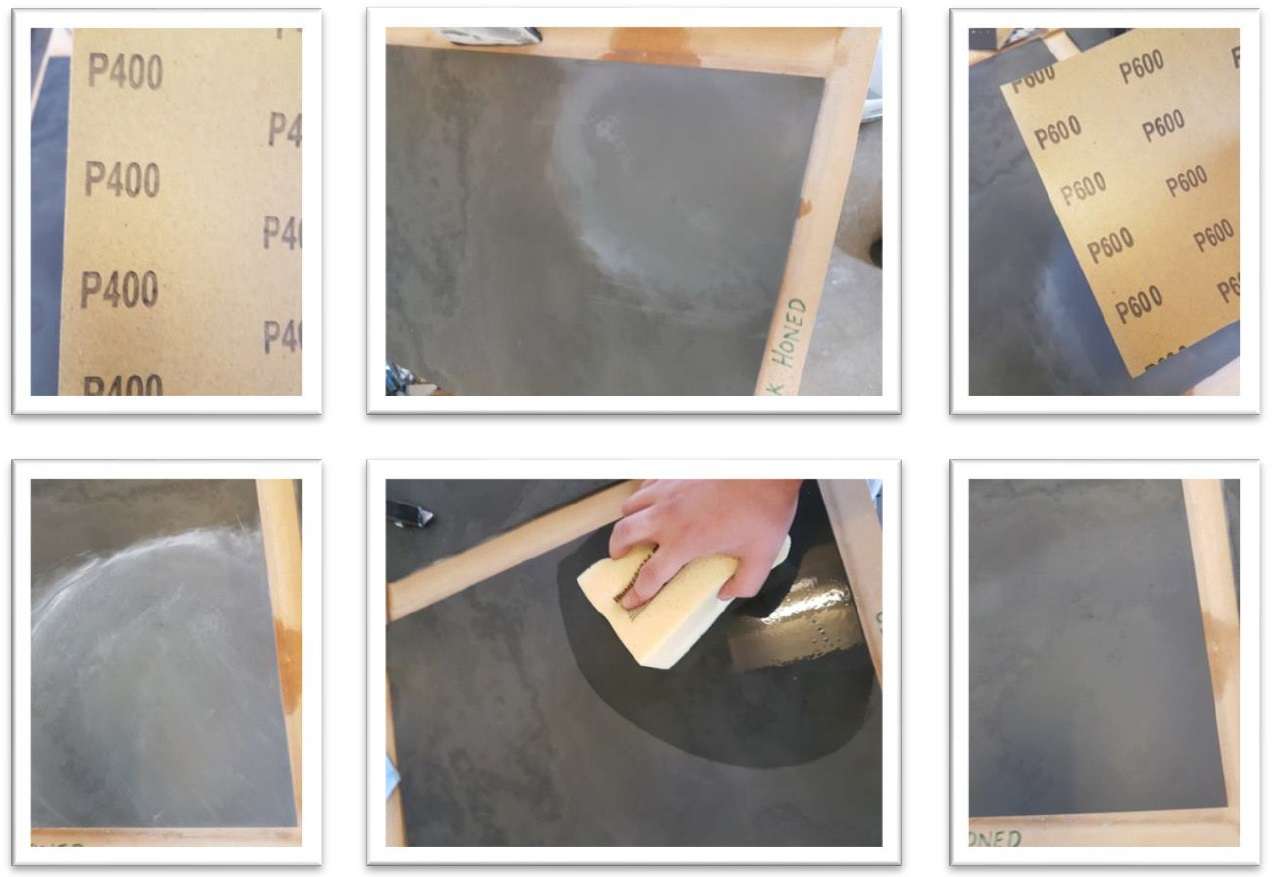
D: To finish, not only does the texture need to be uniform, but so does the colour, therefore we need to use the LTP Stone Oil that the tile was originally sealed with, to bring the affected area back to the correct colour. Apply just enough of the LTP Stone oil to a dry cloth and gradually work into the affected area and leave for 1 hour. Remove the excess and buff to a finish. There will be no sign of a scratch ever being present.

There you have it – a complete guide to sealing honed and brushed slate tiles, along with tips for removing scratches! If you found this guide useful, check out our Help Centre for more helpful tiling info.
RELATED: HOW TO WORK OUT HOW MANY TILES YOU NEED
RELATED: CAN I TILE DIRECTLY ONTO WOODEN FLOORBOARDS?
OFFER: CLICK HERE FOR OUR LATEST DISCOUNT CODES