
House cladding defines external wall protection, insulation performance, cost efficiency, and property value, with material choice, installation method, and maintenance determining lifespan between 20 and 100 years and total project cost ranging from £40 to £250+ per m² across UK residential applications.
House cladding functions as a protective outer system that reduces weather damage by 30–60%, improves thermal efficiency by lowering heat loss by 20–35%, and enhances façade durability through moisture resistance, UV stability, and structural shielding. These materials include uPVC, timber, shiplap, composite, fibre cement, metal, stone, and brick slip, each varying in cost, maintenance, and performance characteristics. It’s installation requires structured preparation, including surface assessment, ventilation gap planning, batten fixing, and membrane application to ensure long-term durability and moisture control.
House cladding cost structure includes material pricing, labour cost between £20 and £60 per m², insulation integration, and design complexity, with bulk purchasing and efficient installation reducing cost by 10–30%. House cladding selection depends on durability requirements, climate exposure, fire safety compliance, and aesthetic objectives, ensuring alignment with UK Building Regulations and long-term structural performance. The maintenance varies by material, with timber requiring treatment every 3–5 years and composite or uPVC requiring minimal upkeep, directly influencing lifecycle cost and durability.
Table of Contents
What Is House Cladding?
House cladding is an external wall covering system that protects building structures from weather exposure, improves thermal insulation, and enhances façade appearance through materials such as timber, composite, metal, stone, and uPVC installed over structural walls.
The definition and functions of house cladding are given below:
- Protect Structural Walls: It forms a barrier against rain, wind, and UV exposure, reducing external damage and extending building lifespan.
- Improve Thermal Insulation: It reduces heat transfer by adding an external insulating layer, improving indoor temperature stability and energy efficiency.
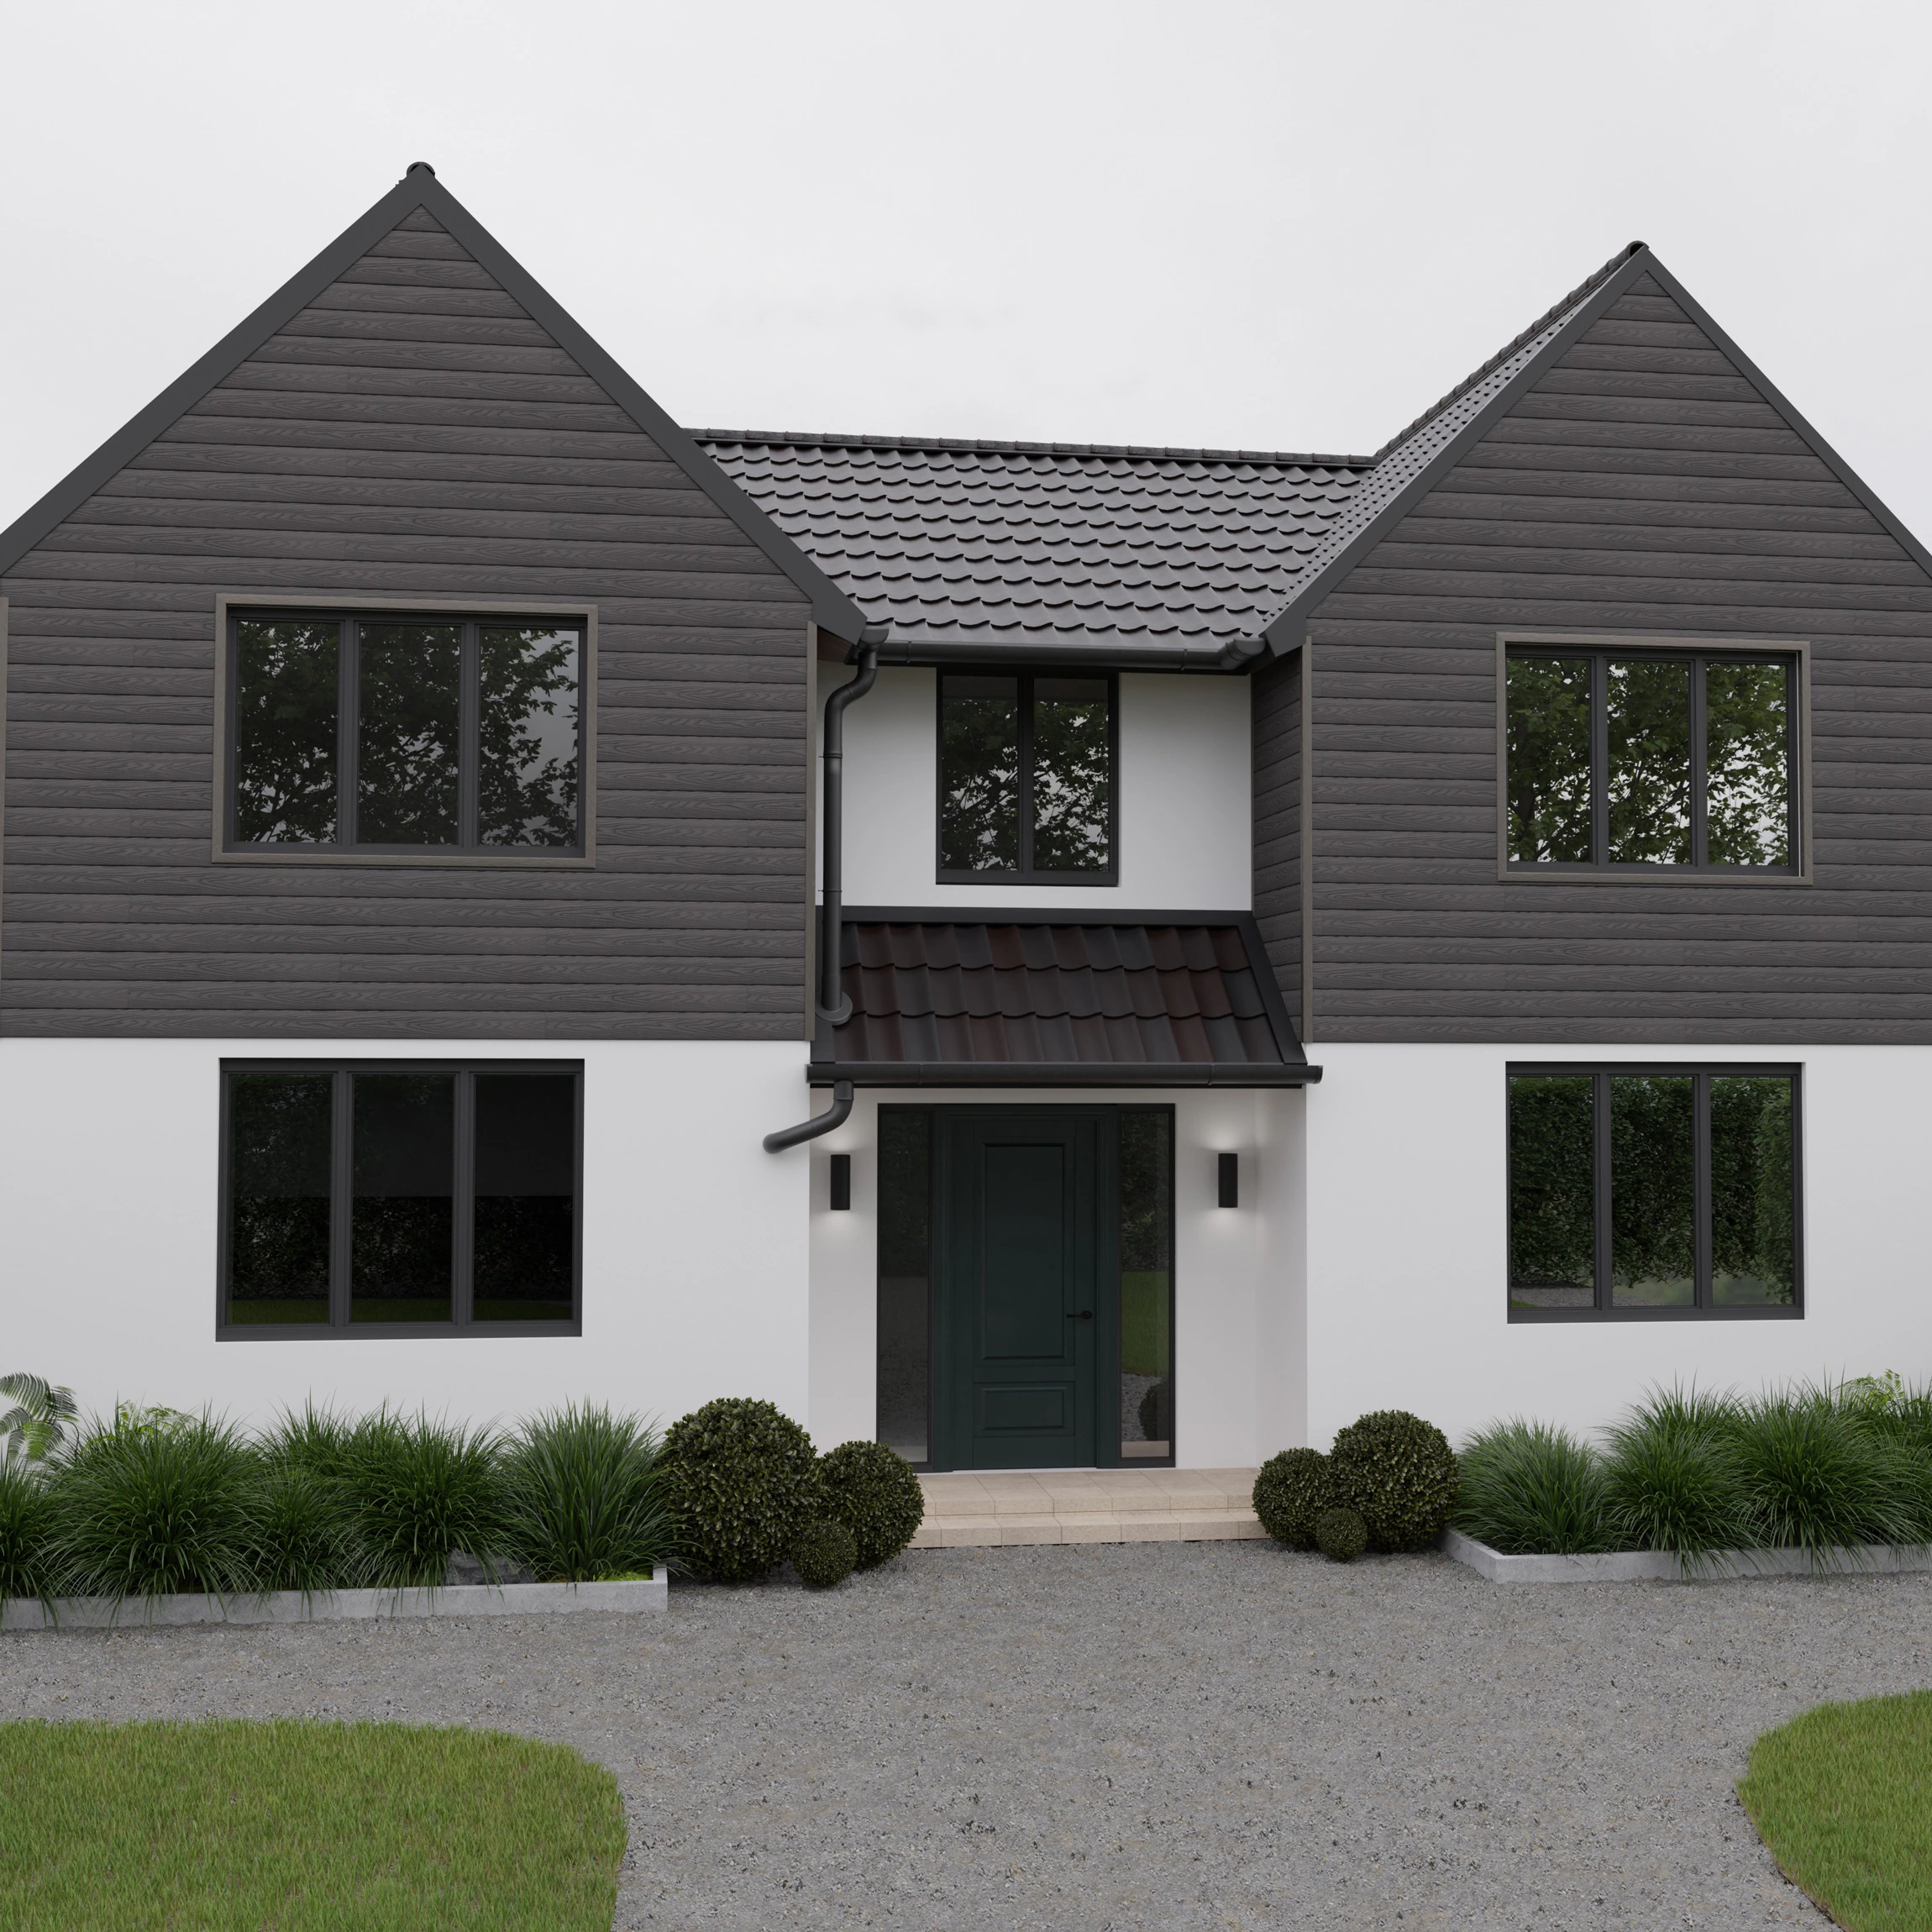
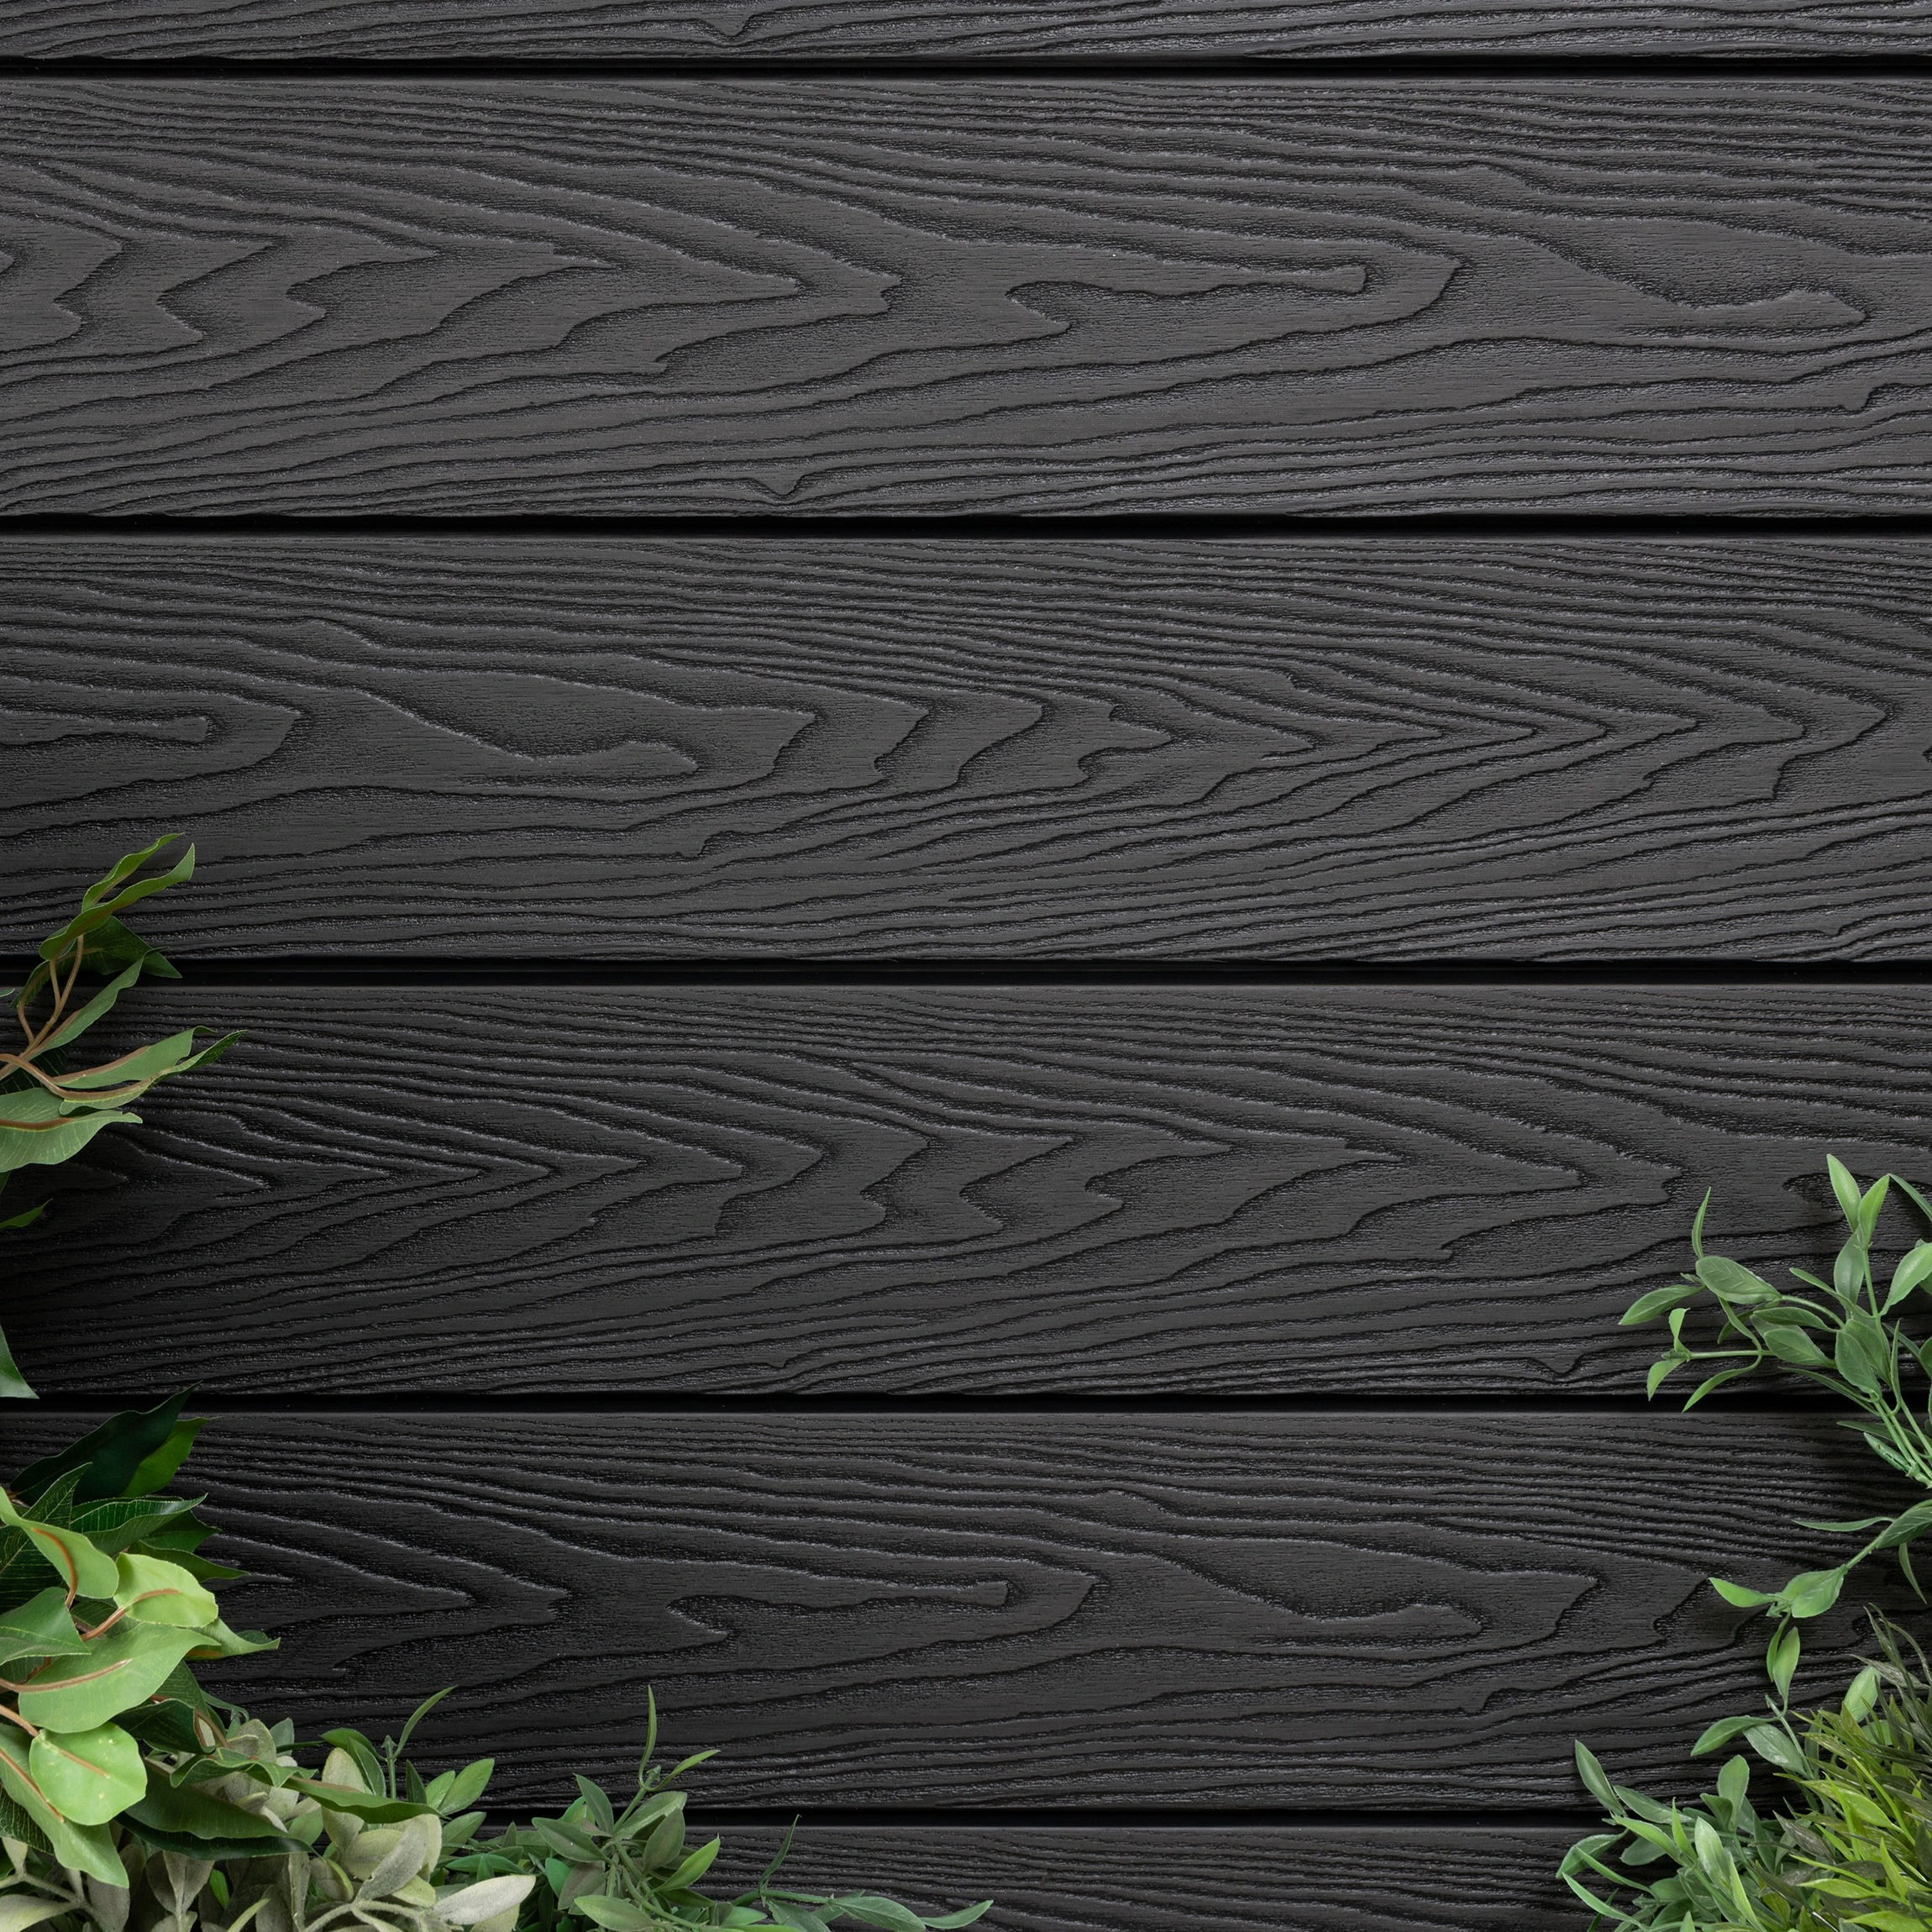
- Enhance Façade Appearance: It provides visual finishes such as woodgrain, stone-effect, or metallic surfaces, improving architectural design quality.
- Support Ventilated Systems: It enables ventilated façade structures that improve airflow and reduce moisture buildup behind panels.
- Reduce Maintenance Requirements: It protects underlying walls, lowering repainting, repair, and structural maintenance frequency by 20–40%.
- Increase Durability Performance: House cladding materials such as composite, metal, and stone increase resistance to impact, moisture, and environmental stress.
- Enable Material Versatility: It includes timber, uPVC, WPC, aluminium, fibre cement, and stone panels, allowing application across residential and commercial buildings.
What Purpose Does House Cladding Serve?
House cladding serves 5 primary purposes including structural protection, thermal insulation, moisture control, aesthetic enhancement, and durability improvement, with cladding systems reducing external damage by 30–60% and improving energy efficiency through reduced heat transfer.
The purposes of house cladding are given below:
- Protect External Walls: It shields structural walls from rain, wind, and UV exposure, reducing surface degradation and extending building lifespan.
- Improve Thermal Efficiency: It reduces heat gain and heat loss by adding an external barrier, improving indoor temperature stability and lowering energy consumption.
- Control Moisture Penetration: House cladding systems prevent water ingress and condensation buildup, reducing risk of mould, dampness, and structural damage.
- Enhance Visual Appearance: It improves façade design through finishes such as timber, stone, metal, and composite textures.
- Increase Structural Durability: House cladding materials such as fibre cement, composite, and metal increase resistance to impact, weathering, and long-term environmental stress.
- Reduce Maintenance Frequency: It lowers repainting and repair requirements by protecting underlying surfaces from exposure and wear.
- Support Ventilation Systems: It enables ventilated façade structures that improve airflow and reduce trapped moisture behind panels.
What Are the Main Benefits of Installing House Cladding?
House cladding delivers 6 core benefits including structural protection, thermal insulation, moisture resistance, aesthetic enhancement, durability improvement, and maintenance reduction, with cladding systems extending wall lifespan by 20–50% and improving energy efficiency through reduced heat transfer.
The main benefits of installing house cladding are given below:
- Increase Structural Protection: It protects external walls from rain, wind, and UV exposure, reducing surface damage and extending building lifespan.
- Improve Thermal Performance: It reduces heat gain and heat loss, improving indoor temperature stability and lowering energy usage by 10–30%.
- Enhance Moisture Resistance: It prevents water penetration and condensation buildup, reducing risk of dampness and mould formation.
- Upgrade Visual Appearance: It improves façade design with finishes such as timber, stone, metal, and composite textures.
- Increase Durability: House cladding materials such as fibre cement, metal, and WPC increase resistance to impact, weathering, and environmental stress.
- Reduce Maintenance Costs: House cladding lowers repainting and repair frequency by protecting underlying surfaces from exposure.
- Support Long-Term Value: House cladding increases property value by improving exterior quality, durability, and energy efficiency.
What Are the Different Types of House Cladding Available in the UK?
House cladding types in the UK include timber, uPVC, composite, fibre cement, metal, stone, brick slip, render systems, and shiplap cladding, each defined by material composition, durability, insulation performance, and maintenance requirements across residential and commercial applications.
Timber Cladding
Timber cladding uses natural wood boards such as cedar, larch, and oak to provide breathable, renewable, and aesthetic façade finishes with moderate durability and maintenance requirements. Timber cladding offers natural grain appearance and insulation benefits. Timber cladding requires treatment every 3–5 years to maintain durability. Timber cladding suits traditional and contemporary designs.
uPVC Cladding
uPVC cladding uses lightweight plastic panels that deliver low-cost, waterproof, and low-maintenance exterior wall protection with consistent colour stability. uPVC cladding resists moisture and rot. uPVC cladding requires minimal maintenance compared to timber. uPVC cladding suits budget-focused residential projects.
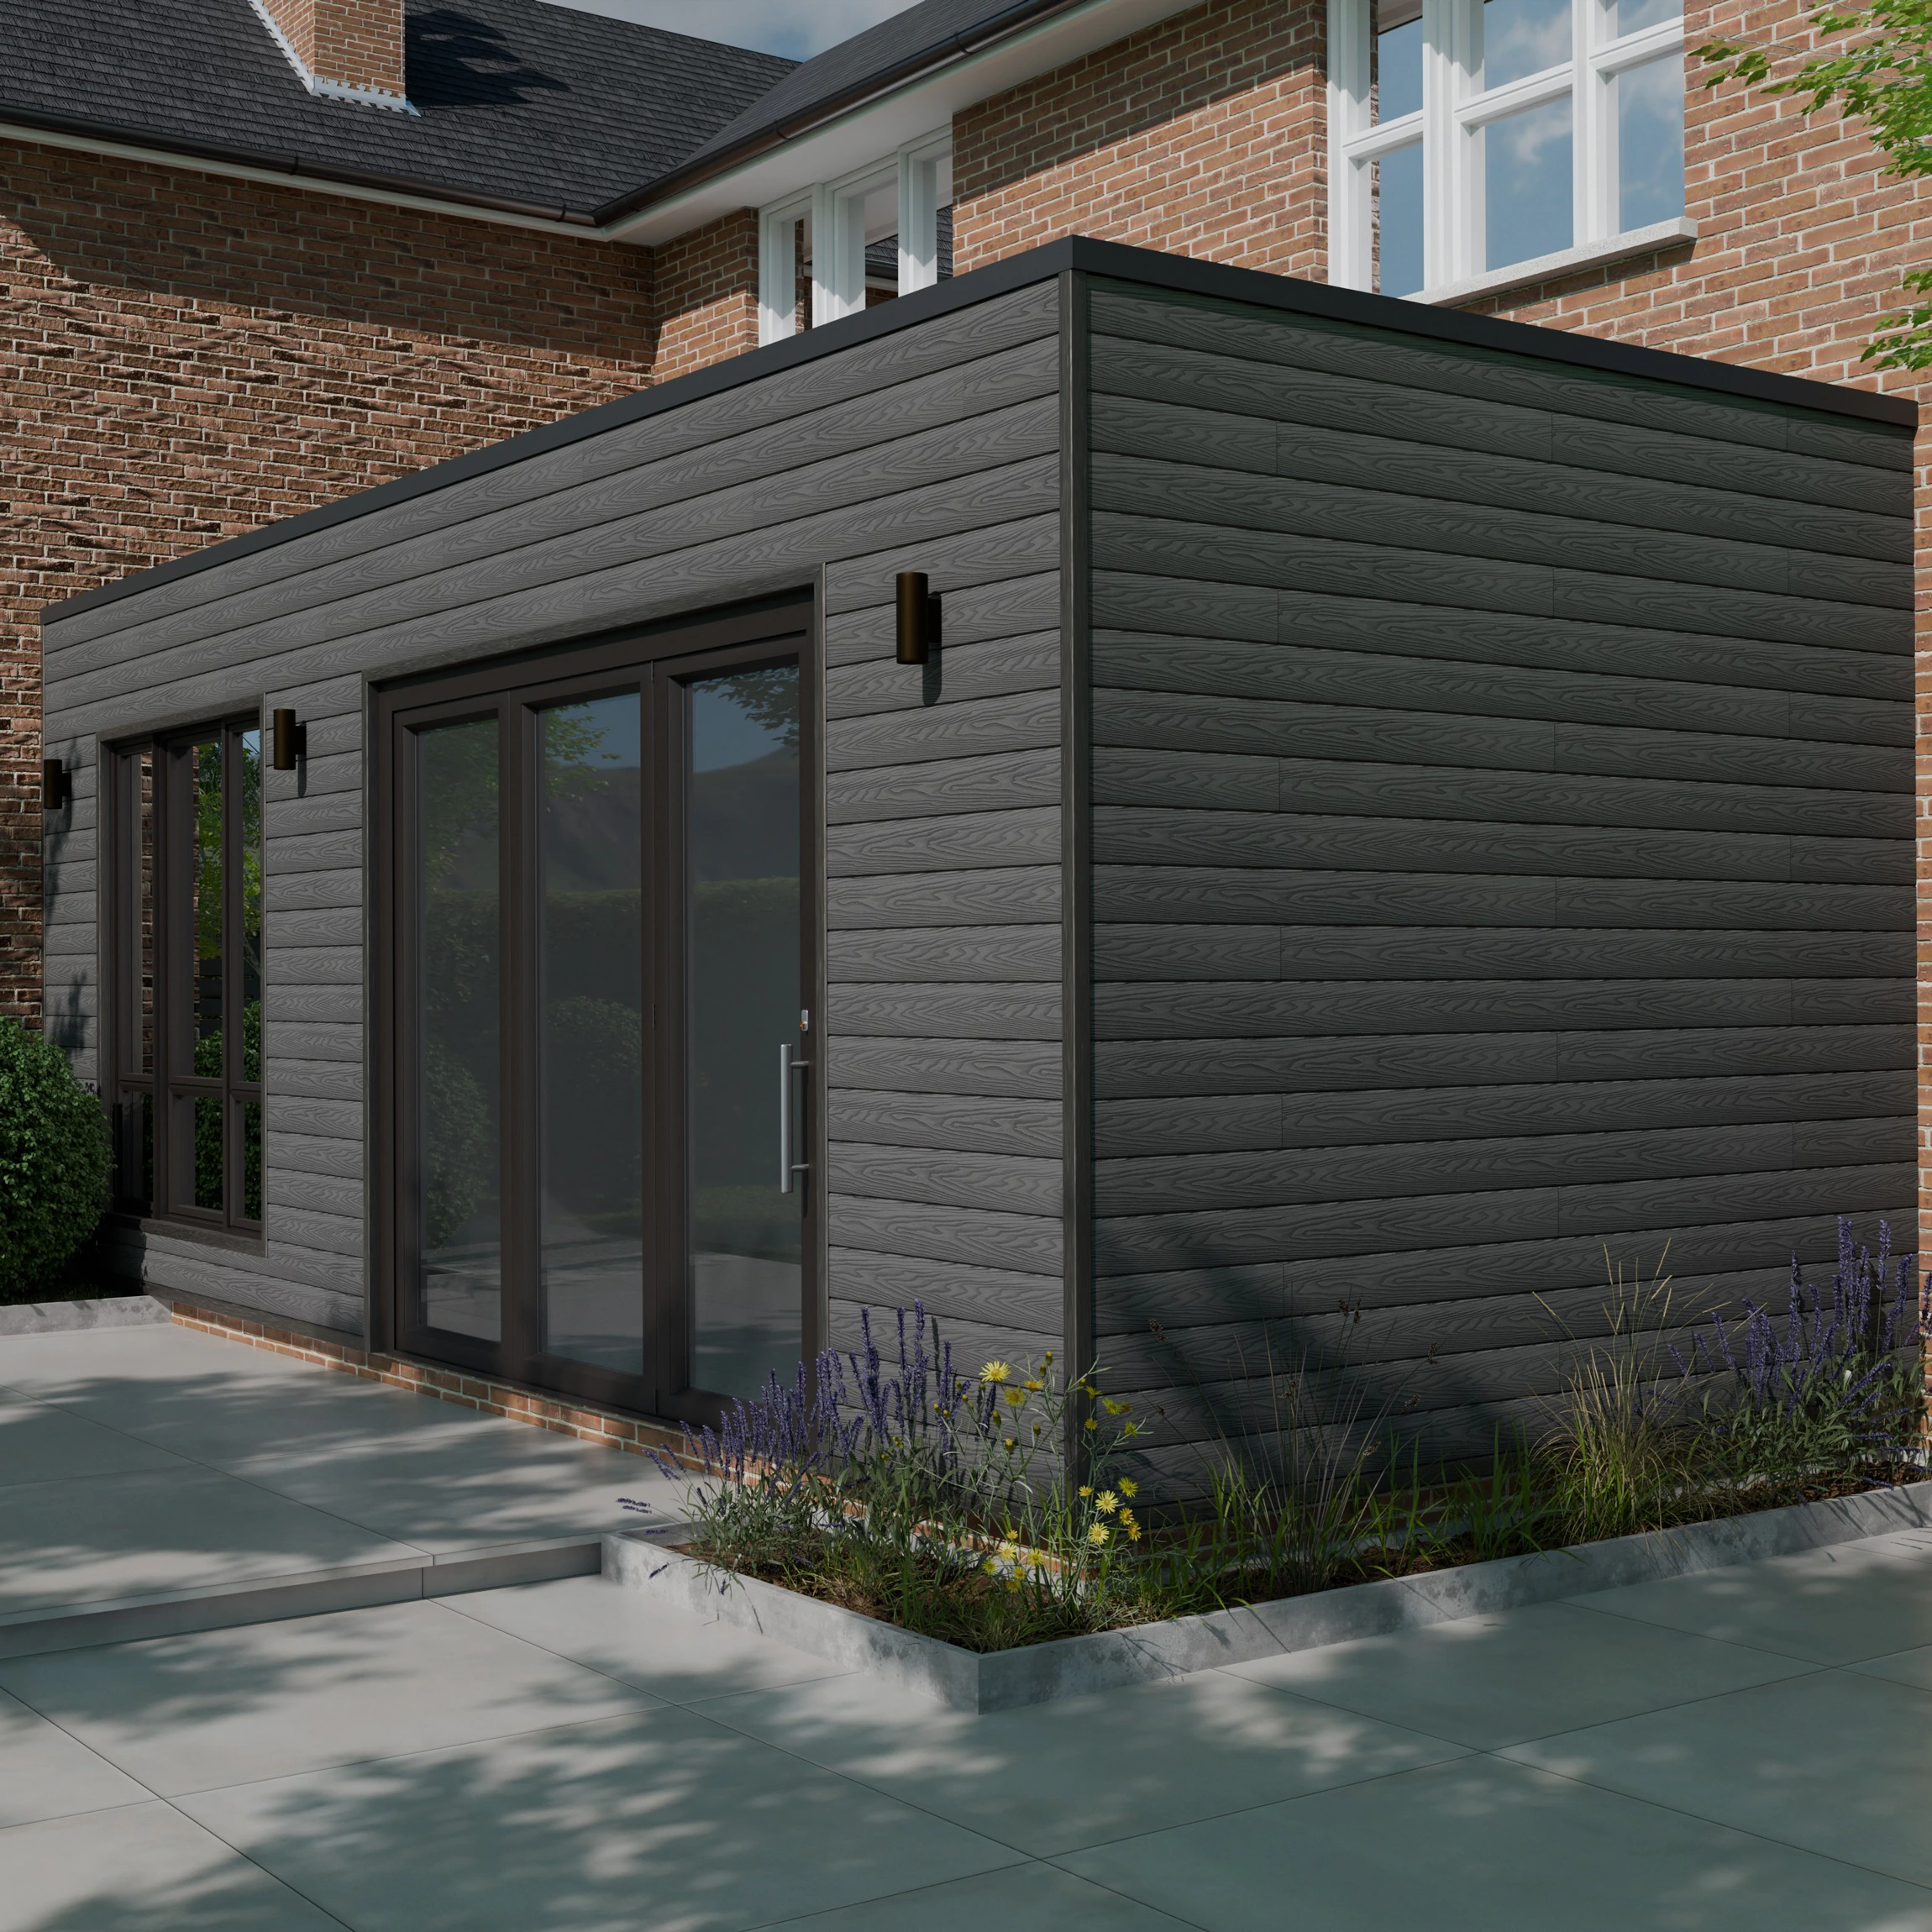
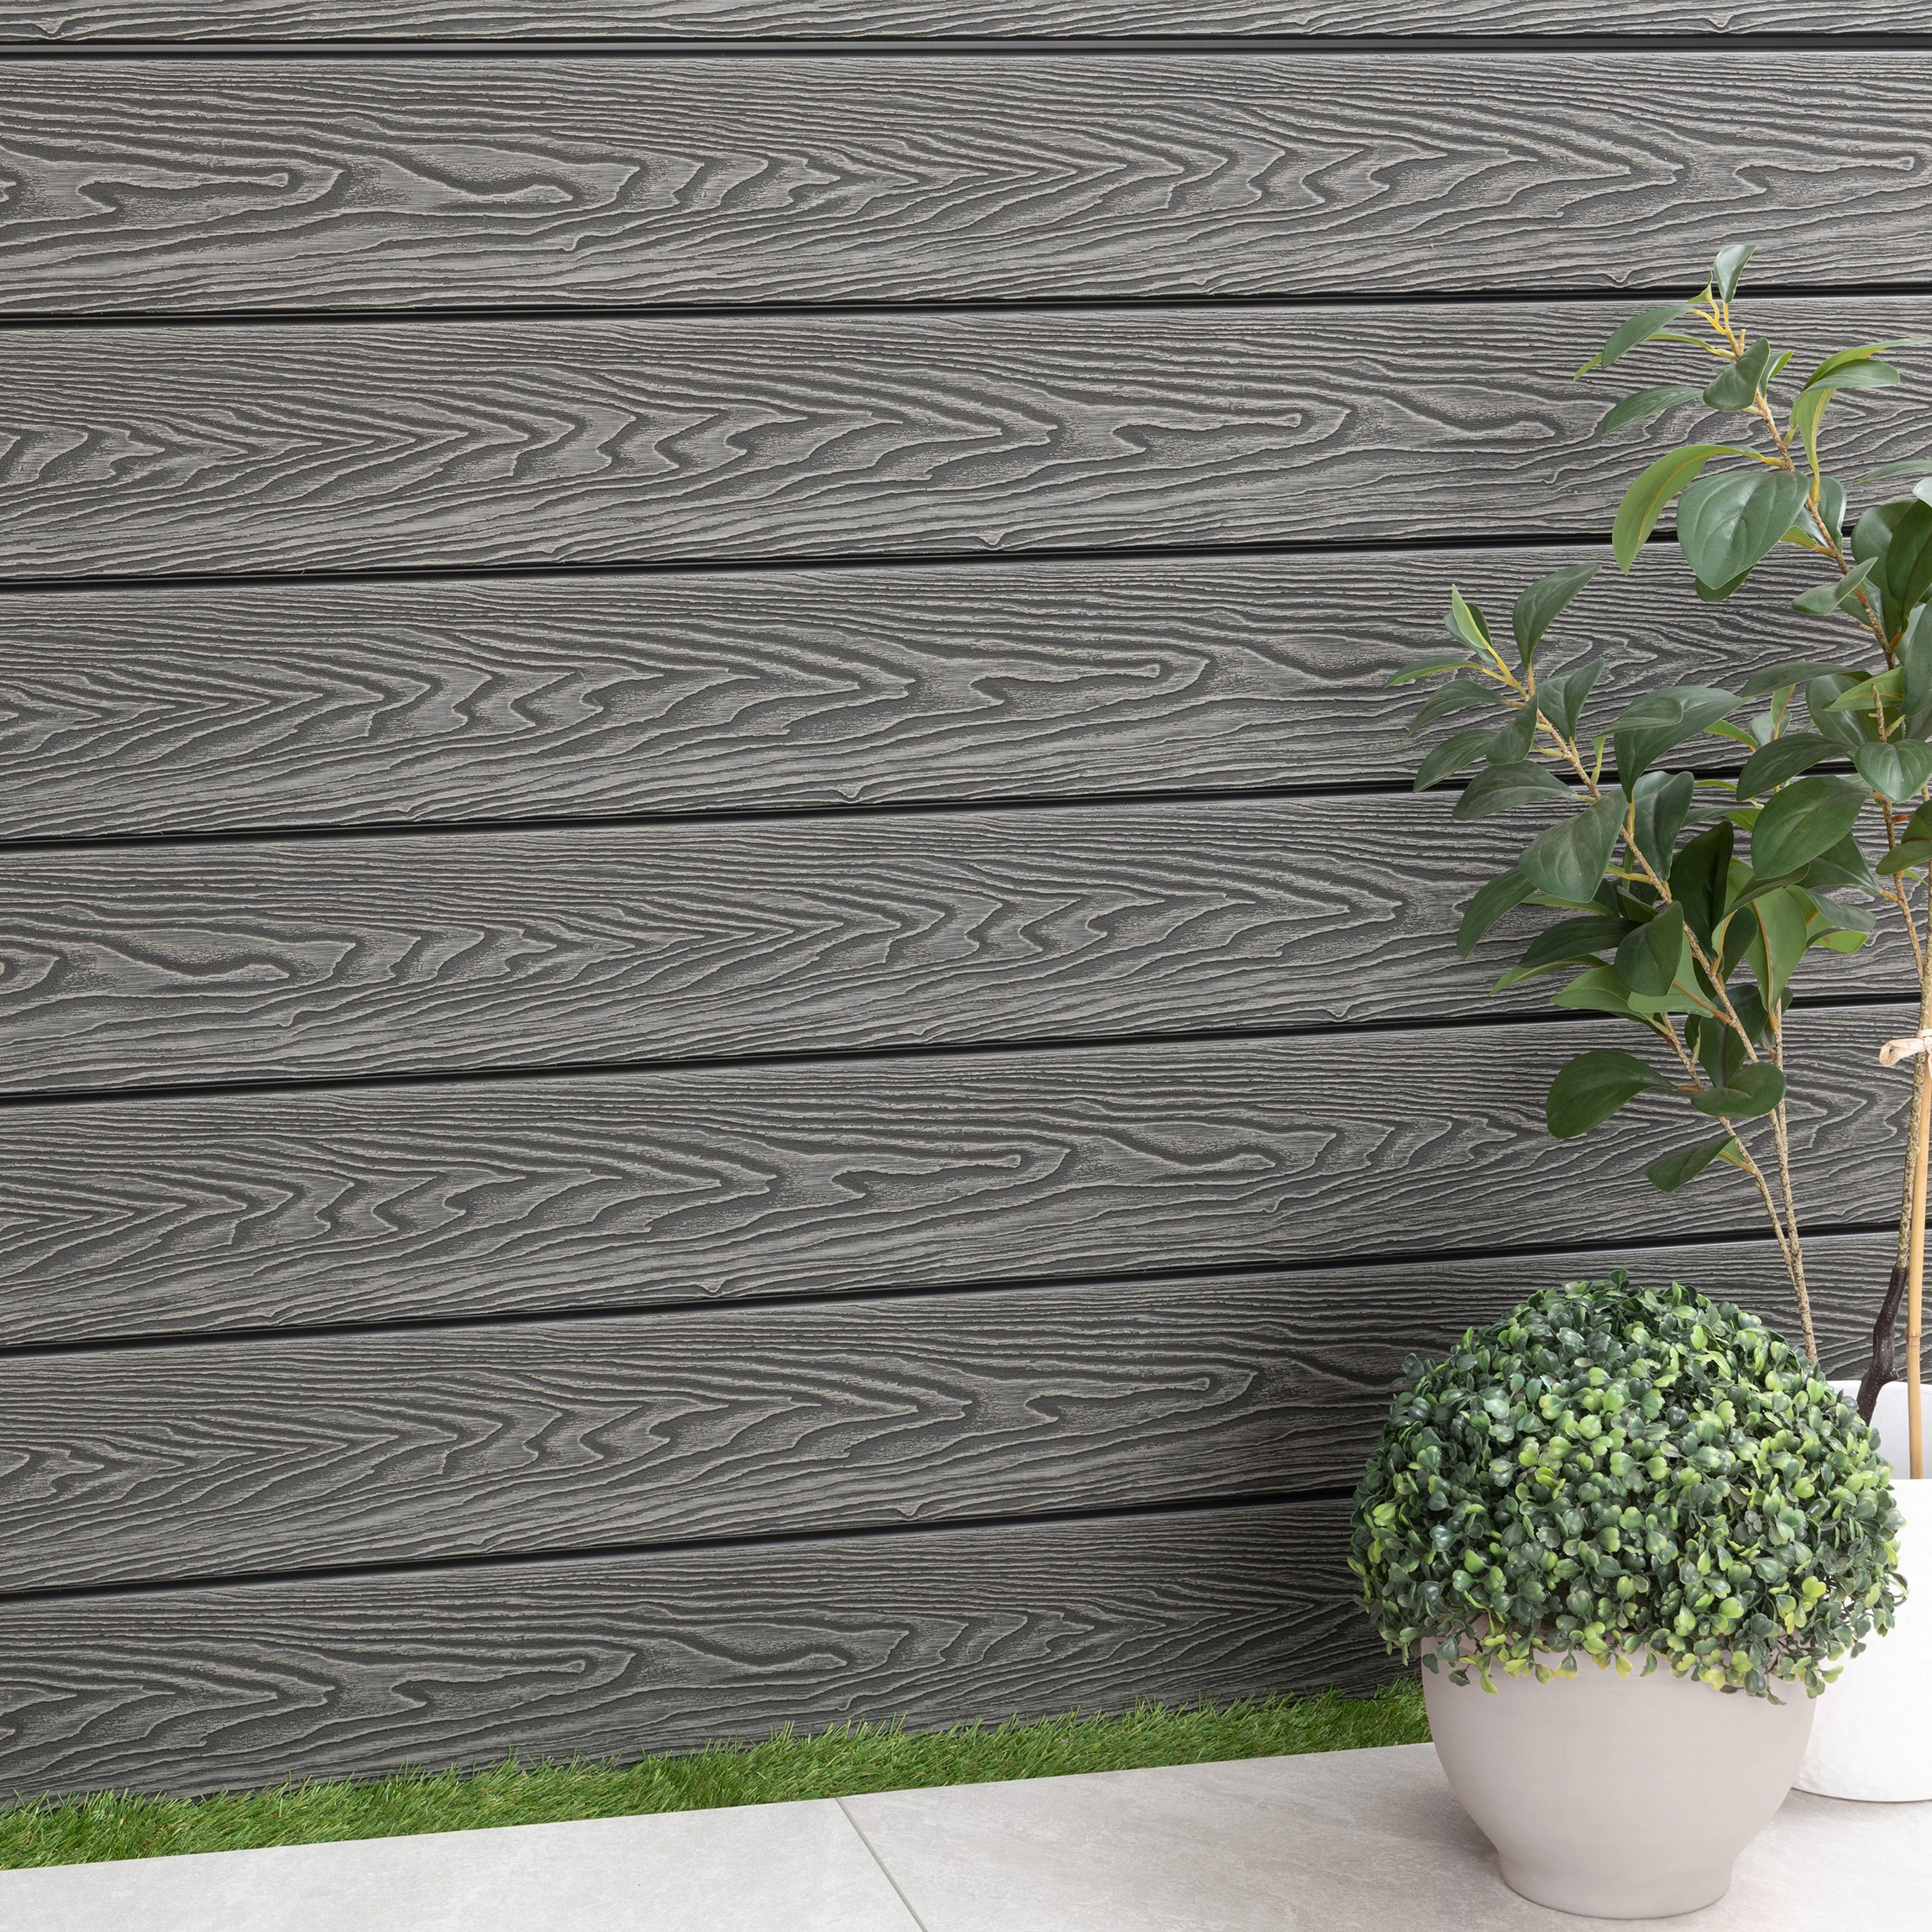
Composite Cladding
Composite cladding combines wood fibres and polymers to create durable, moisture-resistant wall panels with extended lifespan and low maintenance requirements. Composite cladding resists warping and cracking. Composite cladding offers wood-effect finishes. Composite cladding suits high-moisture environments and modern façades.
Fibre Cement Cladding
Fibre cement cladding uses cement, sand, and cellulose fibres to produce fire-resistant, durable panels with high structural stability and low maintenance. Fibre cement cladding withstands weather exposure. Fibre cement cladding offers smooth and textured finishes. Fibre cement cladding suits residential and commercial buildings.
Metal Cladding
Metal cladding uses aluminium, steel, or zinc panels to provide high durability, weather resistance, and modern architectural finishes. Metal cladding resists corrosion with protective coatings. Metal cladding offers lifespan exceeding 30–50 years. Metal cladding suits contemporary and industrial designs.
Stone Cladding
Stone cladding uses natural or engineered stone panels to deliver high durability, thermal mass, and premium façade appearance. Stone cladding increases structural strength. Stone cladding offers natural texture and colour variation. Stone cladding suits luxury residential exteriors.
Brick Slip Cladding
Brick slip cladding uses thin brick sections to replicate traditional brick walls while reducing weight and installation complexity. Brick slip cladding provides an authentic brick appearance. Brick slip cladding reduces structural load. Brick slip cladding suits renovation and retrofit projects.
Render Cladding Systems
Render cladding systems apply cement or polymer-based coatings over insulation boards to create smooth or textured external wall finishes. Render systems improve insulation when combined with external wall insulation boards. Render systems offer flexible design options. Render systems suit modern residential façades.
Shiplap Cladding
Shiplap cladding uses interlocking horizontal boards with overlapping joints to create a weather-resistant façade with improved water runoff and structural alignment. Shiplap cladding reduces water penetration through overlap design. Shiplap cladding provides a uniform linear appearance. Shiplap cladding suits timber, uPVC, and composite installations for residential exteriors.
How Do You Choose the Right Cladding Material for Your Home?
Choosing the right cladding material requires evaluating 6 key factors including durability, climate resistance, maintenance level, budget range, aesthetic requirement, and insulation performance, with correct selection improving lifespan by 20–50% and reducing long-term maintenance costs.
The selection criteria for house cladding materials are given below:
- Evaluate Durability Level: Select materials such as fibre cement, metal, or composite for high durability, while timber suits lower-impact residential environments.
- Assess Climate Resistance: Choose moisture-resistant materials such as uPVC, WPC, or metal for wet climates, and UV-resistant finishes for high sun exposure regions.
- Compare Maintenance Requirements: Low-maintenance options such as uPVC and composite reduce upkeep frequency, while timber requires treatment every 3–5 years.
- Match Budget Range: Economy materials such as PVC cost less, while premium materials such as stone or metal increase upfront cost but extend lifespan.
- Define Aesthetic Requirement: Timber and stone provide natural appearance, while composite and metal offer modern finishes and consistent colour stability.
- Check Insulation Performance: Fibre cement, composite, and insulated cladding systems improve thermal efficiency by reducing heat transfer through external walls.
What Factors Should Influence Your Cladding Selection?
Cladding selection depends on 7 core factors including durability, climate exposure, maintenance level, budget range, insulation performance, installation complexity, and design requirement, with correct selection increasing lifespan by 20–50% and reducing long-term repair and energy costs.
The factors influencing cladding selection are given below:
- Durability Requirement: Select high-density materials such as fibre cement, metal, or composite for long lifespan and resistance to impact and weathering.
- Climate Exposure Level: Choose moisture-resistant materials such as uPVC or WPC for wet environments and UV-resistant finishes for high sun exposure conditions.
- Maintenance Frequency: Low-maintenance materials such as composite and uPVC reduce upkeep cost, while timber requires periodic treatment every 3–5 years.
- Budget Allocation: Economy materials such as PVC reduce upfront cost, while premium materials such as stone or metal increase cost but improve longevity.
- Thermal Insulation Performance: Cladding systems combined with insulation layers reduce heat transfer and improve indoor energy efficiency.
- Installation Complexity: Lightweight panels reduce labour cost and installation time, while heavy materials increase structural requirements and labour expense.
How Does Climate and Weather Impact Cladding Choices?
Climate and weather impact cladding selection by determining moisture resistance, UV stability, thermal performance, and durability, with correct material choice reducing weather-related damage by 30–60% and extending façade lifespan under varying environmental conditions.
The impact of climate and weather on cladding choices is given below:
- High Rainfall Conditions: Select moisture-resistant materials such as uPVC, composite, or fibre cement to prevent water penetration and reduce risk of rot and mould formation.
- High Humidity Environments: Choose non-porous materials such as WPC, metal, or treated fibre cement to limit swelling, warping, and structural degradation.
- Strong UV Exposure: Use UV-stable materials such as metal, composite, or coated panels to prevent colour fading and surface breakdown under prolonged sunlight.
- Cold And Freeze Conditions: Select materials with low water absorption such as fibre cement or composite to prevent cracking caused by freeze–thaw cycles.
- Wind Load Exposure: Use high-strength materials such as metal or fibre cement panels with secure fixing systems to resist wind pressure and structural movement.
- Temperature Fluctuation: Choose materials with low thermal expansion such as fibre cement or engineered composites to maintain dimensional stability across temperature changes.
How Does Fire Safety Regulation Affect Cladding Selection?
Fire safety regulation influences cladding selection by requiring non-combustible or limited-combustibility materials, certified fire ratings, and compliant installation systems, with compliant cladding reducing fire spread risk by 50–90% and meeting UK Building Regulations such as Approved Document B.
The impact of fire safety regulation on cladding selection is given below:
- Material Combustibility Rating: Select materials classified as A1 or A2-s1,d0 under Euroclass standards to ensure non-combustible or low-combustibility performance.
- Building Height Requirement: Use non-combustible cladding for buildings above 18 metres as required by UK fire safety regulations for external wall systems.
- Fire Resistance Performance: Choose cladding systems tested for fire resistance duration such as 30, 60, or 120 minutes depending on building type and use.
- System Certification Compliance: Ensure full cladding systems including insulation, fixings, and cavity barriers meet certified fire safety standards rather than selecting materials individually.
- Cavity Barrier Integration: Install fire-stopping barriers within ventilated cladding systems to prevent flame spread through cavities.
- Surface Spread Of Flame: Select cladding finishes with low flame spread classification to reduce fire propagation across façade surfaces.
What Preparation Is Required Before Installation?
House cladding installation requires 6 preparation steps including surface assessment, structural repair, moisture control, insulation planning, batten layout, and material acclimatisation, with correct preparation reducing installation defects by 30–50% and improving long-term cladding performance.
The preparation steps before cladding installation are given below:
- Assess Wall Condition: Inspect structural walls for cracks, dampness, or uneven surfaces to ensure a stable base for cladding systems.
- Repair Surface Defects: Fill cracks, level uneven areas, and replace damaged sections to prevent structural failure and panel misalignment.
- Control Moisture Levels: Ensure wall dryness and install damp-proof layers where required to prevent trapped moisture behind cladding.
- Plan Insulation Layer: Define insulation type and thickness to improve thermal performance and integrate with cladding system design.
- Set Batten Layout: Mark vertical or horizontal batten spacing based on panel size and fixing requirements to ensure structural support.
- Check Ventilation Design: Plan a 25–50 mm cavity gap to allow airflow and reduce condensation behind cladding panels.
How Do You Install House Cladding Correctly?
Correct house cladding installation requires a 7-step process including surface preparation, batten fixing, membrane installation, ventilation gap creation, panel fixing, joint sealing, and finishing, with proper installation increasing cladding lifespan by 20–40% and preventing moisture and structural issues.
The house cladding installation steps are given below:
- Prepare Wall Surface: Clean and level the structural wall to remove debris, uneven areas, and moisture risks before installation begins.
- Install Support Battens: Fix timber or metal battens vertically or horizontally to create a stable framework for cladding panels.
- Apply Breather Membrane: Install a breathable waterproof membrane over the wall to prevent water ingress while allowing internal moisture to escape.
- Create Ventilation Gap: Maintain a 25–50 mm cavity between wall and cladding to enable airflow and reduce condensation buildup.
- Fix Cladding Panels: Attach panels using screws, clips, or adhesives depending on material type and system specification.
- Seal Joints And Edges: Apply trims, sealants, or joint systems to protect edges and prevent water penetration.
- Complete Finishing Details: Install corner trims, edge profiles, and protective coatings to ensure structural stability and aesthetic consistency.
How Do You Install Shiplap Cladding Correctly?
Correct shiplap cladding installation follows a 7-step process including wall preparation, batten fixing, membrane installation, starter board alignment, horizontal board fixing, expansion gap control, and finishing trims, with proper installation reducing water penetration by 30–50% and improving façade durability.
The shiplap cladding installation steps are given below:
- Prepare Wall Surface: Clean, dry, and level the wall to remove debris and ensure stable fixing conditions for shiplap boards.
- Install Breather Membrane: Fix a breathable waterproof membrane to prevent water ingress while allowing internal moisture to escape.
- Fix Support Battens: Install vertical battens at 400–600 mm spacing to create a ventilated cavity and provide structural fixing points.
- Align Starter Board: Install the first board level at the base to ensure correct alignment for all subsequent horizontal boards.
- Fix Shiplap Boards Horizontally: Secure boards from bottom to top with overlapping joints to direct water runoff away from the structure.
- Maintain Expansion Gaps: Leave 2–5 mm gaps between boards and edges to accommodate material expansion and prevent warping.
- Install Trims And Finishes: Fit corner trims, edge profiles, and sealing elements to protect joints and complete façade appearance.
How Do You Handle Cladding Around Windows and Doors?
Cladding around windows and doors requires a 6-step detailing process including opening preparation, flashing installation, trim fitting, expansion gap control, sealing, and drainage management, with correct detailing reducing water ingress risk by 40–70% and improving façade durability.

The cladding detailing steps around openings are given below:
- Prepare Opening Edges: Clean and level window and door reveals to ensure accurate alignment and secure fixing of trims and cladding panels.
- Install Flashing System: Fit head flashing above openings to direct water away from joints and prevent water penetration behind cladding.
- Fix Window And Door Trims: Install side and head trims to create a clean edge finish and provide structural support for panel terminations.
- Maintain Expansion Gaps: Leave 5–10 mm gaps between cladding panels and window or door frames to allow material movement and prevent cracking.
- Apply Sealants At Joints: Use weatherproof sealants at all junctions to block water ingress and improve airtightness around openings.
- Ensure Drainage Pathways: Design sill and bottom edges to allow water runoff and prevent pooling near window and door bases.
- Align Cladding Panels Precisely: Cut and fit panels accurately around openings to maintain consistent spacing and visual continuity.
What Cost Considerations Apply to House Cladding?
House cladding cost depends on 7 key considerations including material type, installation labour, insulation integration, design complexity, maintenance requirements, lifespan, and project scale, with total cost ranging between £40 and £200 per m² depending on specification and performance level.
The cost considerations for house cladding are given below:
- Material Type Cost: uPVC and basic composite fence panels cost £40–80/m², while timber, fibre cement, and metal range between £80–150/m², and premium stone or high-end systems exceed £150–200/m².
- Installation Labour Cost: Labour ranges between £20–60/m² depending on fixing method, access difficulty, and installer expertise.
- Insulation Integration Cost: External insulation systems add £30–100/m² depending on thickness and material type, increasing total system cost.
- Design Complexity Cost: Custom layouts, vertical or diagonal fixing, and detailed finishes increase cost by 15–40% due to additional labour and cutting requirements.
- Maintenance Requirement Cost: Low-maintenance materials such as uPVC and composite reduce long-term cost, while timber increases maintenance cost due to treatment cycles every 3–5 years.
- Lifespan Value Impact: Durable materials such as metal and fibre cement extend lifespan to 30–50 years, reducing replacement frequency and lifecycle cost.
How Much Does House Cladding Cost in the UK?
House cladding cost in the UK ranges between £40 and £200 per square metre depending on material type, insulation requirements, installation complexity, and finish quality, with premium stone and metal systems exceeding £250/m² in high-specification projects.
The house cladding cost breakdown in the UK is given below:
- uPVC Cladding Cost: £40–£70/m². Lightweight plastic panels provide the lowest-cost cladding solution with low maintenance requirements.
- Timber Cladding Cost: £60–£120/m². Cedar, larch, and treated softwood systems increase cost due to material quality and maintenance requirements.
- Shiplap Cladding Cost: £50–£110/m². Overlapping horizontal boards in timber, uPVC, or composite provide weather-resistant performance with moderate material and installation cost.
- Composite Cladding Cost: £80–£150/m². Wood–plastic composite boards provide higher durability and moisture resistance with reduced maintenance.
- Fibre Cement Cladding Cost: £90–£140/m². Cement-based panels increase cost due to fire resistance and structural durability.
- Metal Cladding Cost: £100–£200/m². Aluminium, zinc, and steel systems increase cost due to fabrication and corrosion-resistant finishes.
- Stone Cladding Cost: £120–£250+/m². Natural and engineered stone panels increase cost due to material weight and installation complexity.
- Brick Slip Cladding Cost: £80–£150/m². Thin brick systems provide traditional brick appearance with lower structural load compared to full brick construction.
- Installation Labour Cost: £20–£60/m². Labour cost varies based on access difficulty, fixing method, and façade complexity.
- Insulation Integration Cost: £30–£100/m². External wall insulation systems increase total project cost depending on insulation thickness and material specification.
What Installation Labour Costs Should You Expect?
House cladding installation labour in the UK costs between £20 and £60 per square metre depending on material type, access complexity, fixing method, and project scale, with high-complexity façades increasing labour cost to £70–£100 per m² in specialised installations.
The installation labour cost factors are given below:
- Standard Labour Cost: £20–£40/m². Basic installations using uPVC, shiplap, or simple composite panels with straightforward fixing systems.
- Mid-Range Labour Cost: £40–£60/m². Installations involving timber, fibre cement, or composite panels requiring precise alignment and cutting.
- High-Complexity Labour Cost: £60–£100/m². Stone, metal, or custom cladding systems require specialised tools, structural support, and skilled labour.
- Access Difficulty Impact: Scaffolding and multi-storey installations increase labour cost by 10–30% due to safety requirements and extended installation time.
- Fixing Method Variation: Mechanical fixing systems increase labour cost compared to adhesive systems due to additional drilling and alignment steps.
- Design Complexity Influence: Vertical layouts, patterns, and detailed trims increase labour cost by 15–40% due to additional cutting and finishing work.
- Project Scale Efficiency: Large projects reduce labour cost per m² by 10–25% due to repetitive workflows and improved installation efficiency.
What Return on Investment Can You Expect From Cladding?
House cladding delivers a return on investment of 60–90% through property value increase, energy cost reduction, and maintenance savings, with external upgrades increasing resale value by 5–15% and reducing annual energy costs by 10–30%.
The return on investment factors for house cladding are given below:
- Property Value Increase: House cladding improves exterior appearance and durability, increasing property value by 5–15% depending on material quality and design.
- Energy Cost Reduction: Insulated cladding systems reduce heat loss, lowering energy bills by 10–30% through improved thermal efficiency.
- Maintenance Cost Savings: Low-maintenance materials reduce repainting and repair frequency, lowering long-term maintenance cost by 20–40%.
- Extended Lifespan Value: Durable cladding materials such as fibre cement and metal extend façade lifespan to 30–50 years, reducing replacement frequency.
- Weather Damage Reduction: Protective cladding systems reduce structural damage from moisture and UV exposure by 30–60%, lowering repair costs.
- Rental Yield Improvement: Improved exterior condition increases rental appeal, supporting higher rental value in residential properties.
- Market Competitiveness: Modern cladding enhances property desirability, improving sale speed and buyer interest in competitive markets.
How Does Cladding Affect Property Valuation?
House cladding increases property valuation by 5–15% through improved exterior appearance, enhanced durability, and better energy performance, with modern cladding systems increasing buyer demand and reducing perceived maintenance risk during property assessment.
The impact of cladding on property valuation is given below:
- Enhance Visual Appeal: House cladding upgrades façade appearance, increasing buyer interest and perceived property quality during valuation.
- Improve Energy Efficiency: Insulated cladding reduces heat loss, improving energy performance ratings and increasing property value in energy-conscious markets.
- Reduce Maintenance Risk: Durable cladding materials lower long-term repair and repainting requirements, improving buyer confidence and valuation stability.
- Increase Structural Protection: Cladding protects underlying walls from weather damage, reducing future repair costs and supporting higher valuation.
- Support Modern Design Standards: Contemporary cladding finishes align with current architectural trends, increasing desirability in competitive housing markets.
- Extend Building Lifespan: High-performance cladding systems increase façade durability, supporting long-term asset value retention.
- Improve Marketability: Well-clad properties attract more buyers and achieve faster sale times due to improved condition and reduced upgrade requirements.
How Do You Maintain Different Types of House Cladding?
House cladding maintenance requires material-specific cleaning, inspection, and protective treatment routines, with correct maintenance extending cladding lifespan by 20–50% and reducing repair costs through early detection of damage and controlled surface degradation.
The maintenance methods for different cladding types are given below:
- Maintain uPVC Cladding: Clean surfaces 2–3 times per year using mild detergent and water to remove dirt, algae, and stains while preserving colour stability.
- Maintain Timber Cladding: Apply protective oil, stain, or paint every 3–5 years to prevent moisture absorption, UV damage, and surface cracking.
- Maintain Composite Cladding: Wash panels 1–2 times per year with water and soft brushes to remove debris and maintain surface appearance with minimal upkeep.
- Maintain Fibre Cement Cladding: Inspect annually for cracks or joint issues and clean periodically to maintain durability and weather resistance.
- Maintain Metal Cladding: Clean surfaces to remove dirt and pollutants while inspecting coatings for corrosion or damage, especially in coastal environments.
- Maintain Stone Cladding: Seal surfaces every 5–10 years and clean periodically to prevent staining and moisture penetration.
- Maintain Brick Slip Cladding: Inspect mortar joints annually and repair damaged pointing to maintain structural integrity and weather resistance.
- Maintain Shiplap Cladding: Check overlapping joints for alignment and reseal or repaint surfaces where required to maintain water runoff performance.
What Cleaning and Care Procedures Apply to Timber Cladding?
Timber cladding requires routine cleaning, protective treatment, moisture control, and surface inspection, with correct care extending lifespan by 20–40% and preventing rot, UV degradation, and surface cracking under external exposure.
The cleaning and care procedures for timber cladding are given below:
- Clean Surface Regularly: Wash timber cladding 2–3 times per year using water and mild detergent to remove dirt, algae, and surface contaminants.
- Remove Biological Growth: Treat mould, algae, and mildew using specialist cleaners to prevent surface staining and moisture retention.
- Apply Protective Coatings: Use oils, stains, or paints every 3–5 years to protect against UV exposure, moisture absorption, and colour fading.
- Inspect For Damage: Check for cracks, warping, or loose boards annually to maintain structural integrity and prevent further deterioration.
- Maintain Ventilation Gaps: Keep airflow pathways clear behind cladding to reduce moisture buildup and prevent timber decay.
- Control Moisture Exposure: Ensure proper drainage and avoid prolonged water contact to minimise swelling and rot formation.
- Repair And Replace Boards: Replace damaged or decayed boards promptly to maintain performance and visual consistency.
How Long Do Different Cladding Types Last?
Different cladding types last between 20 and 100 years depending on material composition, maintenance level, and environmental exposure, with uPVC lasting 20–30 years, timber 30–50 years, and metal or stone cladding exceeding 50–100 years under proper maintenance conditions.
The lifespan of different cladding types is given below:
- uPVC Cladding Lifespan: 20–30 years. Plastic panels resist moisture but degrade under prolonged UV exposure over time.
- Timber Cladding Lifespan: 30–50 years. Treated timber maintains durability with regular maintenance every 3–5 years.
- Shiplap Cladding Lifespan: 25–50 years. Timber or composite shiplap systems maintain performance through proper sealing and joint maintenance.
- Composite Cladding Lifespan: 25–40 years. Wood–plastic composite panels resist moisture and warping with low maintenance requirements.
- Fibre Cement Cladding Lifespan: 40–60 years. Cement-based panels provide high durability and resistance to fire, moisture, and weathering.
- Metal Cladding Lifespan: 50–100 years. Aluminium, zinc, and steel panels deliver long-term durability with protective coatings.
- Brick Slip Cladding Lifespan: 40–60 years. Thin brick systems maintain structural integrity with proper joint maintenance.
- Stone Cladding Lifespan: 75–100+ years. Natural stone provides the longest lifespan due to high density and weather resistance.
How Do Weather Conditions Affect Cladding Durability?
Weather conditions affect cladding durability by influencing moisture exposure, UV degradation, temperature expansion, and wind pressure, with harsh environments reducing cladding lifespan by 20–40% if materials lack resistance to specific climate stress factors.
The impact of weather conditions on cladding durability is given below:
- Rain And Moisture Exposure: High rainfall increases water penetration risk, causing rot in timber and joint degradation if moisture-resistant materials are not used.
- UV Radiation Impact: Prolonged sunlight exposure causes colour fading and surface breakdown in plastics and untreated timber, reducing aesthetic lifespan.
- Temperature Fluctuation Effect: Repeated expansion and contraction cause cracking and joint failure in materials with high thermal movement.
- Freeze–Thaw Cycles: Water absorption followed by freezing causes expansion damage in porous materials such as untreated wood and low-density panels.
- Wind Load Pressure: Strong winds increase mechanical stress on cladding fixings, causing panel loosening or structural damage in poorly secured systems.
- Humidity Influence: High humidity levels accelerate mould growth and material swelling in timber-based cladding systems.
- Coastal Salt Exposure: Salt air accelerates corrosion in metal cladding without protective coatings, reducing lifespan and surface integrity.
How Does Cladding Contribute to Home Energy Efficiency?
House cladding improves home energy efficiency by reducing heat transfer, enhancing insulation performance, and minimising air leakage, with insulated cladding systems lowering heat loss by 20–35% and reducing annual energy consumption by 10–30%.
The contribution of cladding to energy efficiency is given below:
- Reduce Heat Loss: External cladding systems create a thermal barrier that limits heat escaping through walls, improving indoor temperature retention.
- Improve Insulation Performance: Cladding combined with insulation boards increases wall thermal resistance, reducing heat transfer between interior and exterior environments.
- Minimise Air Leakage: Properly installed cladding systems reduce drafts and uncontrolled airflow, improving airtightness of building envelopes.
- Control Thermal Bridging: Continuous external cladding layers reduce cold bridges across structural elements, improving overall energy efficiency.
- Enhance Temperature Stability: Cladding systems maintain consistent indoor temperatures by reducing external temperature influence on internal spaces.
- Support Ventilated Façades: Ventilated cladding systems reduce heat buildup by allowing airflow, improving summer cooling performance.
- Lower Energy Costs: Improved insulation and reduced heat transfer decrease heating and cooling demand, reducing energy bills by 10–30%.
How Do You Ensure Fire Compliance in Cladding Choice?
Fire compliance in cladding selection requires using non-combustible materials, certified system testing, correct installation of cavity barriers, and adherence to UK Building Regulations, with compliant systems reducing fire spread risk by 50–90% across external wall assemblies.
The steps to ensure fire compliance in cladding choice are given below:
- Select Non-Combustible Materials: Use materials rated A1 or A2-s1,d0 under Euroclass classification to ensure minimal contribution to fire spread.
- Verify Full System Certification: Choose cladding systems tested as complete assemblies including insulation, fixings, and membranes rather than selecting individual components.
- Install Cavity Barriers: Fit fire-stopping barriers within ventilated cavities to prevent vertical and horizontal fire spread behind cladding panels.
- Follow Building Height Regulations: Use non-combustible cladding systems for buildings above 18 metres to meet regulatory requirements.
- Check Fire Resistance Ratings: Ensure cladding systems meet required fire resistance durations such as 30, 60, or 120 minutes based on building use.
- Control Surface Spread Of Flame: Select finishes with low flame spread classification to reduce fire propagation across façade surfaces.
- Ensure Professional Installation: Use certified installers to maintain compliance with design specifications and regulatory standards.
What Common Mistakes Occur When Installing Cladding?
Common cladding installation mistakes include poor surface preparation, incorrect fixing, lack of ventilation gaps, improper sealing, and ignoring expansion allowances, with such errors increasing failure risk by 30–60% and reducing cladding lifespan and weather resistance.
The common cladding installation mistakes are given below:
- Skip Surface Preparation: Uneven or damp walls cause misalignment, weak fixing, and long-term structural instability in cladding systems.
- Incorrect Batten Spacing: Improper batten layout reduces structural support, leading to panel movement and fixing failure over time.
- Ignore Ventilation Gap: Lack of a 25–50 mm cavity traps moisture behind cladding, causing mould growth and material deterioration.
- Use Improper Fixings: Incorrect screws, clips, or adhesives reduce load capacity and increase risk of panel detachment.
- Fail To Allow Expansion Gaps: Absence of 2–10 mm movement gaps causes warping, cracking, and joint failure under temperature changes.
- Poor Sealing And Flashing: Incorrect sealing around joints, windows, and edges allows water ingress and structural damage.
- Incorrect Panel Alignment: Misaligned panels create visible defects and increase stress on fixing systems, reducing durability.
- Neglect Weather Conditions During Installation: Installation during wet or extreme temperature conditions reduces adhesion quality and structural performance.
How Do You Plan a House Cladding Project?
House cladding project planning requires a structured 7-step process including requirement definition, material selection, budget allocation, design layout, regulatory compliance, contractor selection, and timeline scheduling, with proper planning reducing project cost overruns by 20–30% and improving installation efficiency.
The planning steps for a house cladding project are given below:
- Define Project Requirements: Identify objectives such as insulation improvement, façade upgrade, or structural protection to guide material and system selection.
- Select Cladding Material: Choose materials based on durability, maintenance level, climate resistance, and aesthetic requirement to ensure long-term performance.
- Set Budget Range: Allocate budget for materials, labour, insulation, and contingencies to control total project cost effectively.
- Design Cladding Layout: Plan panel orientation, joint spacing, and detailing around windows and doors to ensure structural alignment and visual consistency.
- Check Regulatory Compliance: Ensure compliance with building regulations, fire safety standards, and planning permissions where required.
- Choose Qualified Contractors: Select experienced installers to ensure correct fixing, ventilation, and system performance.
- Schedule Project Timeline: Define installation phases, delivery timelines, and labour availability to avoid delays and cost increases.
Summing Up
House cladding delivers structural protection, energy efficiency, and long-term property value, with correct material selection, installation, and maintenance determining performance, cost efficiency, and lifespan across all residential applications.
House cladding defines external wall durability through resistance to moisture, UV exposure, temperature variation, and wind load. House cladding materials such as uPVC, timber, shiplap, composite, fibre cement, metal, stone, and brick slip provide different performance levels, cost ranges, and maintenance requirements. House cladding cost varies between £40 and £250+ per m², with labour, insulation, and design complexity influencing total project value.
House cladding selection depends on climate conditions, fire safety compliance, durability requirements, and aesthetic goals. House cladding installation requires correct preparation, ventilation gaps, fixing systems, and detailing around openings to prevent water ingress and structural issues. House cladding maintenance directly affects lifespan, with low-maintenance materials reducing long-term costs and high-maintenance materials requiring regular treatment.
House cladding increases property value by improving façade quality, reducing maintenance risk, and enhancing energy efficiency. House cladding planning ensures cost control, regulatory compliance, and efficient execution across all project stages. House cladding performance depends on aligning material properties, installation standards, and environmental conditions to achieve durable, efficient, and visually consistent building exteriors.
