
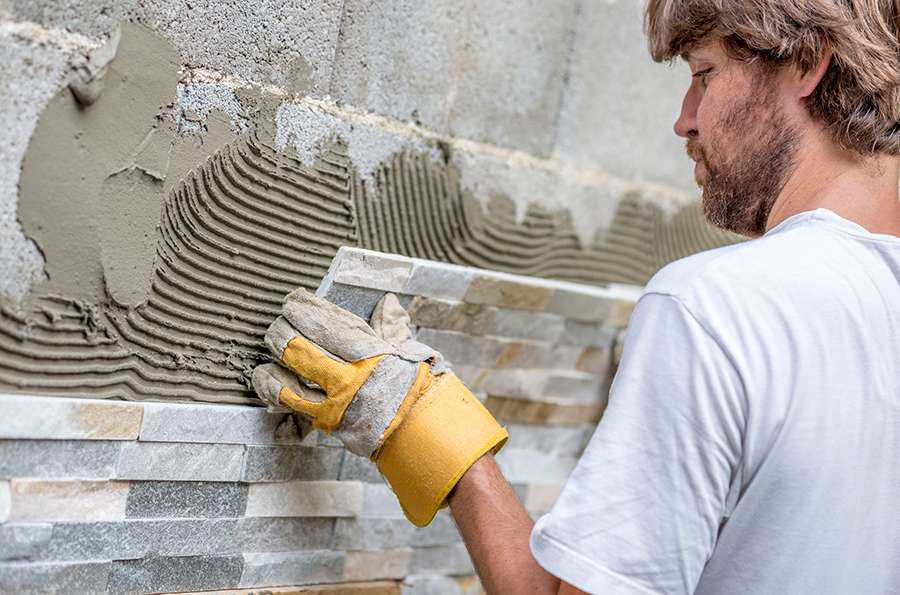
Uneven walls affect most UK homes built before 1980, caused mainly by mortar joint variation, plaster shrinkage and natural building settlement over time. A wall becomes too uneven to tile once dips or bumps pass 3mm across a 2 metre length, checked with a spirit level or straight edge. Gaps under 3mm can be tiled over directly, while anything beyond this needs levelling first with a compound, backer board or fresh render.
Tiling an uneven wall properly starts with cleaning the surface, checking for damp, and filling gaps before any adhesive goes on. A flexible, thick-bed adhesive works best on uneven walls, since it fills gaps up to 10mm without cracking, and smaller tiles under 200mm x 200mm sit flatter than large format tiles on an imperfect surface. Guide lines, a level batten and careful measuring around corners, sockets and pipework all keep tile rows straight despite the wall underneath.
Rushing the levelling stage causes most tiling failures, showing up later as cracked grout, hollow tiles or crooked rows near the top of a wall. Severely uneven walls, particularly those out by more than 10mm, or walls with damp and structural damage, are usually best left to a professional. Bathrooms and kitchens need extra care too, since steam, grease and constant moisture put more strain on adhesive and grout than a standard living room wall.
Table of Contents
Why Are Walls Uneven in the First Place?
Walls turn uneven because of the way they’re built and how they age over time. Bricklayers use mortar joints that can vary by a few millimetres from row to row. Plaster also shrinks slightly as it dries, leaving small bumps and dips behind. Over the years, houses settle into the ground too, and that shifts the wall out of line.
Sloped Wall Base: The ground under a house settles unevenly, so the bottom of the wall sits lower on one side than the other.
Surface Ridges and Hollows: Plaster shrinks as it dries and leaves small bumps and dips across the wall, usually 2-5mm deep.
Shifted Brick Alignment: Bricks and blocks move slightly with the weather, shifting in and out as temperatures rise and fall.
Variable Mortar Depth: Older UK homes, especially those built before 1980, often have mortar joints between 8mm and 15mm thick instead of an even depth.
Warped Stud Walls: Timber-framed walls in homes older than 50 years can bend and twist as the wood ages.
How Do You Know If a Wall Is Too Uneven to Tile?
A wall is too uneven to tile if it has dips or bumps deeper than 3mm across a 2 metre length, checked with a spirit level or straight edge. Anything beyond this figure risks cracked grout lines, hollow-sounding tiles and an uneven finish once the tiles are up. Small dips under 3mm can usually be fixed with a levelling compound before tiling starts.
Spirit Level Test: Hold a spirit level flat against the wall in several spots to spot any obvious high or low areas.
Straight Edge Gaps: Run a long straight edge, such as a wooden batten, across the wall and check for gaps of more than 3mm underneath.
Tapping Sounds: Tap the wall gently with your knuckles, since a hollow sound can mean loose plaster that needs fixing before tiling.
Visible Waves: Stand back and look along the wall at an angle, since light will show up waves or dips that aren’t obvious close up.
Old Tile Marks: Check for ridges left behind from old tile adhesive or previous tiling work, as these often create uneven patches.
Can You Tile Directly Onto an Uneven Wall?
You can tile directly onto an uneven wall only if the dips or bumps stay under 3mm across a 2 metre length. Anything beyond this figure needs levelling first, either with a levelling compound, backer board or fresh render, before tiles go up. Tiling straight over a wall that’s too uneven leads to cracked grout, weak adhesion and tiles that sit at odd angles.
Minor Unevenness: Small dips and bumps under 3mm can be tiled over directly, since standard tile adhesive fills these gaps.
Levelling Compound: Walls with gaps between 3mm and 10mm need a levelling compound applied first to create a flat surface.
Backer Boards: Severely uneven walls, especially those over 10mm out, are better fitted with backer boards to create an even base.
Fresh Render: Walls with structural damage or large sections of crumbling plaster need fresh render before any tiling can start.
Adhesive Choice: Flexible, thick-bed adhesive helps fill small gaps on slightly uneven walls better than a standard thin-bed adhesive.
What Tools and Materials Do You Need to Tile an Uneven Wall?
Tiling an uneven wall needs a spirit level, notched trowel, tile spacers, tile adhesive and a levelling compound as the core tools. A tile cutter, grout float and mixing paddle also help finish the job to a high standard. Choosing the right adhesive matters most on uneven walls, since a flexible, thick-bed adhesive fills gaps better than a standard thin-bed mix.
Spirit Level: Checks if the wall and each tile row stay straight, especially important when the surface underneath isn’t flat.
Notched Trowel: Spreads tile adhesive evenly and controls how thick the adhesive layer sits behind each tile.
Levelling Compound: Fills dips and gaps between 3mm and 10mm before tiling starts, creating a flatter surface underneath.
Tile Spacers: Keep gaps between tiles consistent, which matters more on uneven walls where tiles can drift out of line.
Thick-Bed Adhesive: Fills larger gaps behind tiles better than standard adhesive, making it suited to uneven wall surfaces.
Tile Cutter: Cuts tiles to size around edges, corners and fittings, especially where wall lines aren’t straight.
Mixing Paddle: Mixes adhesive and levelling compound to an even consistency, which affects how well either product fills gaps.

How Do You Prepare an Uneven Wall Before Tiling?
Preparing an uneven wall before tiling means cleaning the surface, filling gaps and checking for damp, all before any adhesive goes on. Start by removing dust, grease and loose paint, since tiles won’t stick properly to a dirty surface. Next, fill dips over 3mm with a levelling compound and let it dry fully, usually for 24 hours, before moving on to tiling.
Clean the Surface: Remove dust, grease and flaking paint with sugar soap or a similar cleaner, since tiles need a clean base to bond well.
Check for Damp: Test the wall with a damp meter, as tiling over a damp patch causes adhesive failure and mould further down the line.
Fill Larger Gaps: Apply a levelling compound to dips deeper than 3mm and leave it to dry for 24 hours before continuing.
Sand Rough Patches: Smooth out any dried compound or old adhesive residue with sandpaper to keep the surface even.
Prime the Wall: Apply a wall primer to porous surfaces like fresh plaster, since this helps the tile adhesive grip properly.
Mark Reference Lines: Draw level horizontal and vertical guidelines with a spirit level, giving a straight starting point despite an uneven wall underneath.
What Are the Best Methods to Level an Uneven Wall Before Tiling?
The best methods to level an uneven wall before tiling are levelling compound, backer boards, dot and dab plasterboard and fresh render, chosen according to how uneven the wall is. Levelling compound suits gaps between 3mm and 10mm, while backer boards work better for walls out by more than 10mm. Fresh render suits walls with structural damage, and dot and dab plasterboard suits walls needing a completely new flat surface.
Levelling Compound: Fills gaps between 3mm and 10mm and dries within 24 hours, giving a flat surface for smaller unevenness.
Backer Boards: Fix directly onto battens or adhesive to correct walls out by more than 10mm, creating an even tiling surface.
Dot and Dab Plasterboard: Uses adhesive dabs to fix plasterboard to the wall, suited to walls needing a full, flat surface rebuild.
Fresh Render: Replaces damaged or crumbling plaster sections, particularly on older walls with structural issues beneath the surface.
Battens and Packers: Support backer boards or plasterboard at the correct depth, useful where one section of a wall sits much further out than another.
What’s the Best Tile Adhesive for Uneven Walls?
The best tile adhesive for uneven walls is a flexible, thick-bed adhesive, since it fills gaps up to 10mm without slumping or cracking. Standard thin-bed adhesive only fills gaps up to 3mm, making it unsuitable for walls with deeper dips. Choosing the right adhesive depends on how uneven the wall is and how heavy the tiles are.
Thick-Bed Adhesive: Fills gaps up to 10mm in a single application, making it suited to walls with noticeable dips and bumps.
Flexible Adhesive: Handles slight wall movement better than rigid adhesive, reducing the risk of cracked grout lines over time.
Cement-Based Adhesive: Suits porous surfaces like fresh render or plasterboard, offering strong adhesion on uneven backgrounds.
Ready-Mixed Adhesive: Works well for small gaps under 3mm, though it’s less effective on deeper or wider dips.
Heavy-Duty Adhesive: Supports larger or heavier tiles, such as natural stone, on walls that need extra hold due to unevenness.
Does Tile Size Matter When Tiling an Uneven Wall?
Tile size matters when tiling an uneven wall, since smaller tiles sit flatter on uneven surfaces than larger ones. Tiles under 200mm x 200mm flex less across dips and bumps, reducing the risk of cracked grout or lippage. Larger tiles, especially those over 600mm x 600mm, show unevenness more clearly and need a flatter surface underneath, usually within 3mm across a 2 metre length.
Small Tiles: Tiles under 200mm x 200mm sit flatter on uneven walls, since their smaller size flexes across minor dips and bumps.
Large Format Tiles: Tiles over 600mm x 600mm highlight wall unevenness more clearly and need a flatter base, ideally within 3mm across a 2 metre length.
Mosaic Tiles: Small mosaic pieces, often under 50mm, adjust well to uneven surfaces due to their size and flexible backing sheets.
Rectified Edges: Tiles with rectified, precisely cut edges highlight uneven lines more than tiles with softer, cushioned edges.
Tile Thickness: Thicker tiles, typically above 9mm, resist warping over minor wall imperfections better than thinner tiles.

How Do You Tile an Uneven Wall Step by Step?
Tiling an uneven wall step by step means preparing the surface, levelling any gaps, marking guide lines, then fixing tiles from the bottom up. Each step matters more on an uneven wall, since skipping surface prep or guide lines leads to crooked rows further up. The whole process usually takes 24 to 48 hours, factoring in drying time for levelling compound and adhesive.
Step 1: Clean and Check the Wall. Remove dust, grease and old adhesive with sugar soap, then test the wall with a damp meter before starting any work.
Step 2: Fill Gaps Over 3mm. Apply a levelling compound to any dips or bumps deeper than 3mm, then leave it to dry fully for 24 hours.
Step 3: Mark Level Guide Lines. Draw horizontal and vertical lines across the wall using a spirit level, giving straight edges to follow despite the uneven surface underneath.
Step 4: Fix a Batten. Screw a straight batten along the bottom guide line to support the first row of tiles while the adhesive sets.
Step 5: Mix the Adhesive. Mix a flexible, thick-bed adhesive to an even, lump-free consistency using a mixing paddle.
Step 6: Apply Adhesive with a Notched Trowel. Spread adhesive across a small section of wall at a time, adjusting the depth to fill any remaining unevenness.
Step 7: Place Tiles from the Bottom Up. Press tiles firmly into the adhesive, starting from the batten and working upward row by row.
Step 8: Use Tile Spacers. Fit spacers between each tile to keep gaps even, checking every row with a spirit level as you go.
Step 9: Cut Edge Tiles. Measure and cut tiles to fit around corners, edges and fittings using a tile cutter.
Step 10: Remove the Batten and Grout. Take out the batten once the adhesive has set, usually after 24 hours, then fill the gaps between tiles with grout.
How Do You Tile Uneven Bathroom Walls?
Tiling uneven bathroom walls means checking for damp before anything else, since bathrooms hold more moisture than any other room in a home. A waterproof levelling compound and cement-based adhesive work better here than standard products, since bathroom walls face constant exposure to steam and splashing water. Areas around baths, showers and sinks need extra attention, as uneven patches near sealant lines let water through more easily.
Check for Damp First: Test bathroom walls with a damp meter before levelling, since trapped moisture behind tiles causes mould within months.
Use Waterproof Levelling Compound: Fill gaps over 3mm with a waterproof compound, rather than a standard product, to handle constant bathroom moisture.
Tank Shower Areas: Apply a tanking membrane over uneven sections around showers and baths, creating a fully waterproof layer before tiling.
Choose Cement-Based Adhesive: Fit tiles with a cement-based, waterproof adhesive, since this holds better in humid, uneven bathroom conditions than ready-mixed alternatives.
Seal Wet Zone Joints: Fill gaps around baths, showers and sinks with flexible silicone sealant, rather than grout, since these areas move slightly with heat and moisture.
Mind Extractor Fan Cuts: Measure extractor fan and pipe cutouts individually, since uneven bathroom walls often throw cuts off by several millimetres between fittings.

How Do You Tile Uneven Kitchen Walls?
Tiling uneven kitchen walls means levelling around sockets, splashbacks and worktops carefully, since these areas sit close to appliances and need a precise fit. Kitchen walls behind hobs and sinks face heat and grease, so a heat-resistant adhesive holds better than a standard mix in these spots. Cuts around cabinets and worktops also need measuring at multiple points, since an uneven wall rarely gives the same gap from top to bottom.
Level Around Splashbacks: Fill gaps behind cooker and sink splashback areas with a levelling compound, since these zones need a flat surface for a tight seal.
Use Heat-Resistant Adhesive: Fit tiles near hobs and ovens with a heat-resistant adhesive, since standard adhesive can weaken under constant heat exposure.
Measure Worktop Gaps Individually: Check the gap between the wall and worktop at both ends, since an uneven wall often creates a wider gap on one side.
Fit Around Sockets Precisely: Measure each kitchen socket cutout separately, since uneven walls shift socket positions slightly from one section to the next.
Mind Cabinet Edges: Leave a small expansion gap where tiles meet cabinet edges, since uneven walls and cabinet units can shift slightly at different rates.
Choose Grease-Resistant Grout: Apply a grease-resistant, wipeable grout in cooking areas, since standard grout absorbs kitchen grease and discolours faster on uneven surfaces.
How Do You Tile Tricky Areas on an Uneven Wall?
Tiling tricky areas on an uneven wall means paying extra attention to corners, edges, sockets and pipework, since these spots show unevenness more than flat sections. Internal corners often need trimmed tiles to sit flush, while external corners need trim strips to hide rough edges. Sockets, pipes and window reveals need careful measuring, since an uneven wall can throw off cuts by several millimetres from one side to the other.
Internal Corners: Cut tiles slightly short of the corner, leaving a small gap for flexible sealant rather than forcing a tight, rigid fit.
External Corners: Fit a plastic or metal trim strip along the edge, since this hides uneven cuts and protects the corner from damage.
Sockets and Switches: Measure each cut individually rather than copying measurements from other sockets, as an uneven wall changes the position slightly across the surface.
Pipework: Use a pipe cutting tool or hole saw to create a snug fit, checking the surrounding wall depth before cutting, since pipes often sit in the most uneven sections.
Window and Door Reveals: Measure both the top and bottom of each reveal separately, since an uneven wall rarely gives the same depth at both points.
Skirting Boards and Floor Junctions: Leave a small expansion gap at the base of the wall, since uneven floors and walls both shift slightly with temperature and moisture changes.
What Mistakes Should You Avoid When Tiling an Uneven Wall?
The mistakes to avoid when tiling an uneven wall are skipping surface prep, ignoring damp, using the wrong adhesive and tiling without guide lines. Skipping these steps often shows up later as cracked grout, hollow tiles or crooked rows that get worse further up the wall. Most tiling failures on uneven walls trace back to rushing the levelling stage rather than the tiling itself.
Skipping Surface Prep: Tiling over dust, grease or flaking paint stops adhesive from bonding properly, leading to tiles that loosen within months.
Ignoring Damp: Fixing tiles over a damp patch causes adhesive failure and mould growth behind the tiles further down the line.
Using Standard Adhesive on Deep Gaps: Standard thin-bed adhesive only fills gaps up to 3mm, so using it on deeper dips leads to hollow, unsupported tiles.
Tiling Without Guide Lines: Starting without level horizontal and vertical lines lets small errors build up, leaving crooked rows by the top of the wall.
Rushing Drying Times: Tiling over wet levelling compound or fresh render, usually before the full 24 hours has passed, causes cracking and poor adhesion.
Overlooking Tile Size: Choosing large format tiles, especially over 600mm x 600mm, on a wall out by more than 3mm highlights every dip and bump.
Forgetting Expansion Gaps: Leaving no gap at corners, skirting boards or floor junctions stops the wall from moving naturally, leading to cracked grout over time.
Should You Hire a Professional to Tile an Uneven Wall?
Hiring a professional to tile an uneven wall is worth it when the wall is out by more than 10mm, or when structural issues like damp or crumbling plaster are involved. A professional brings the right tools and experience to level a wall properly, reducing the risk of cracked grout or loose tiles later on. Smaller jobs, with gaps under 3mm across a 2 metre length, are usually manageable as a DIY project with a levelling compound and some patience.
Severely Uneven Walls: Walls out by more than 10mm often need backer boards or fresh render, work best left to a professional with the right equipment.
Structural Issues: Damp, crumbling plaster or timber frame movement need proper diagnosis, since tiling over these problems only hides them temporarily.
Large Format Tiles: Tiles over 600mm x 600mm need a precisely level surface, so professional levelling reduces the risk of visible lippage.
Time Constraints: A professional finishes levelling and tiling faster, usually within 2 to 3 days, compared to a DIY approach spread over a week or more.
Budget-Friendly DIY Jobs: Minor unevenness, under 3mm across a 2 metre length, suits a DIY approach using a levelling compound and basic tools.
Warranty and Guarantee: Professional tiling work often comes with a workmanship guarantee, typically 1 to 2 years, covering any issues that arise after the job’s finished.
How Do You Maintain Tiles on a Previously Uneven Wall?
Maintaining tiles on a previously uneven wall means checking grout lines, sealant and tile firmness regularly, since these areas show wear first. Grout can crack sooner on a wall that was uneven, especially around corners and joints, so catching small cracks early stops damp getting behind the tiles. A quick check every 6 to 12 months keeps a previously uneven wall performing as well as a flat one.
Check Grout Regularly: Look over grout lines every 6 to 12 months for small cracks, since these often appear first around old uneven sections.
Reseal Corners and Joints: Replace flexible sealant at internal corners and skirting board junctions every 1 to 2 years, as these spots move more on a previously uneven wall.
Test for Loose Tiles: Tap tiles gently every few months, since a hollow sound can mean the adhesive has failed underneath.
Clean with Non-Acidic Products: Use a pH-neutral cleaner rather than acidic or abrasive products, since these can wear down grout faster over time.
Watch for Damp Signs: Check for discolouration or a musty smell near the wall base, as previously uneven walls are more prone to trapped moisture.
Repair Small Cracks Promptly: Fix any cracked grout within a few weeks of spotting it, since delays let water reach the adhesive layer and loosen tiles.
If you found this guide on how to prepare an uneven wall or uneven floor for tiling, you should visit our Tile Glossary! It’s the Wikipedia of tiling queries and information. Tag us in your DIY projects on Instagram, @Wallsandfloors we love seeing what you’ve been up to!
